What started as an engagement event app is becoming a full end-to-end platform. Still exceptionally easy to use – now with Registrations included in all plans.
Eventee lets you send out RSVP invitations and collect registrations for your event. This helps you manage your attendee list more efficiently and streamlines event planning workflows.
This article will help you understand how to navigate Eventee’s Registration feature.
Registrations are completely optional! Feel free to use Eventee's built-in forms to collect sign-up data, or simply hide them and import your attendee list directly.
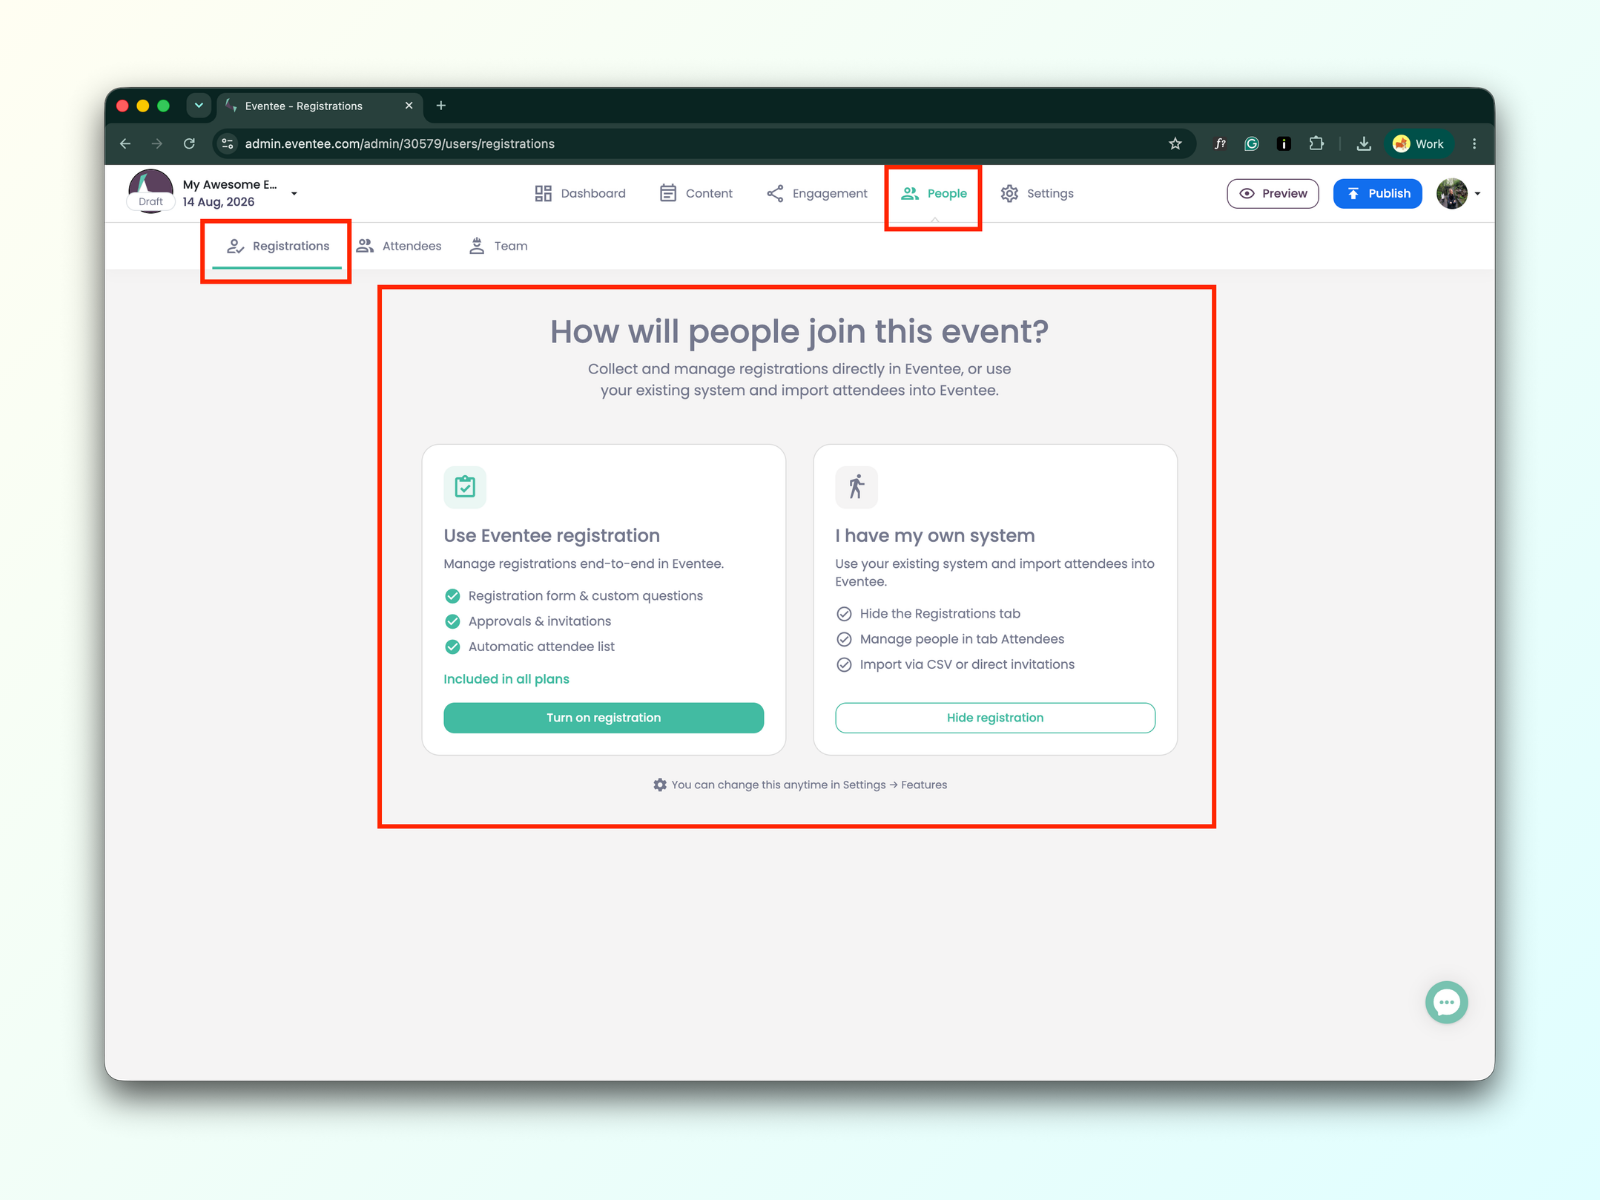
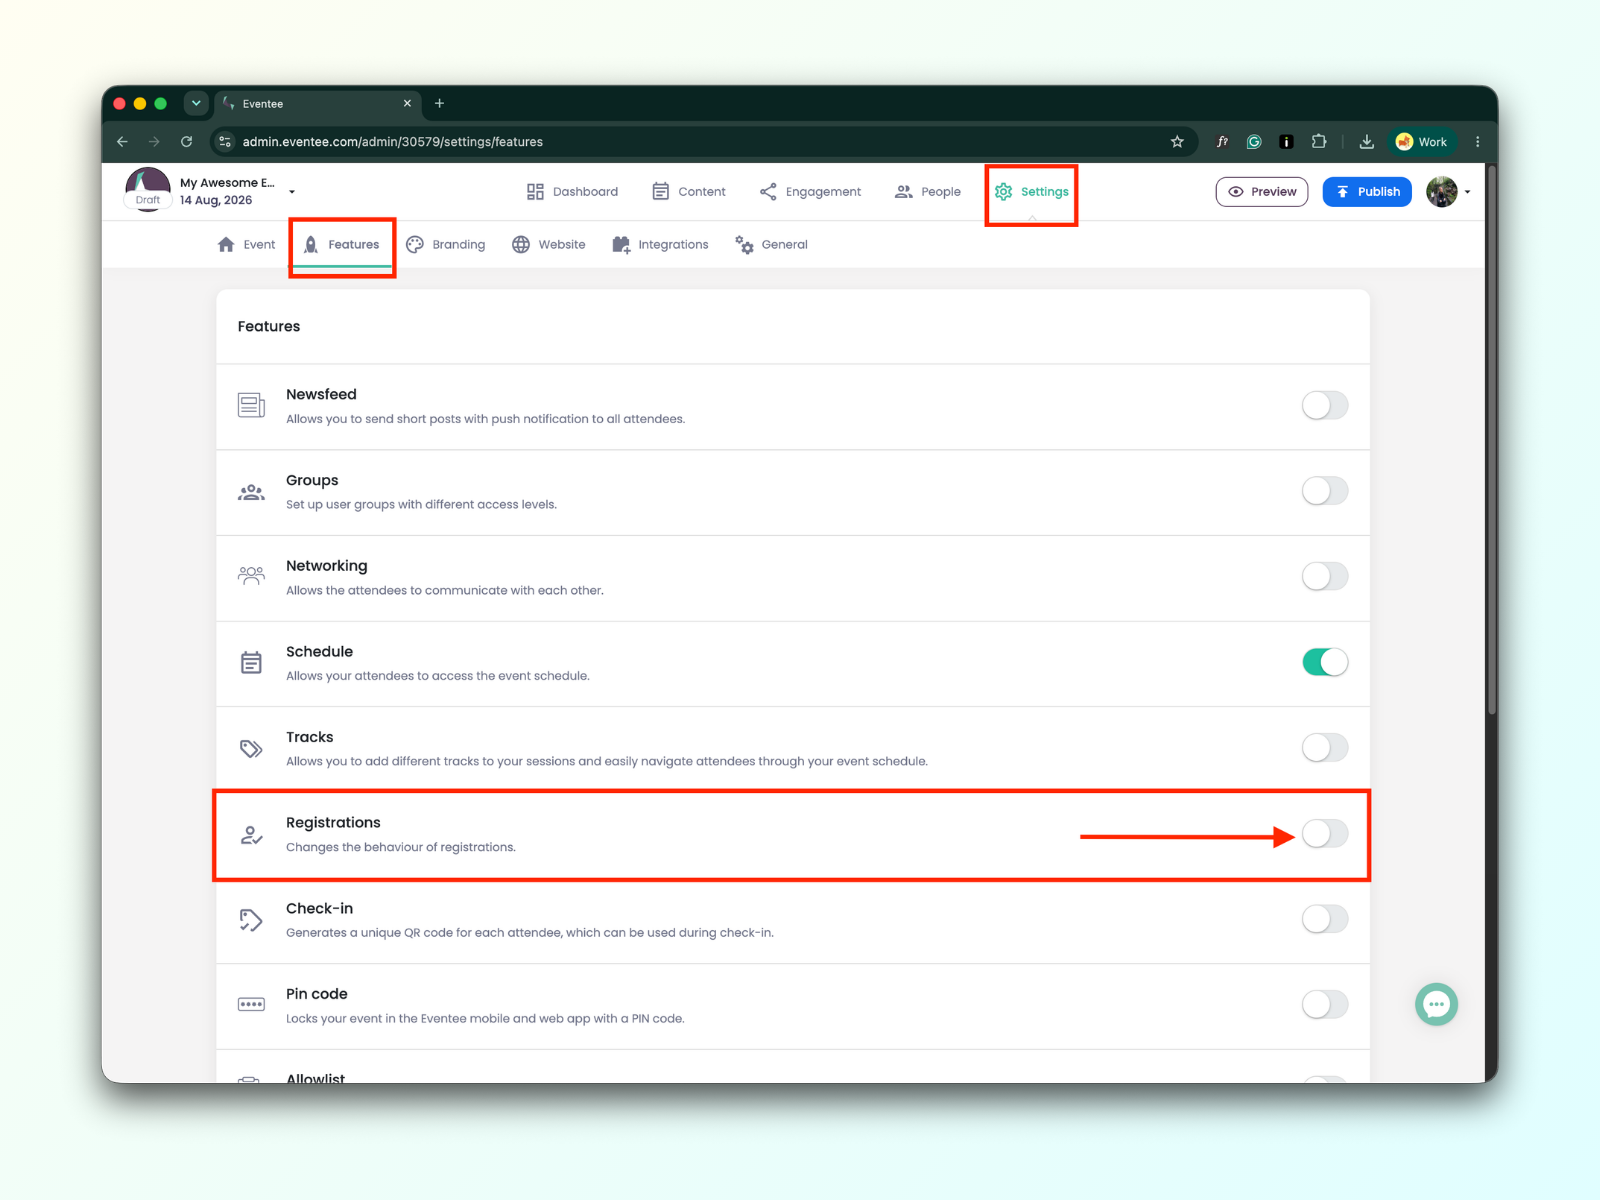
You can change your mind anytime and enable or disable registrations in Settings → Features → Registrations
Before you start sending out RSVPs, you need to open the registration so that registrants can fill out the registration form.
Please check the step-by-step guide on How to open/close registrations?
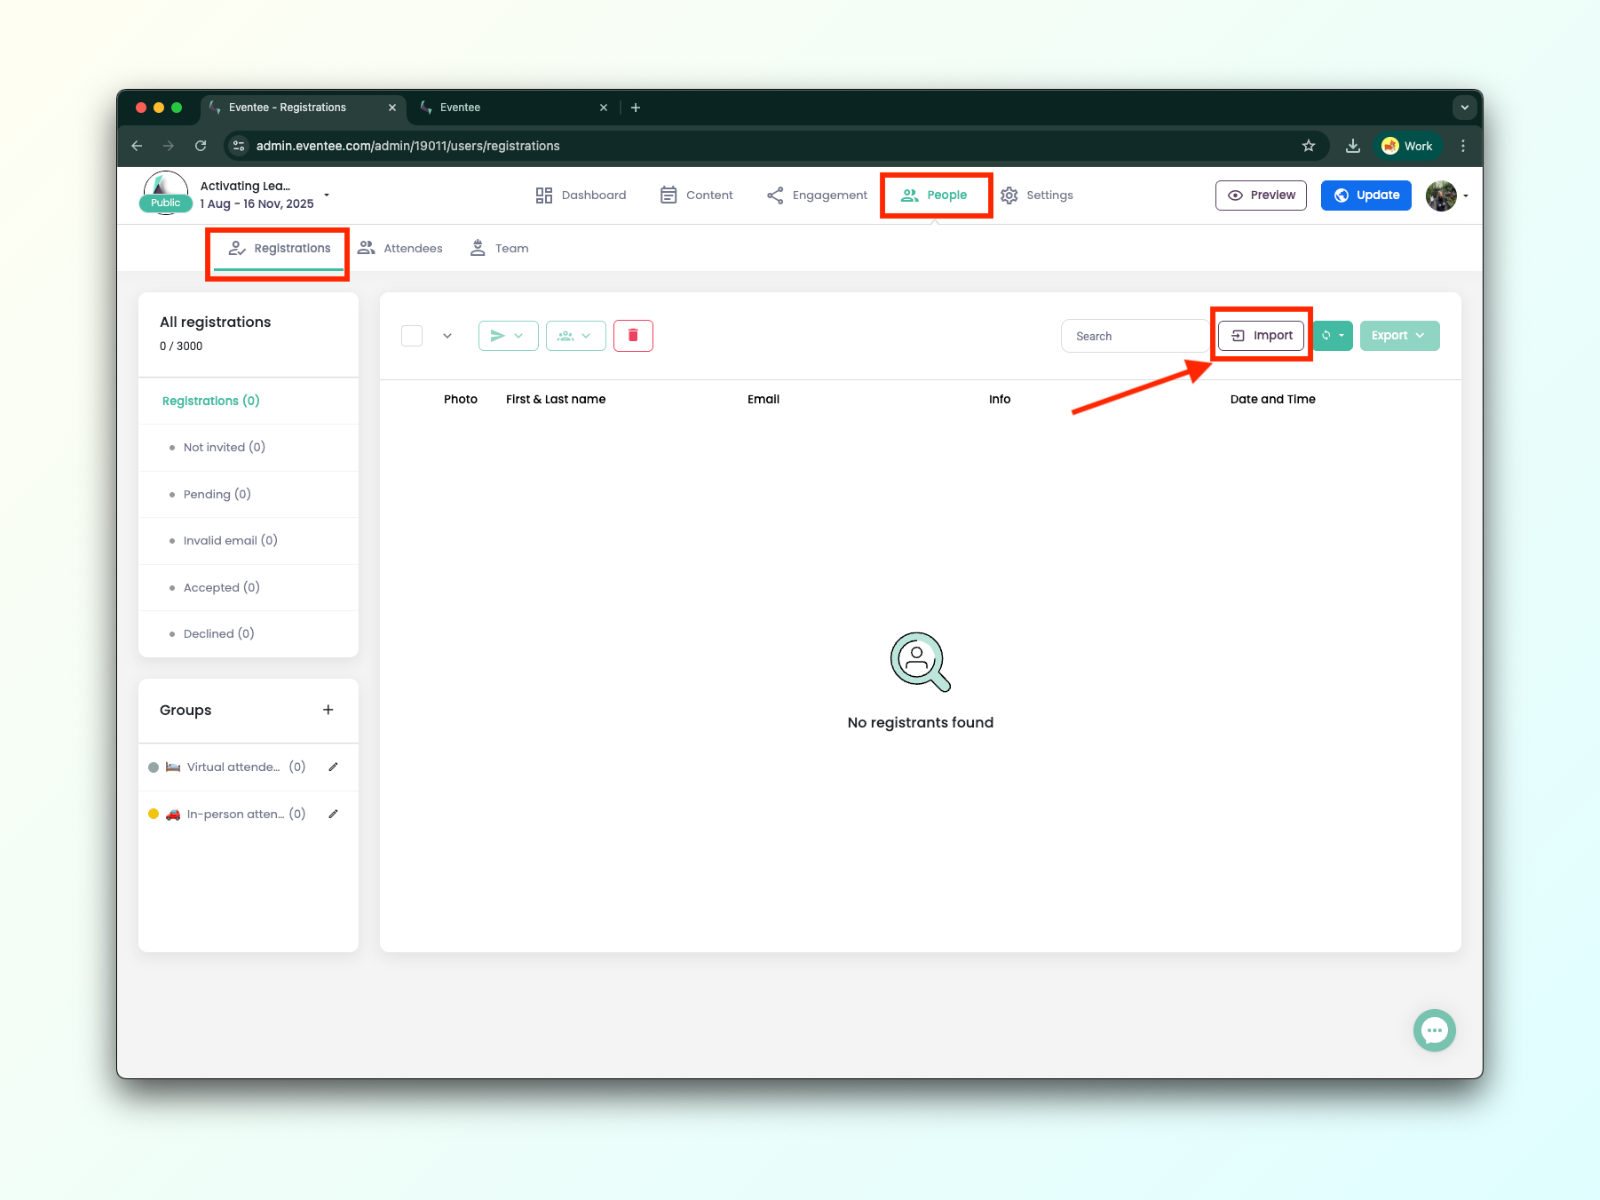
Find your registration admin board in People → Registrations.

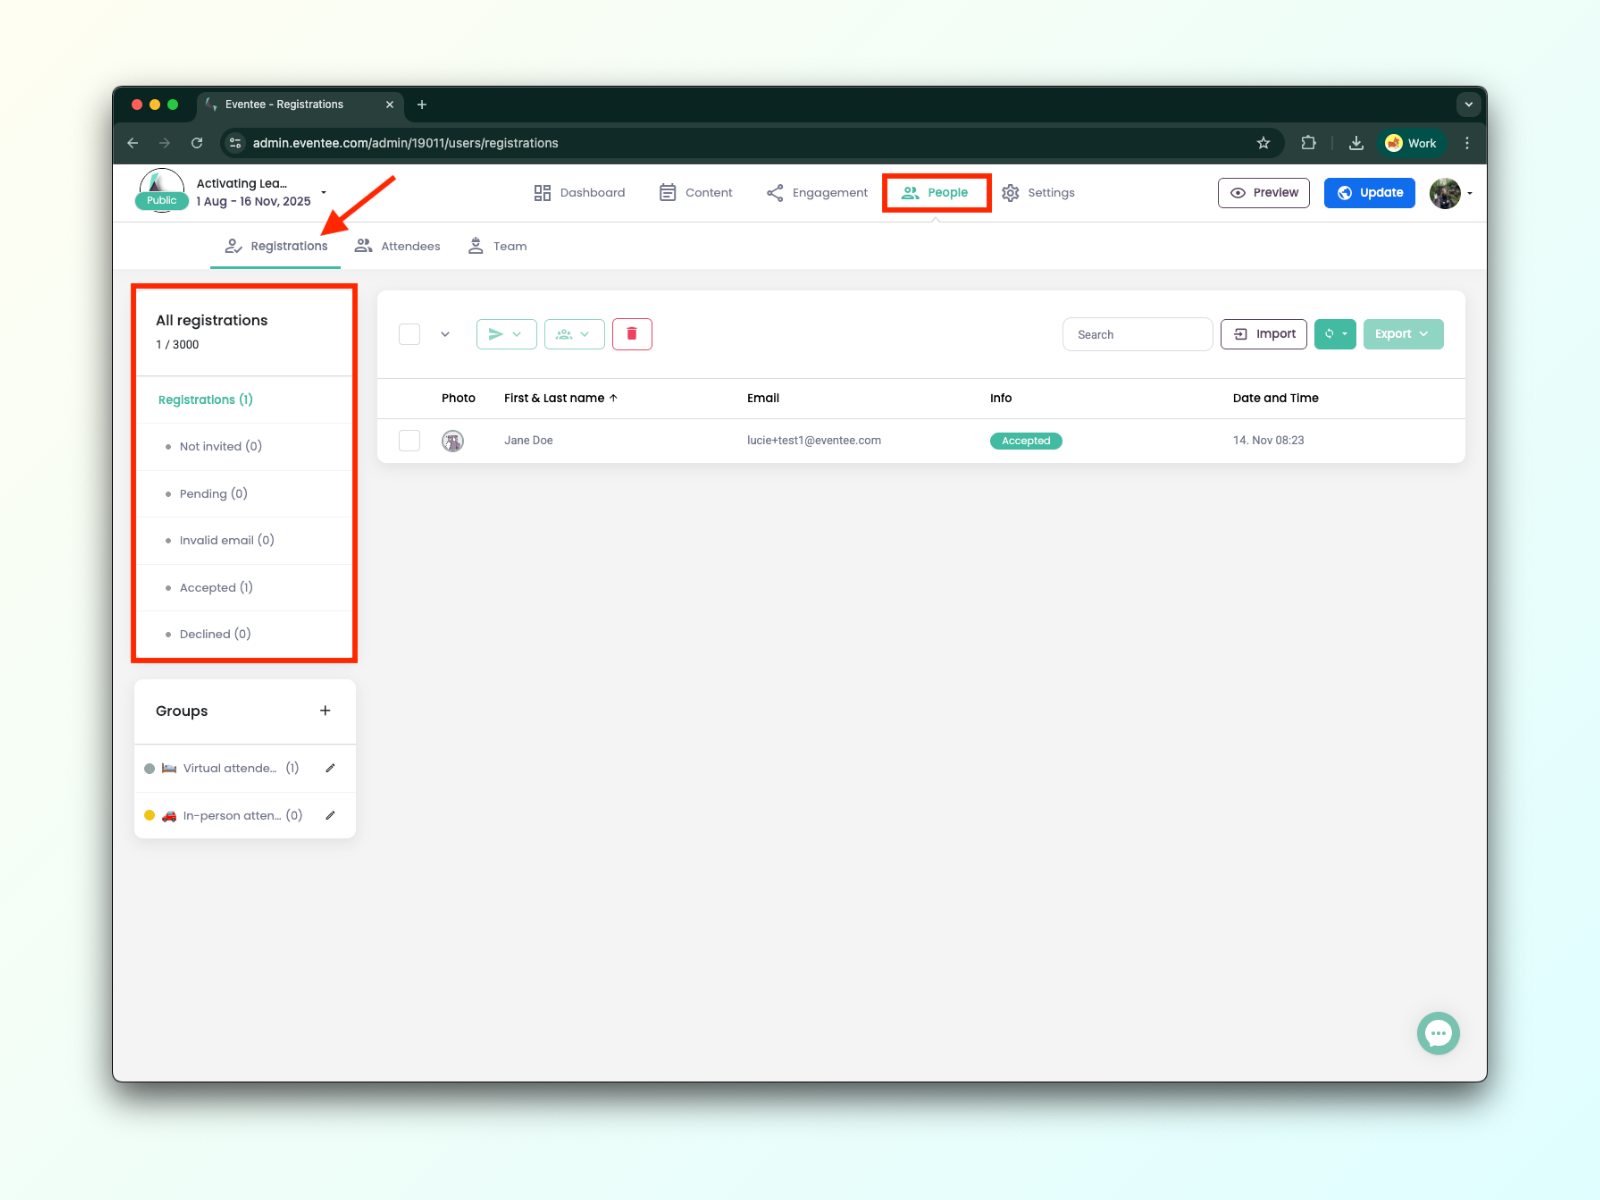
In the left column, you’ll see attributes of each registrant.
Understanding Registration Statuses:
Not invited - The RSVP was not sent to the registrant.
Pending - The registrant did not reply to the RSVP.
Invalid email - The registrant's email was not valid.
Accepted - The registrant responded yes to the RSVP.
Declined - The registrant responded no to the RSVP.
Once your event is set up and public, you can start sending RSVPs and collecting registrations. Registrations can be collected through three channels:
Registration through RSVP invitations
Registration through a direct link
Registration through the event website
You can invite registrants by sending them an RSVP email. To do this, navigate to: People → Registrations → Import.
You can either import the emails from a file or manually.
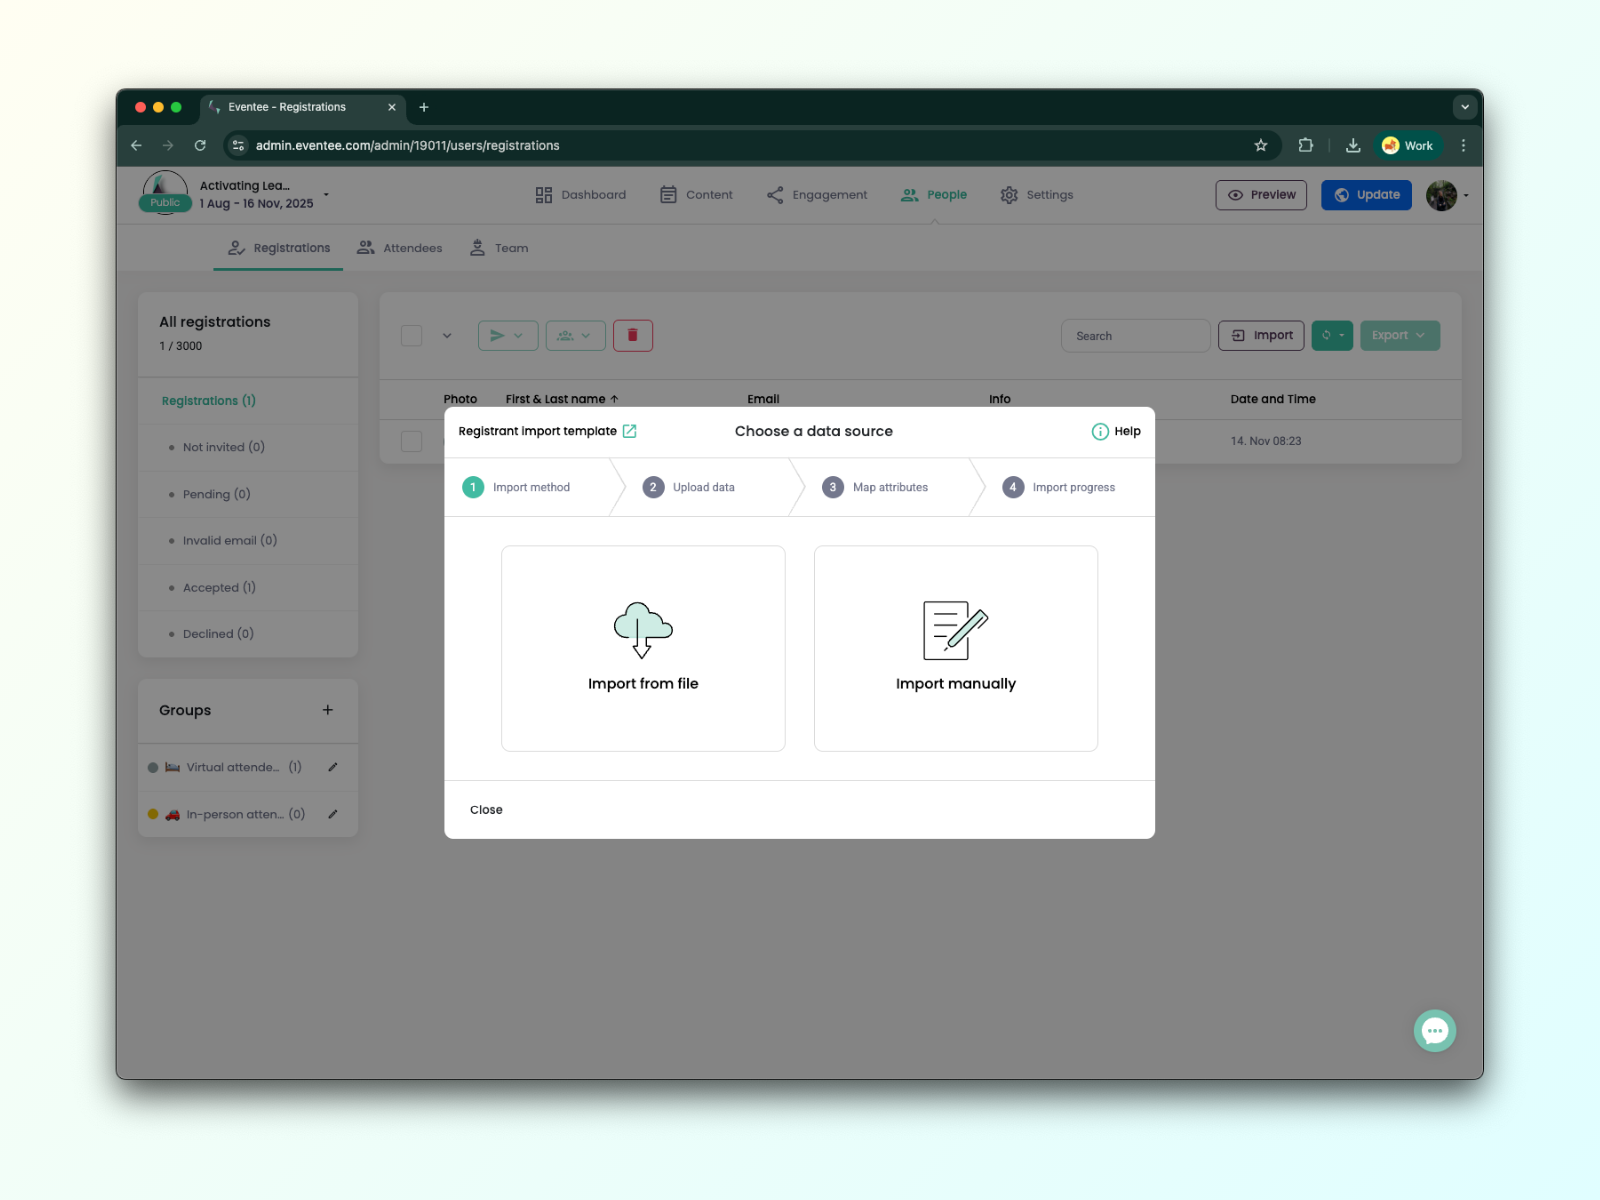
For more detailed information, please see the article How to import registrants and send them an RSVP.
If there’s a specific person you’d like to register, you can send them a direct link through which they can complete their registration.
Simply follow these steps:
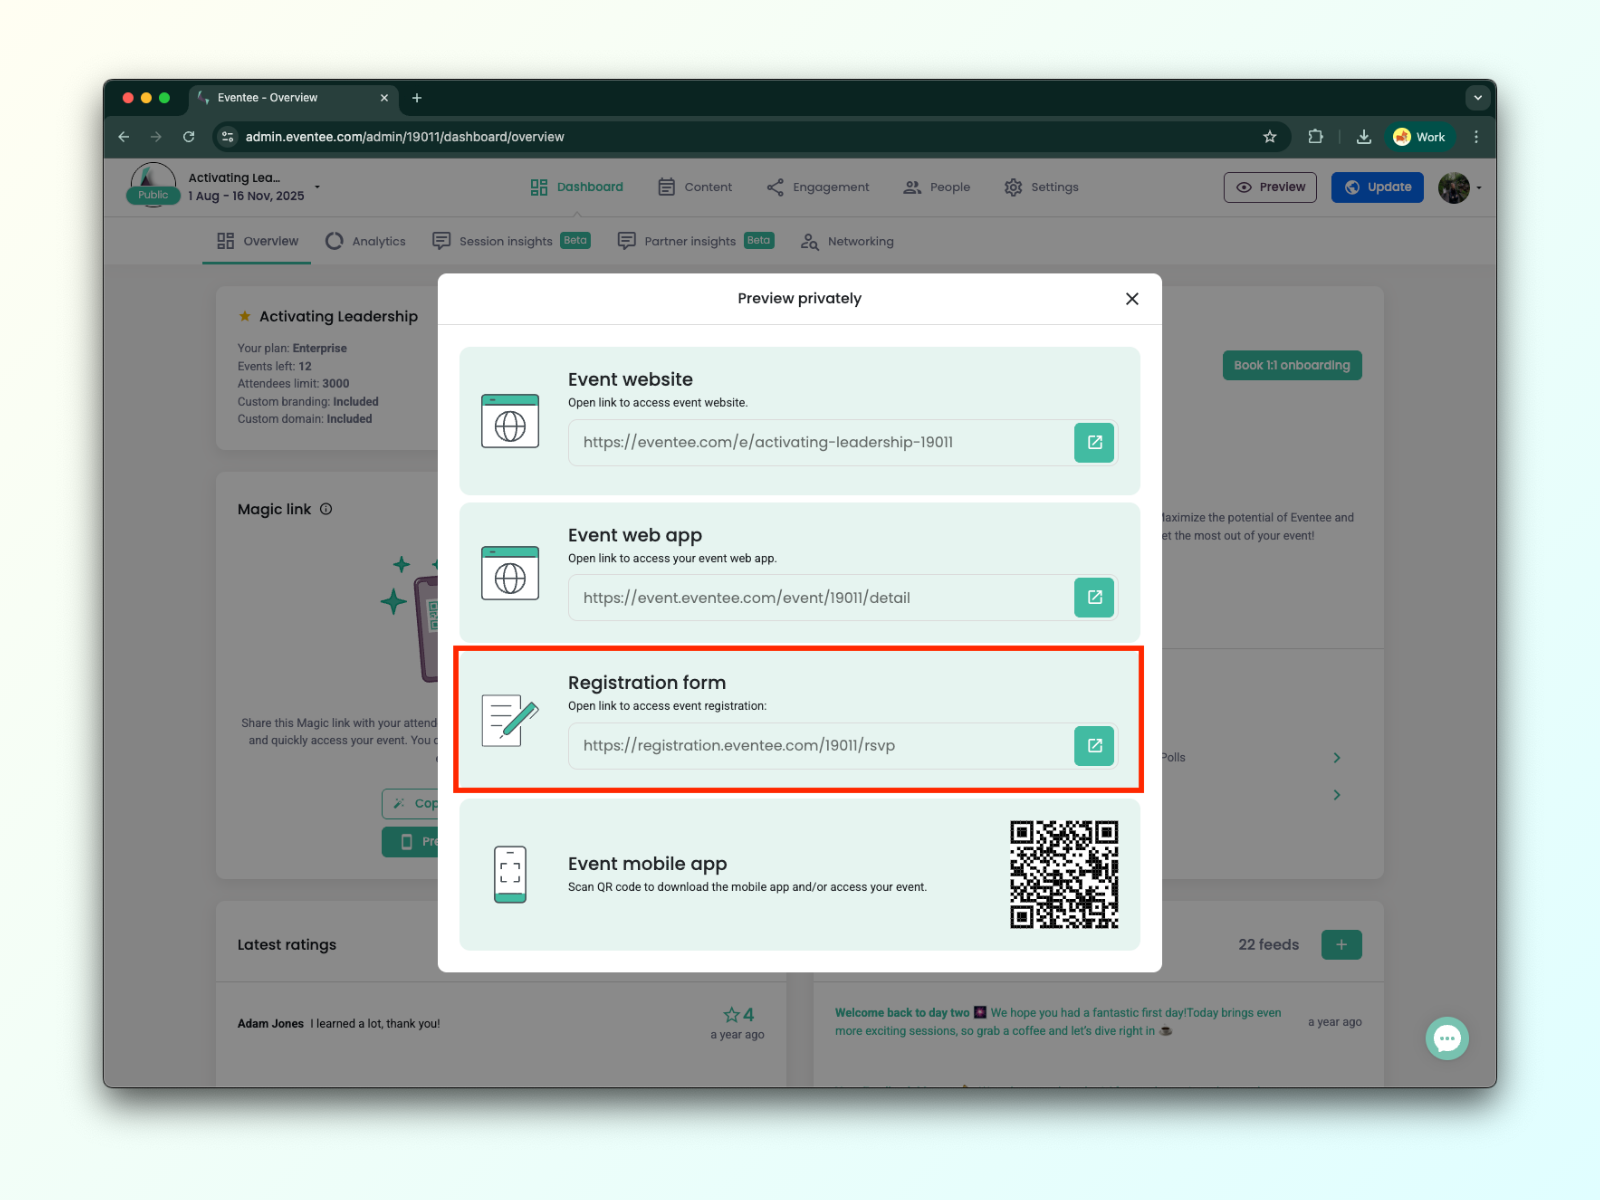
Click on the Preview button.
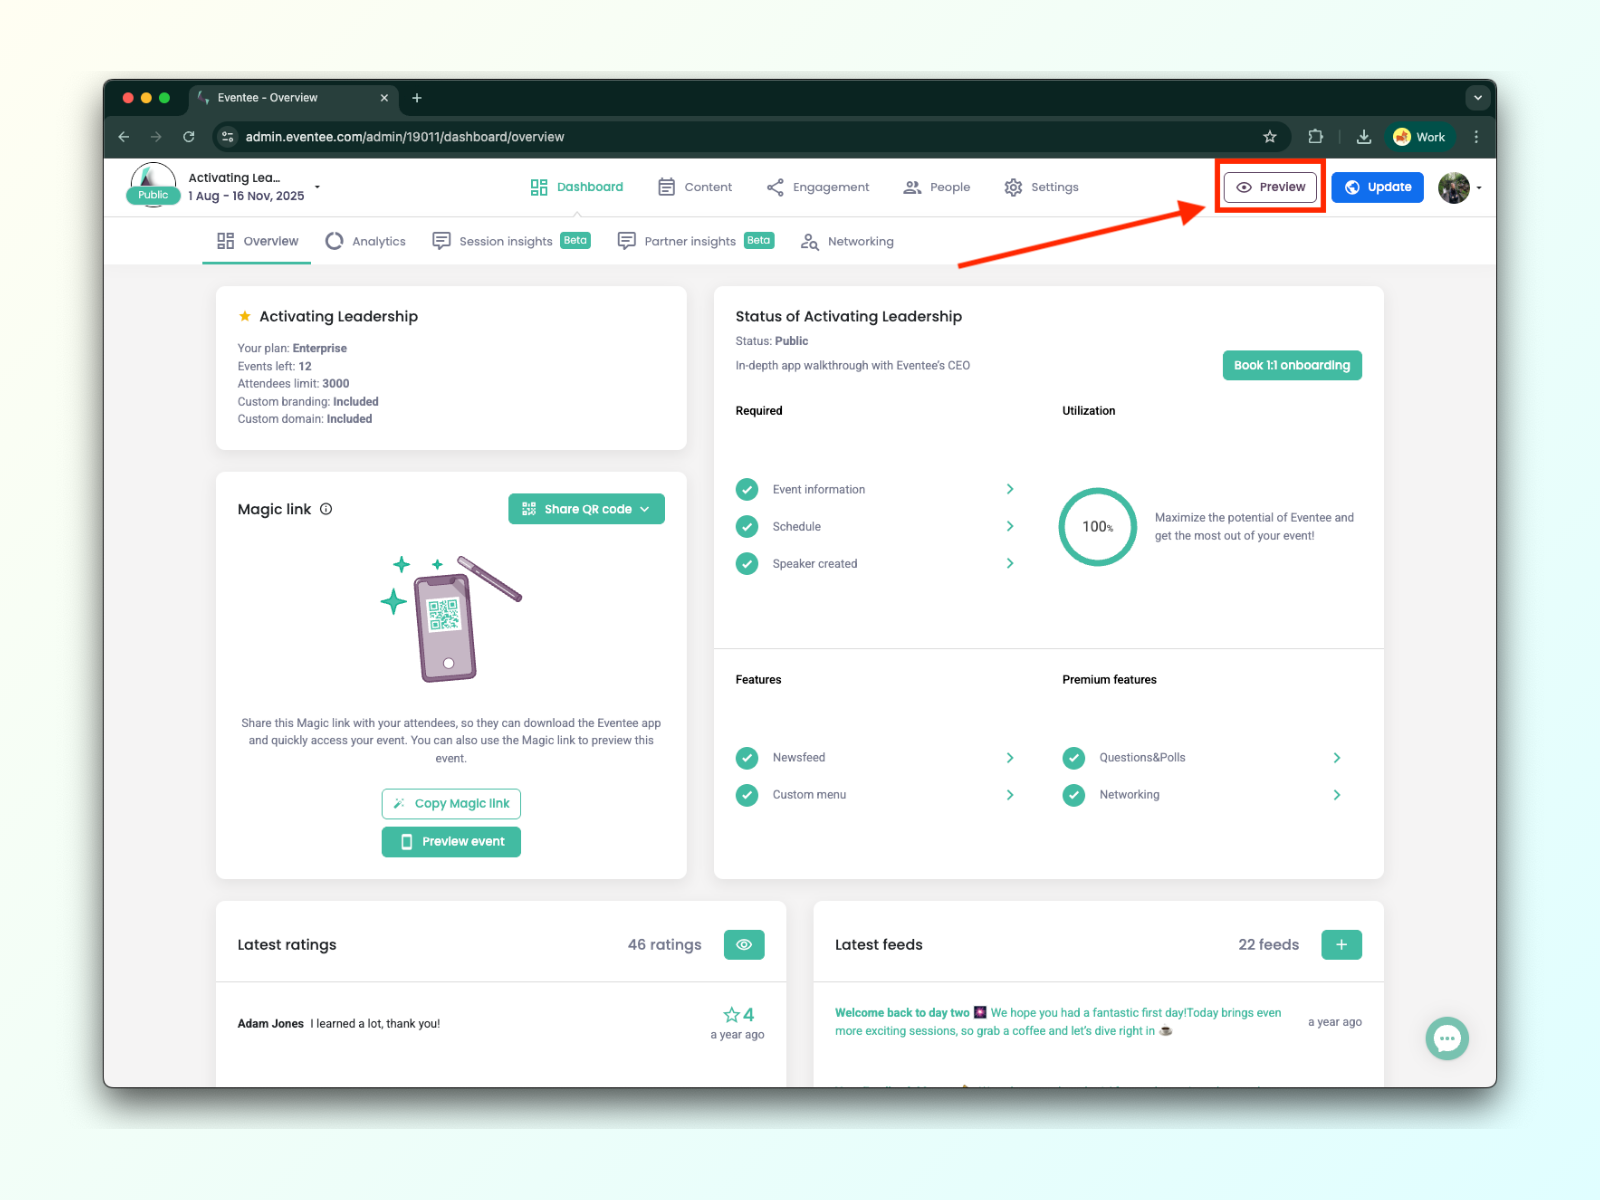
In the pop-up window, you’ll find the URL link to access the registration form. You can copy the link and send it to your potential registrants.
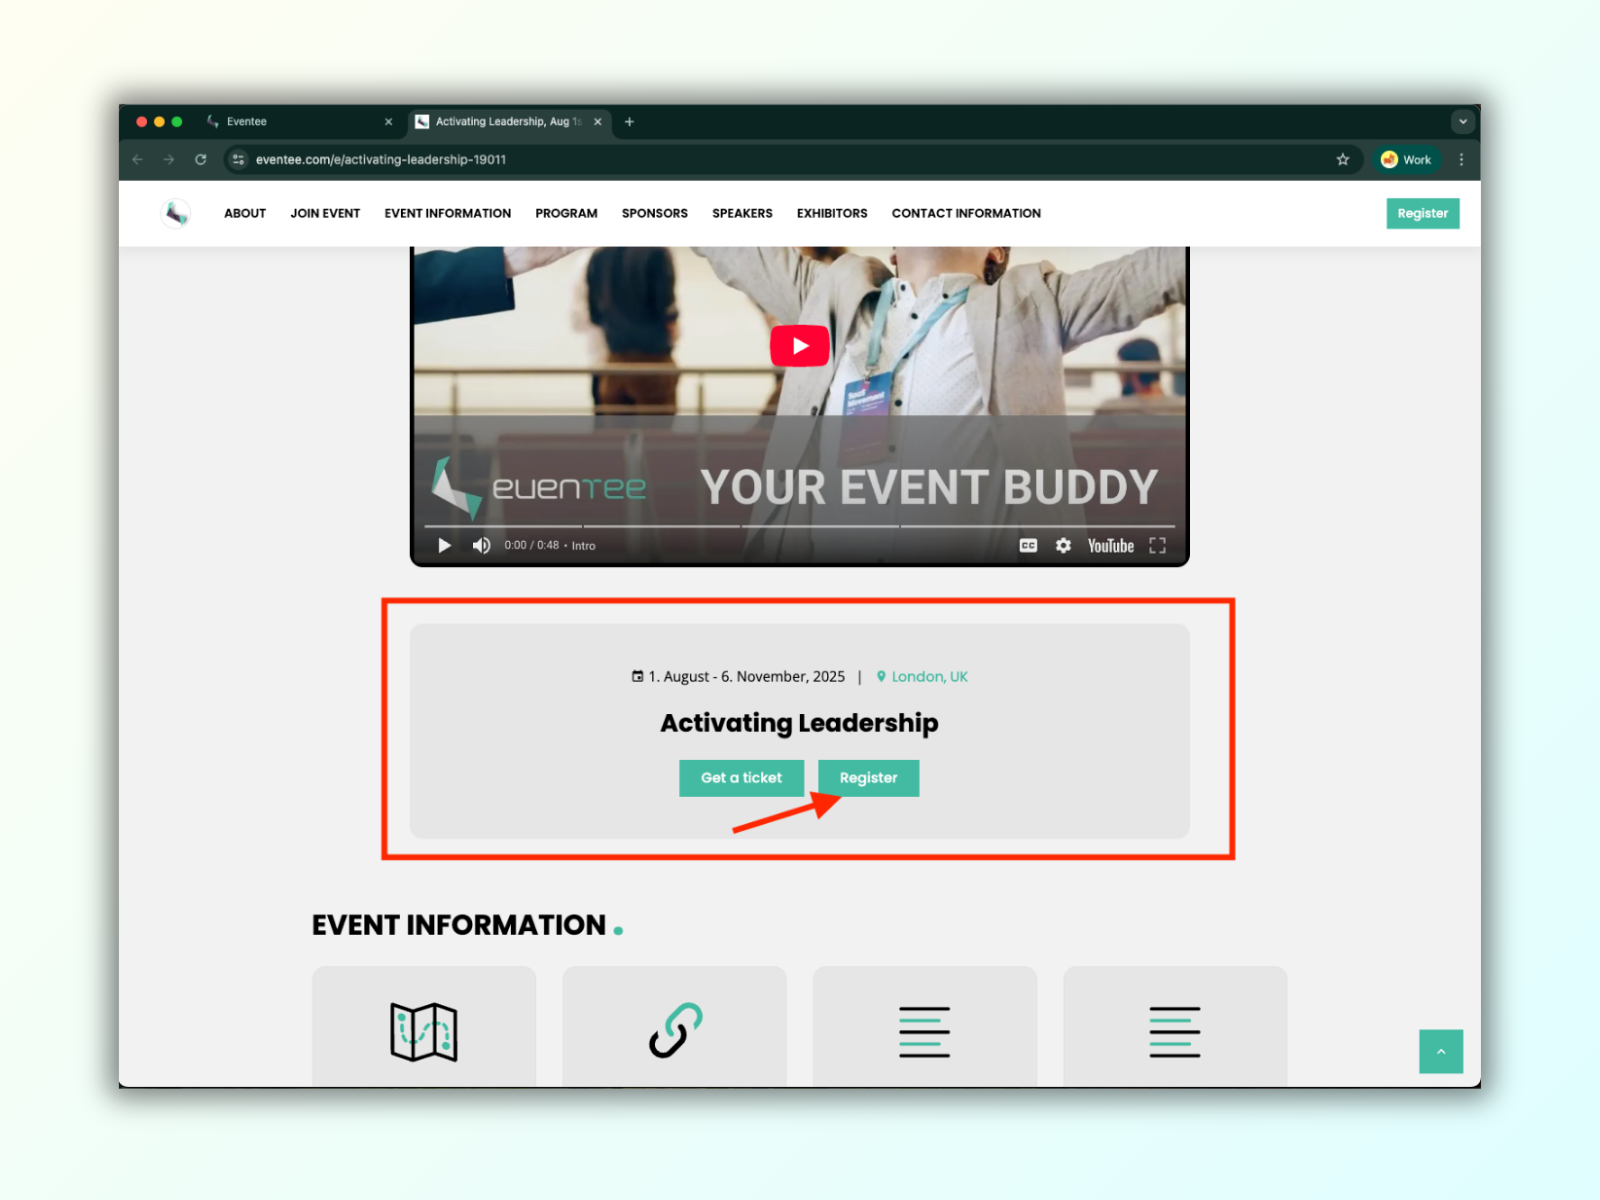
Eventee’s no-code event website allows you to collect registrations. Once registration is open, the 'Register' button appears on your event website.
How to check if the “Register” button is visible on your website:
Click the Preview button on the right side of the upper menu
In the pop-up window, you’ll find the URL link to the event website.
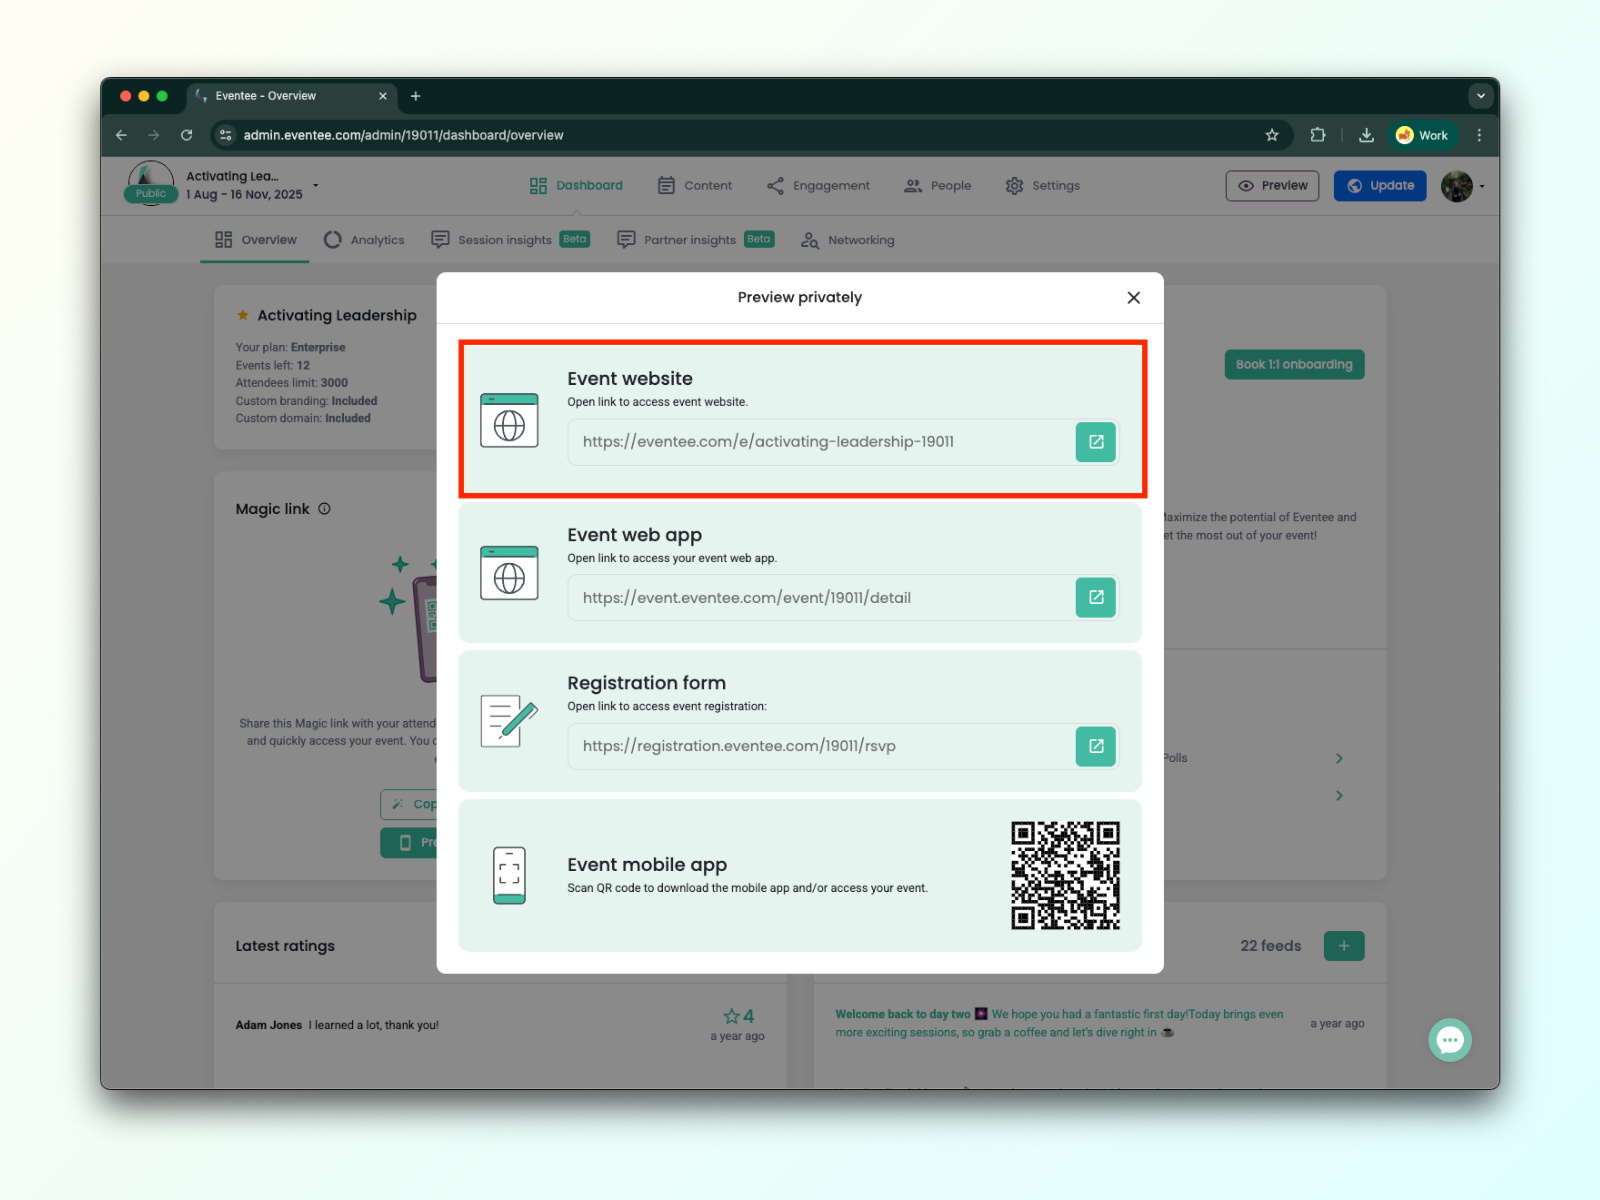
A new tab will open with your event website, where you can check the “Register” button.

To send out RSVPs, your event must be public. Event registrants receive an RSVP email, which allows them to decide whether to accept or decline the invitation.
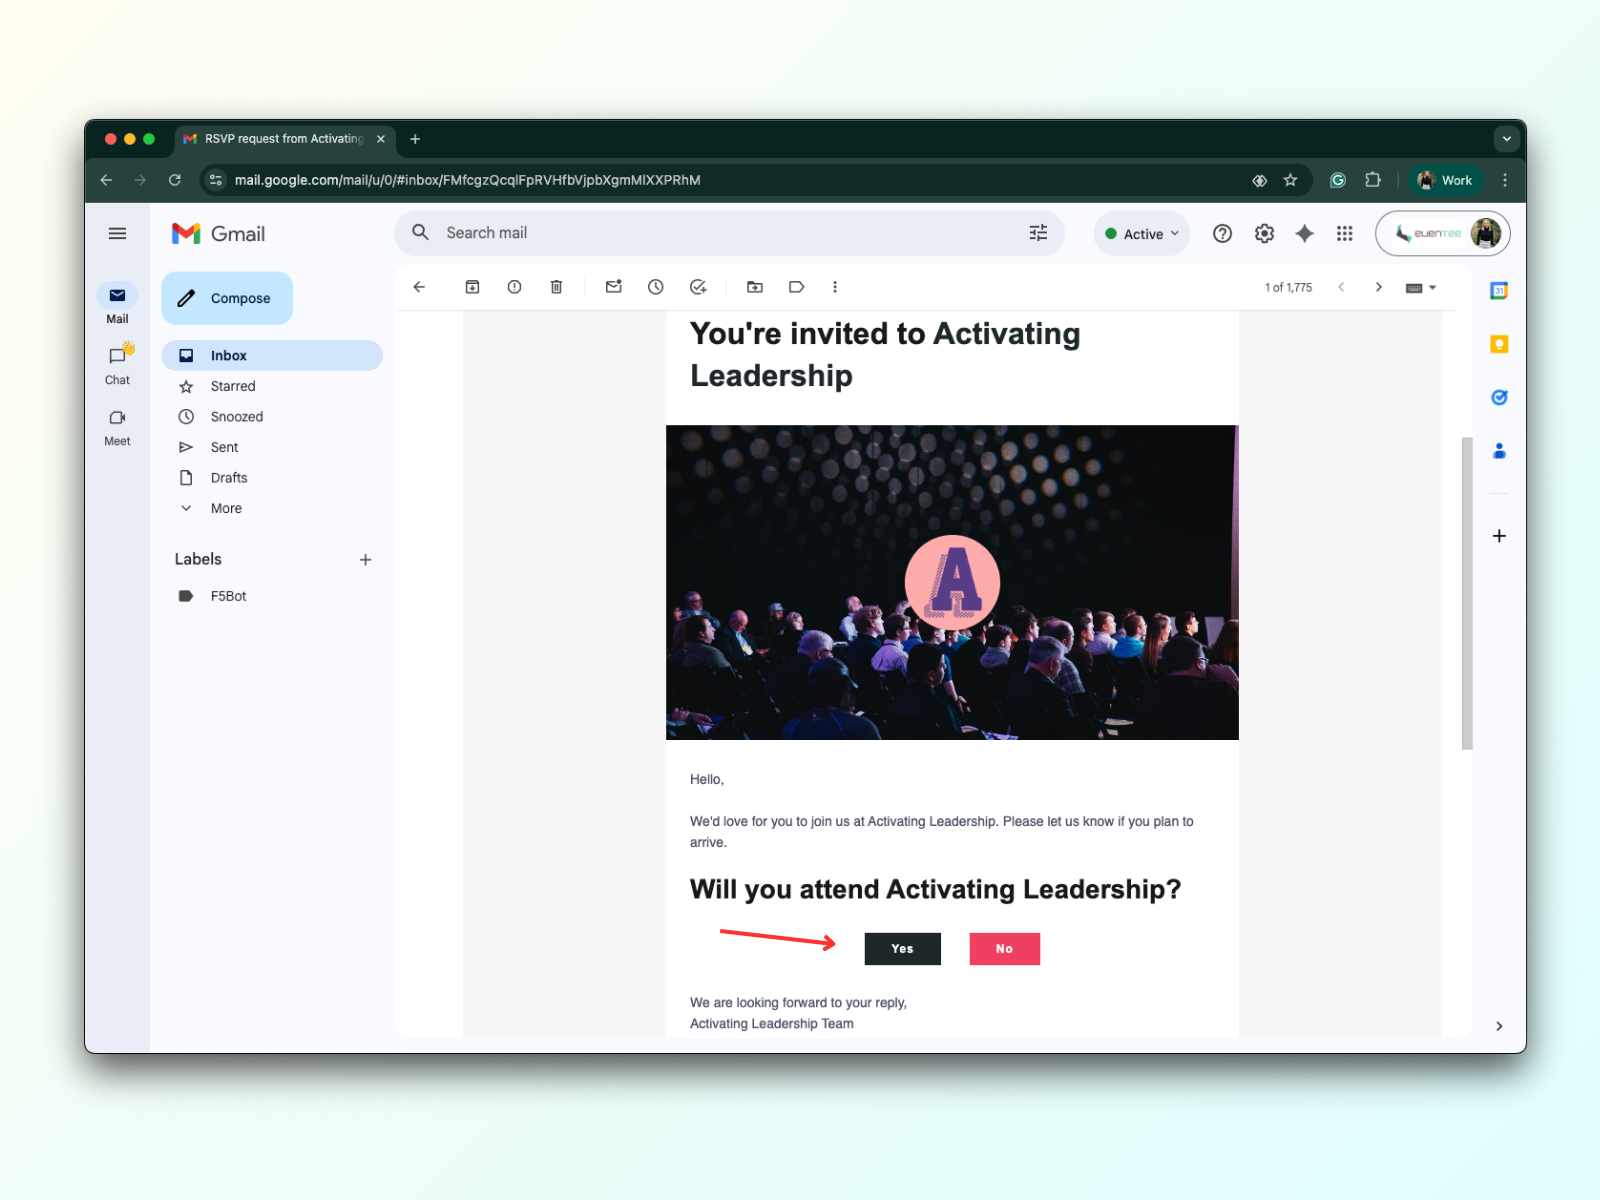
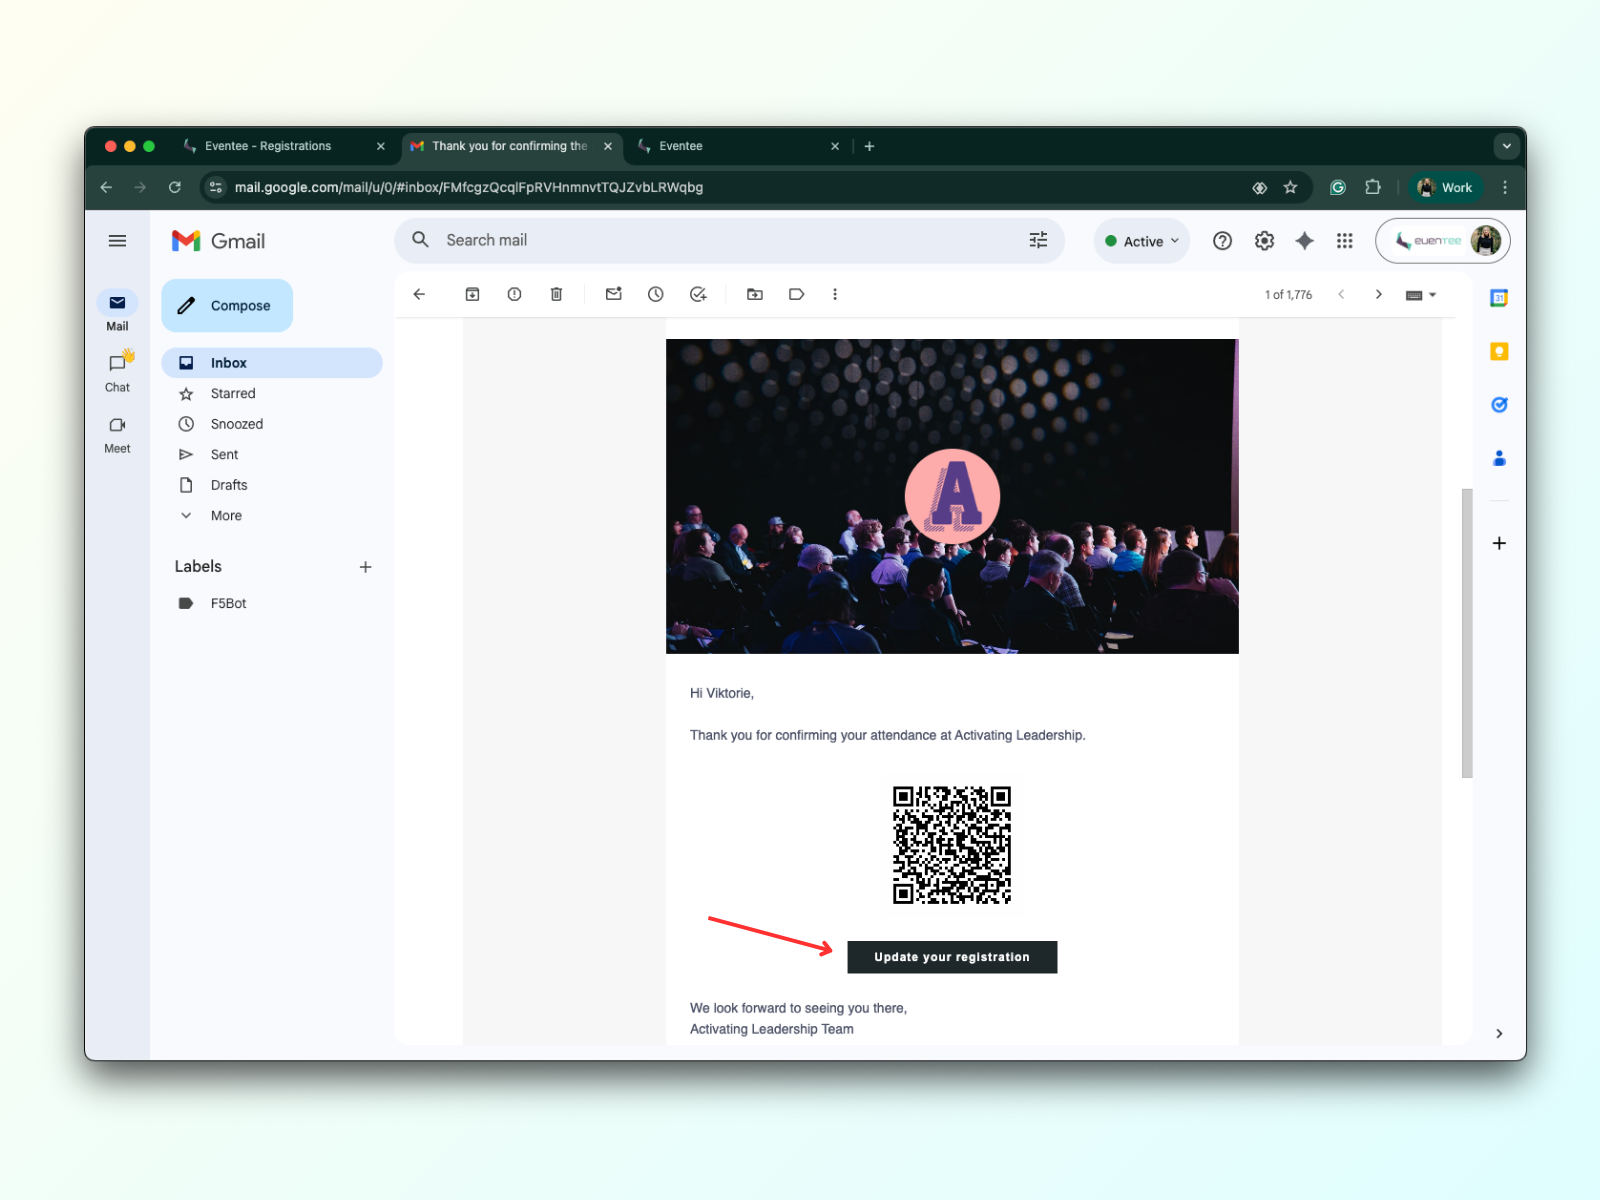
When the registrant clicks 'Yes' on the RSVP, they are forwarded to a page with the registration form. Once they fill out the form, their registration is confirmed, and they receive a thank-you email. The thank-you email contains a button “Update the registration” that allows them to change their mind. They can change their status until the registration is closed.
Once the registrant accepts the RSVP invitation, fills out, and submits the registration form, you will see them in the Registrations tab. At the same time, they become an attendee, and you will see them in the Attendees tab.
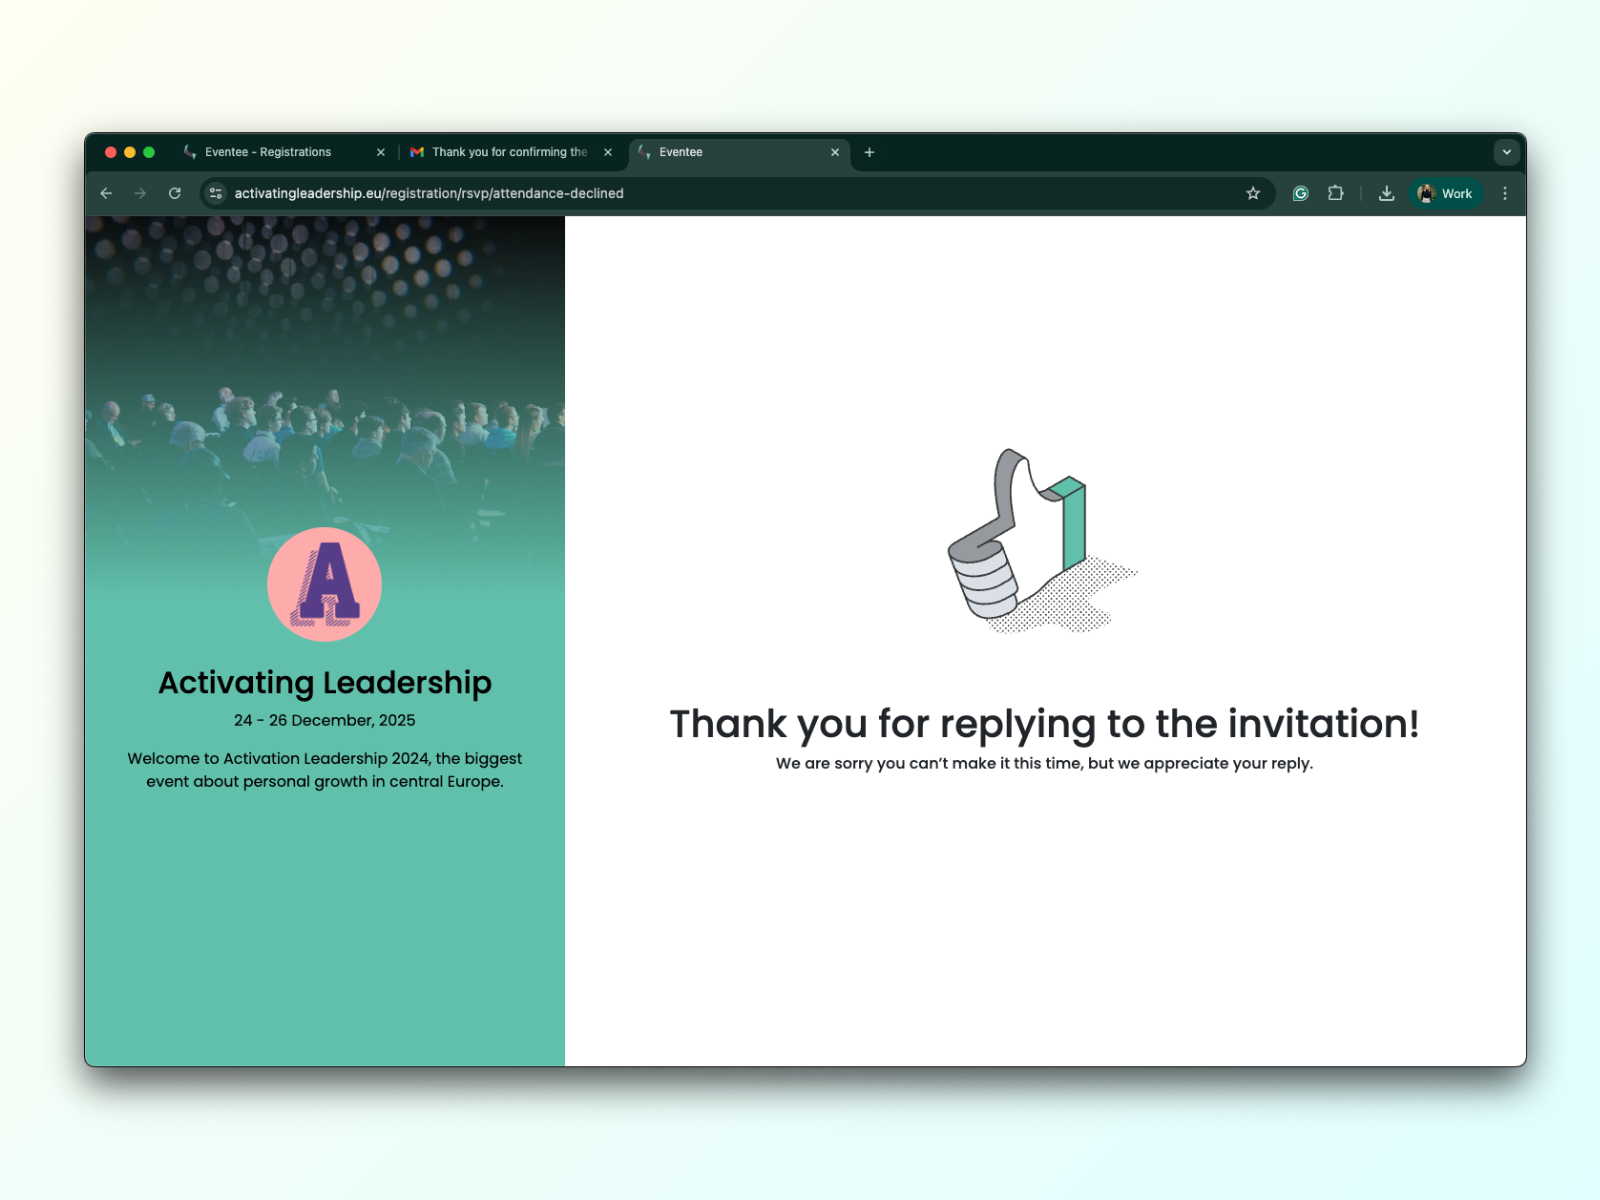
When the registrant clicks 'No' on the RSVP, they are redirected to a page with a thank-you message. They are not receiving a thank-you email. They can change their minds until the registration is closed.
You can customize the RSVP email with the Custom branding feature.
For more information, visit: Customize the looks of the Eventee app.
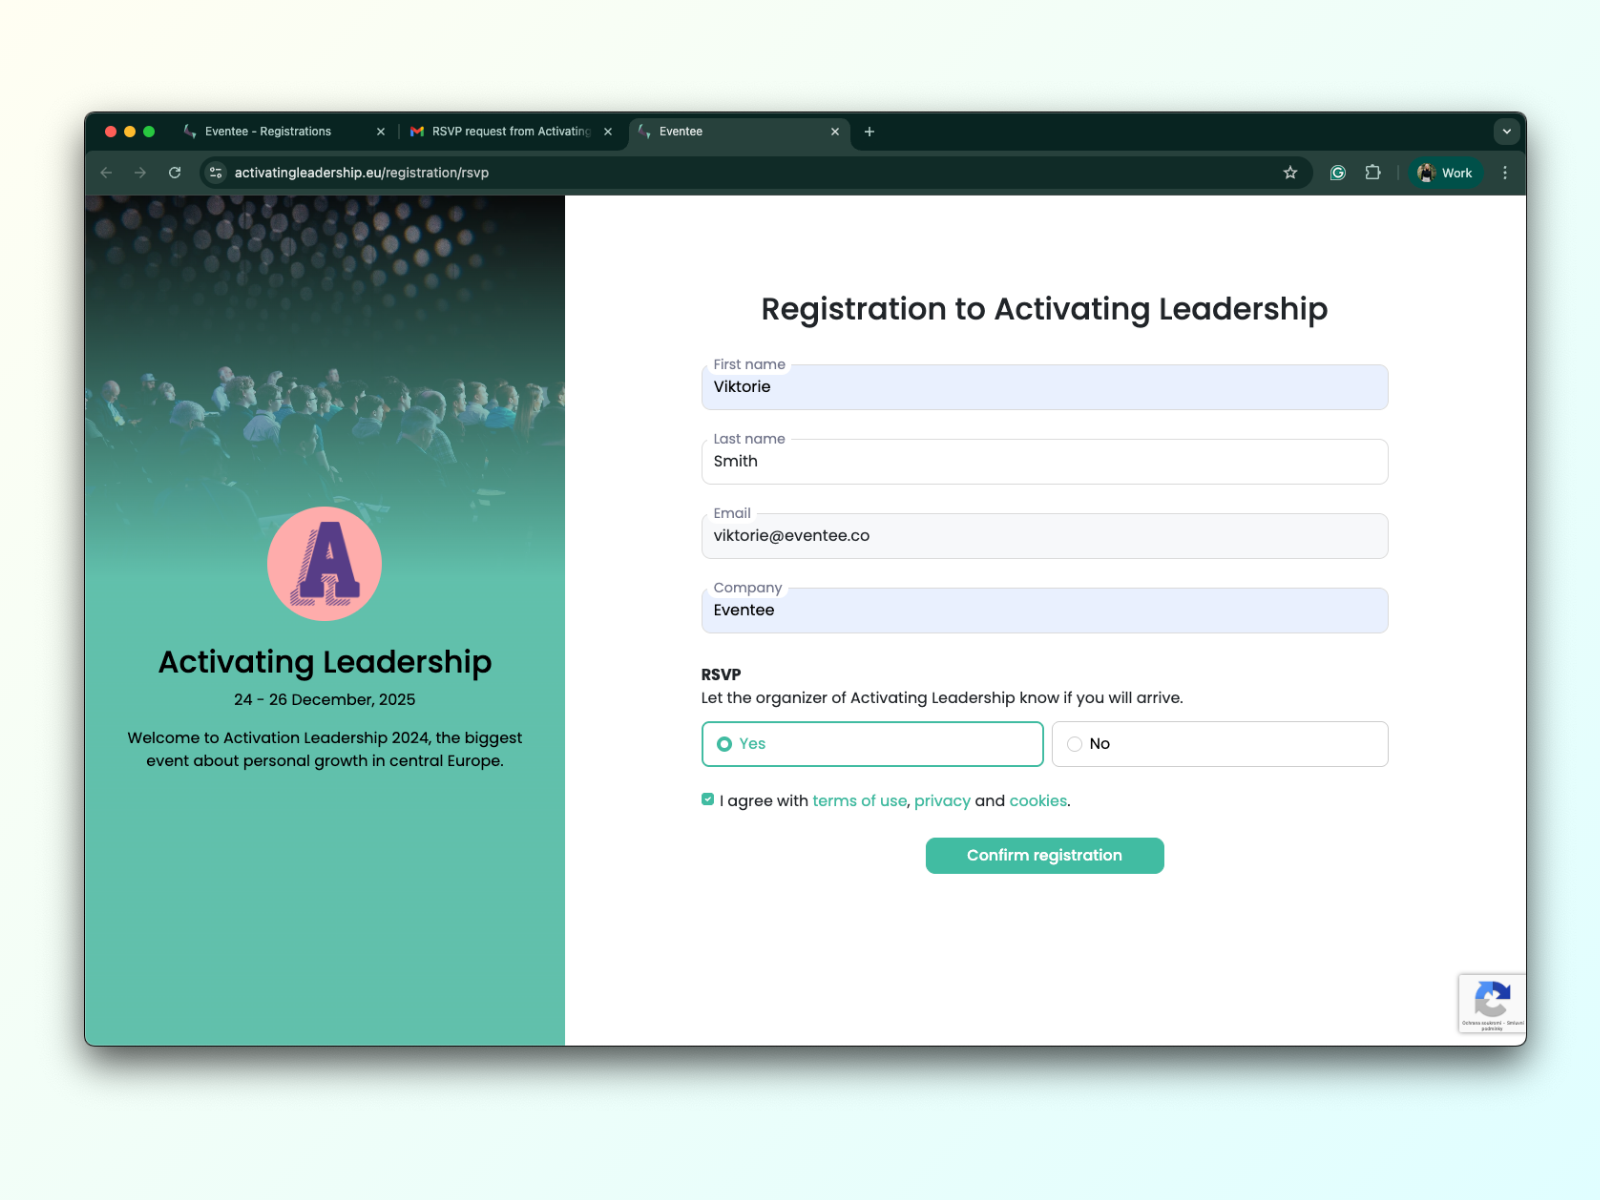
Once a registrant receives an RSVP email and accepts it, they are redirected to the registration form. The registrant's email address is pre-filled in the registration form.
The registration form fields:
First name - Required
Last name - Optional
Email - Required
Company - Optional
RSVP checkbox answer
Checkbox with the terms of use - Required
You can use the default registration form with the fields mentioned above, or create a custom form of your own. Learn more in our guide: How to set up a custom registration form.
Regarding registration behaviour, you can set up an Allowlist for registrations and enable Auto-invitation to download the app.
More detailed information can be found here: How to set up registration behaviour?
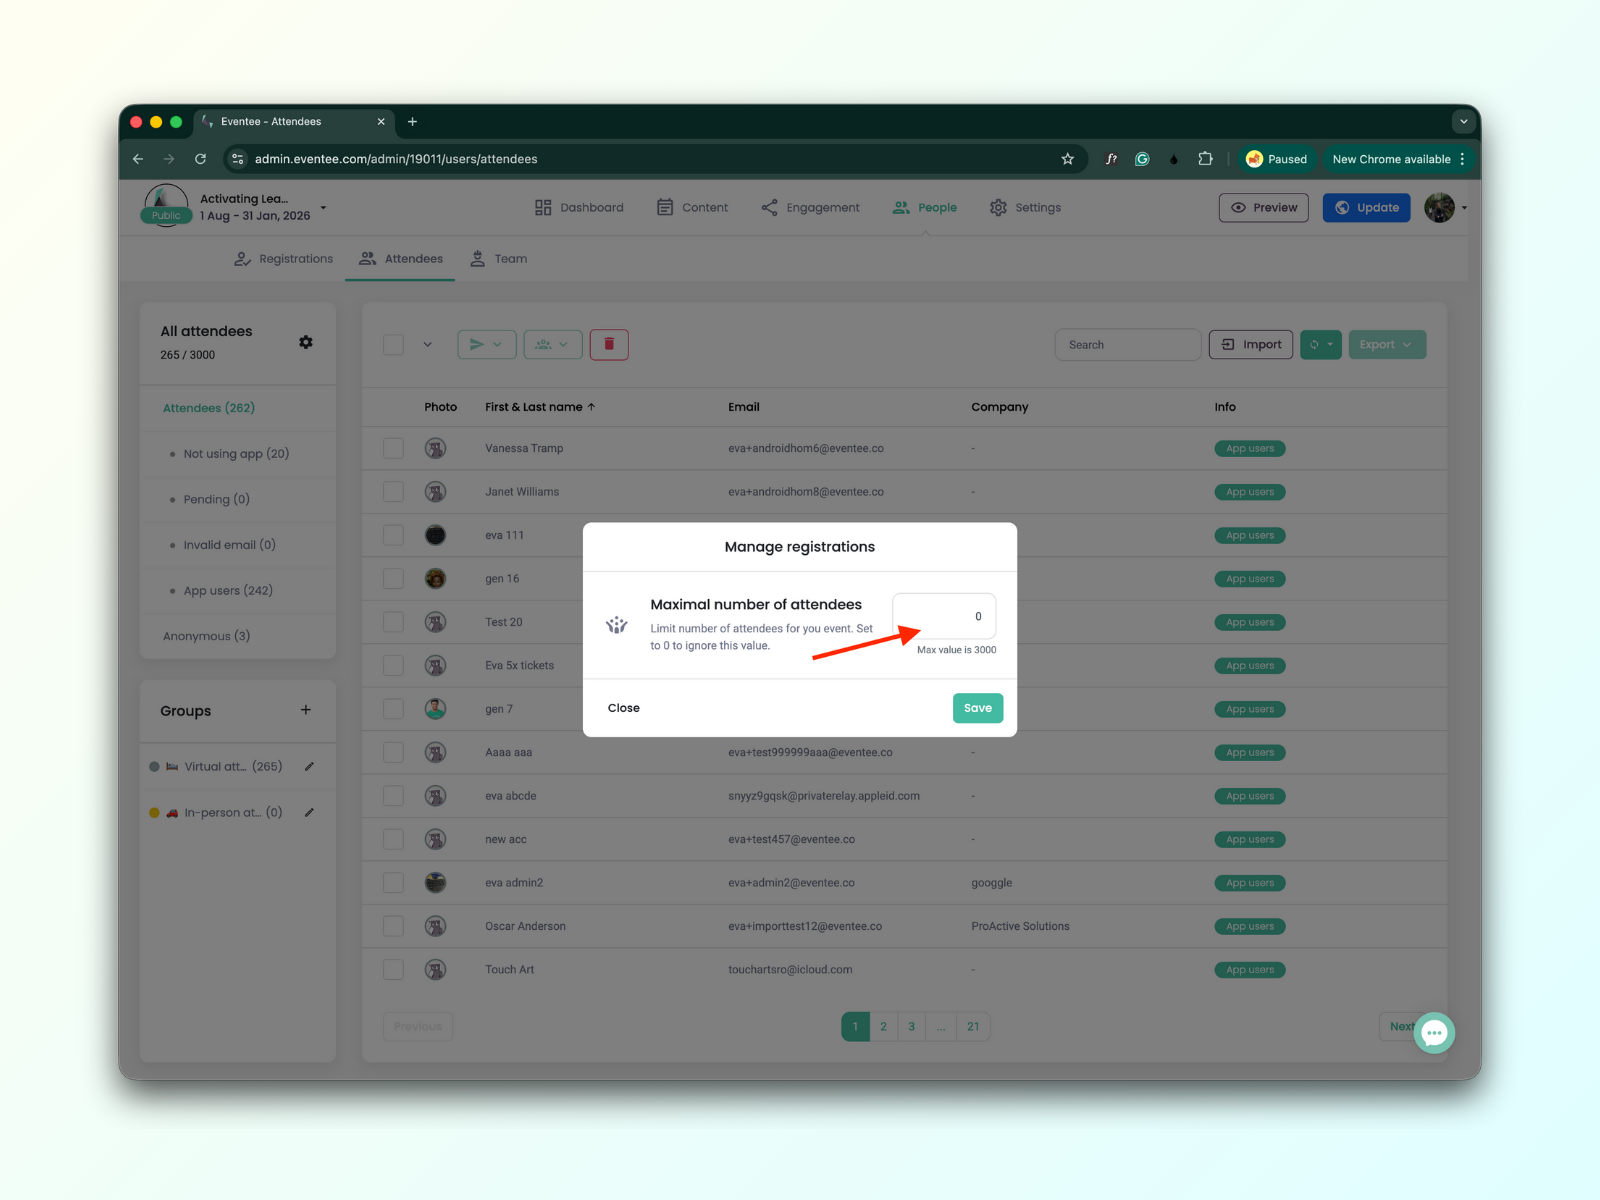
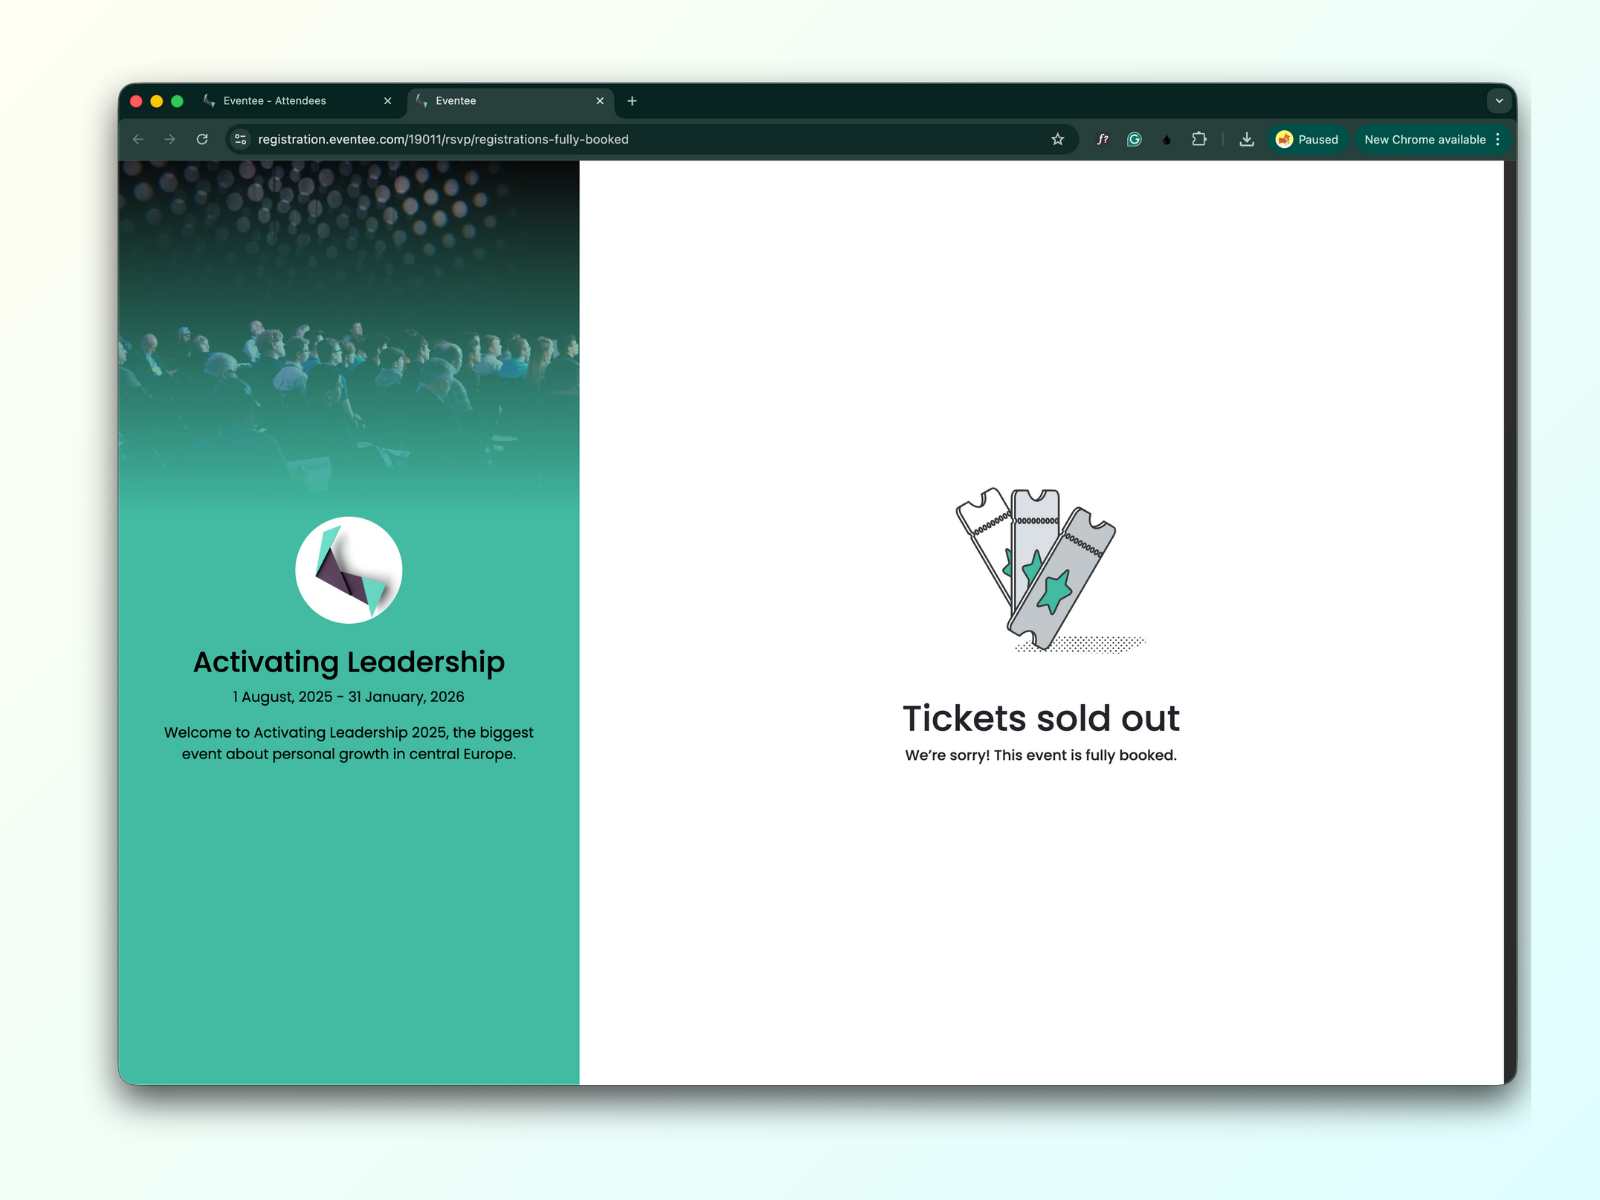
If you know in advance that the capacity of the hall where you are hosting the event has a limited number of seats, you can set the maximum number of attendees and thereby set a registration limit.
Here is an example: Let's say the hall has a capacity of 400 attendees, so you'll set the "Maximum number of attendees" to 400. Now, only 400 registrants can click "Yes" in the RSVP, fill out the registration form, and submit it. If a 401st registrant clicks "Yes" and tries to fill out the form, they will see a warning message, “Tickets sold out”.
How to set up registration limit:
Navigate to People → Attendees tab. On the left side of the screen, you will find the card with filters for attendees; there, you will see a cogwheel icon. When you click on it, a pop-up window will appear.
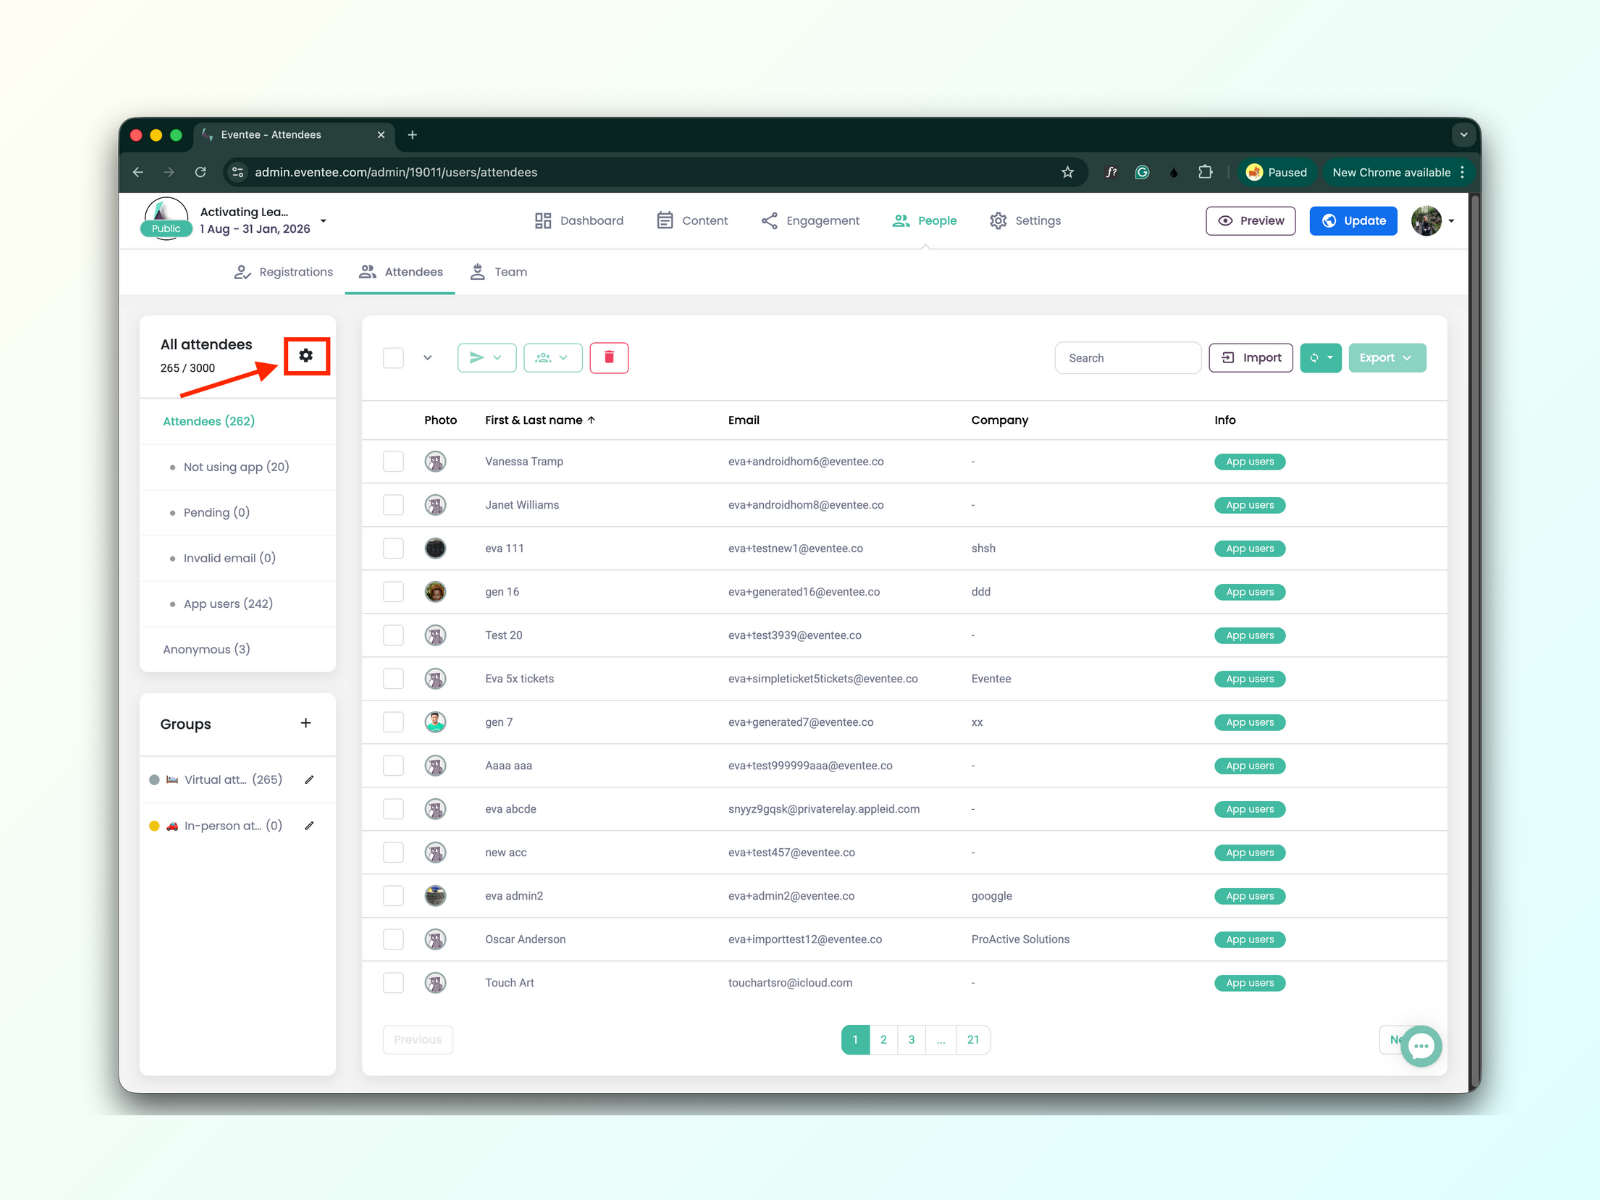
In this pop-up window, you can set the maximum number of attendees. This number cannot exceed the overall maximum allowed for your event (for example, if you are on the Solo plan, the maximum value is 500 attendees). If this setting is left at zero, the limit defaults to the maximum number of attendees permitted by your current plan (e.g., 500 attendees for the Solo plan).