In this article, you'll learn how to import and invite registrants, along with how to deal with invalid users, and more.

When importing users to a published event, you can always choose whether you want to send them an RSVP now or later.
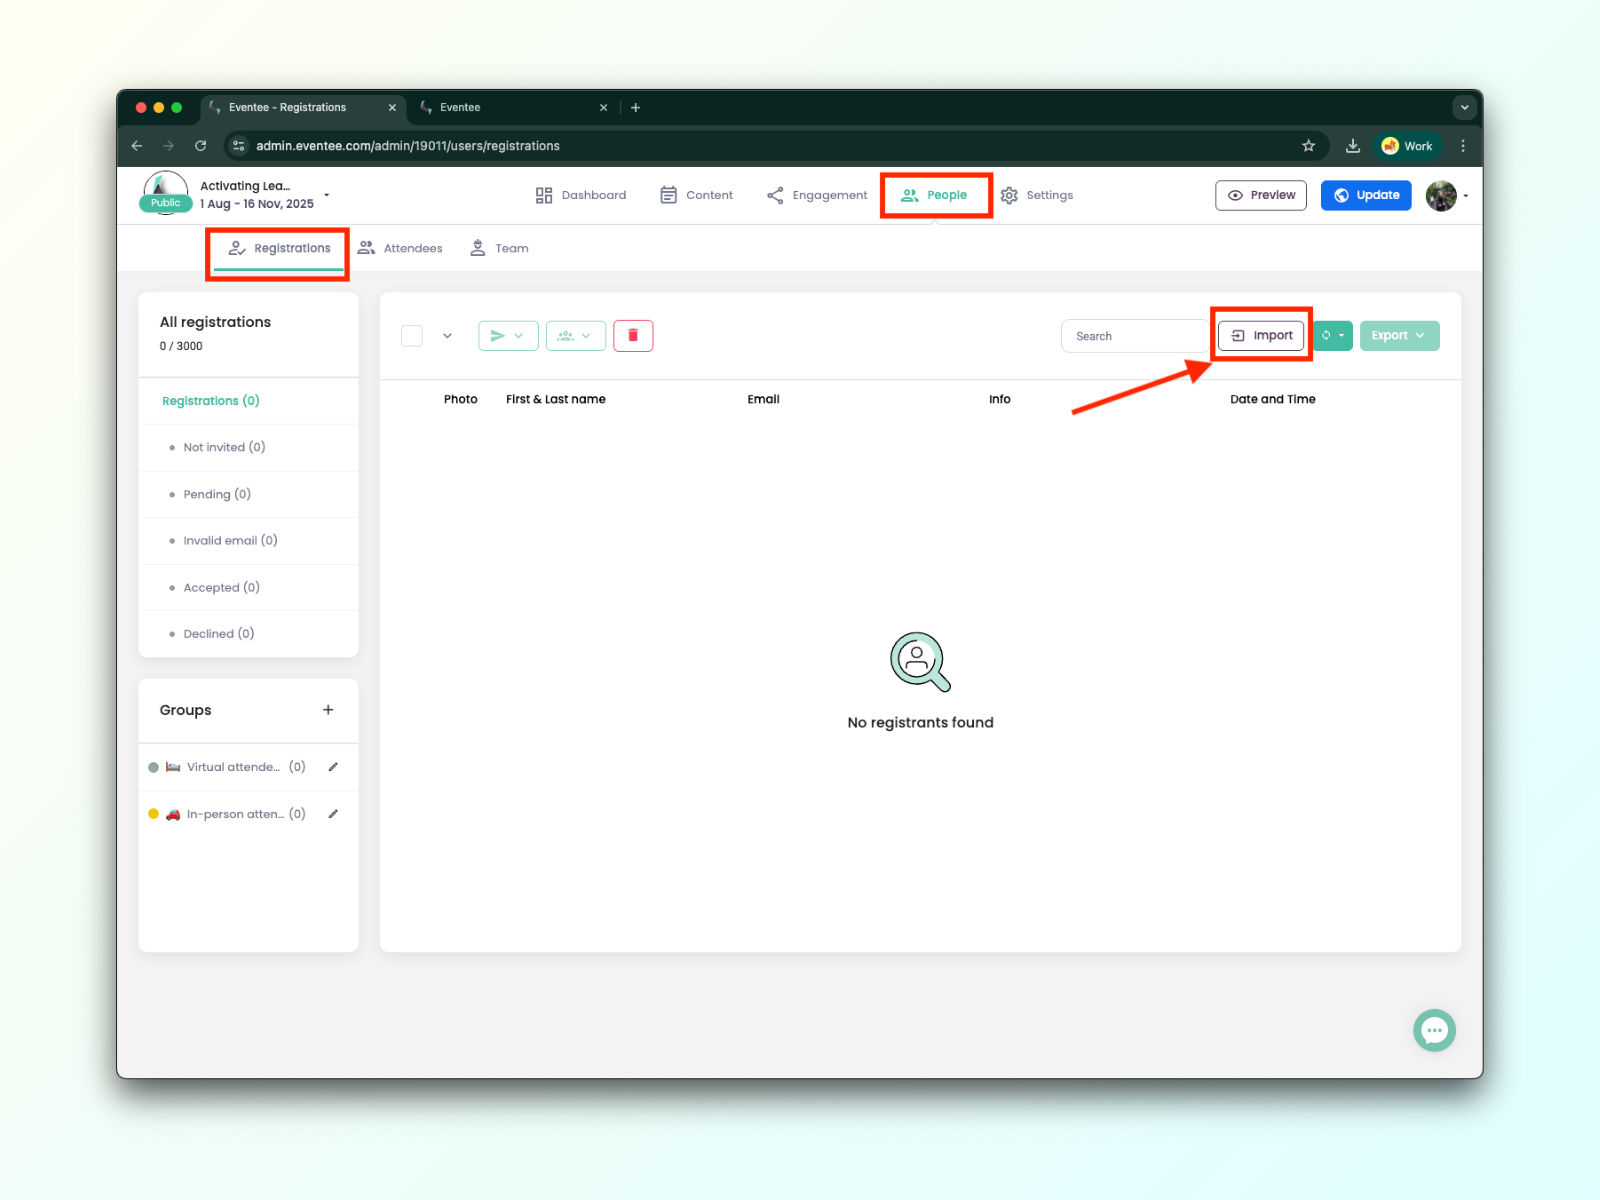
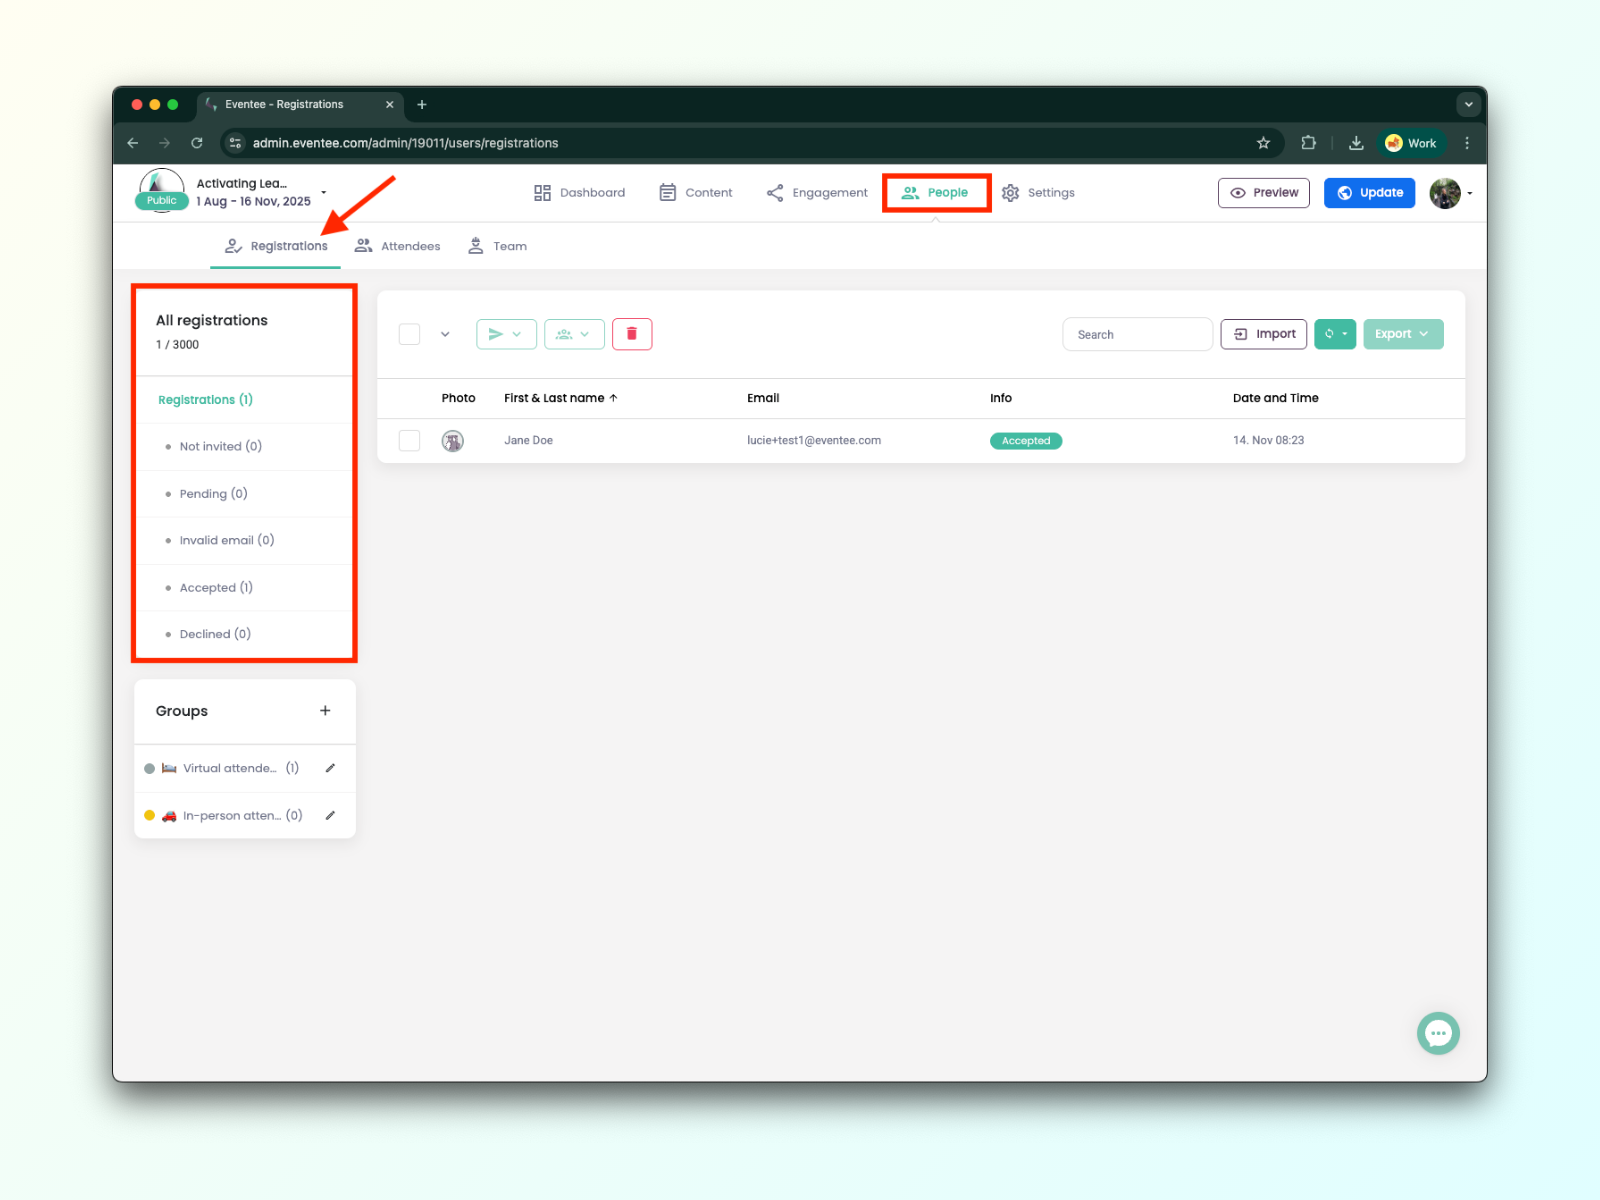
Start by creating your registrant list in Eventee. To add registrants to Eventee, please head over to People → Registrations tab. Here, you should see an Import button on the right side of the screen, next to the Export.

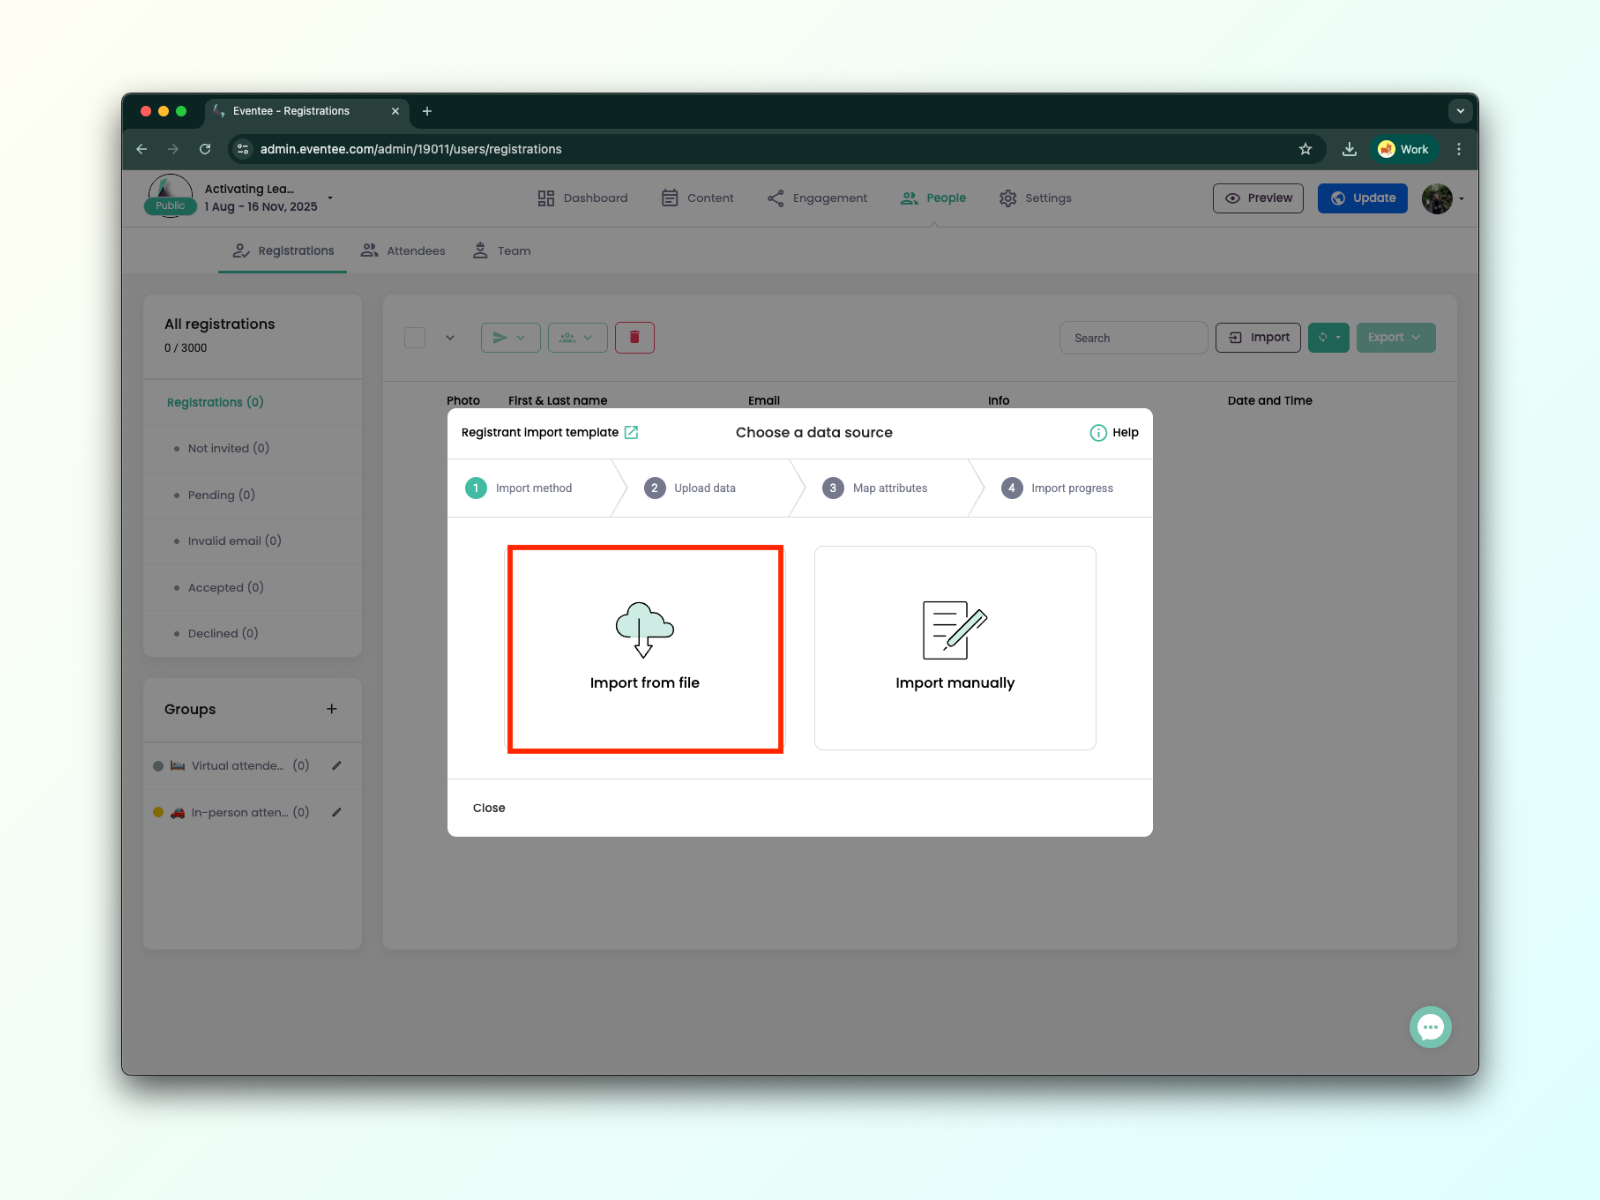
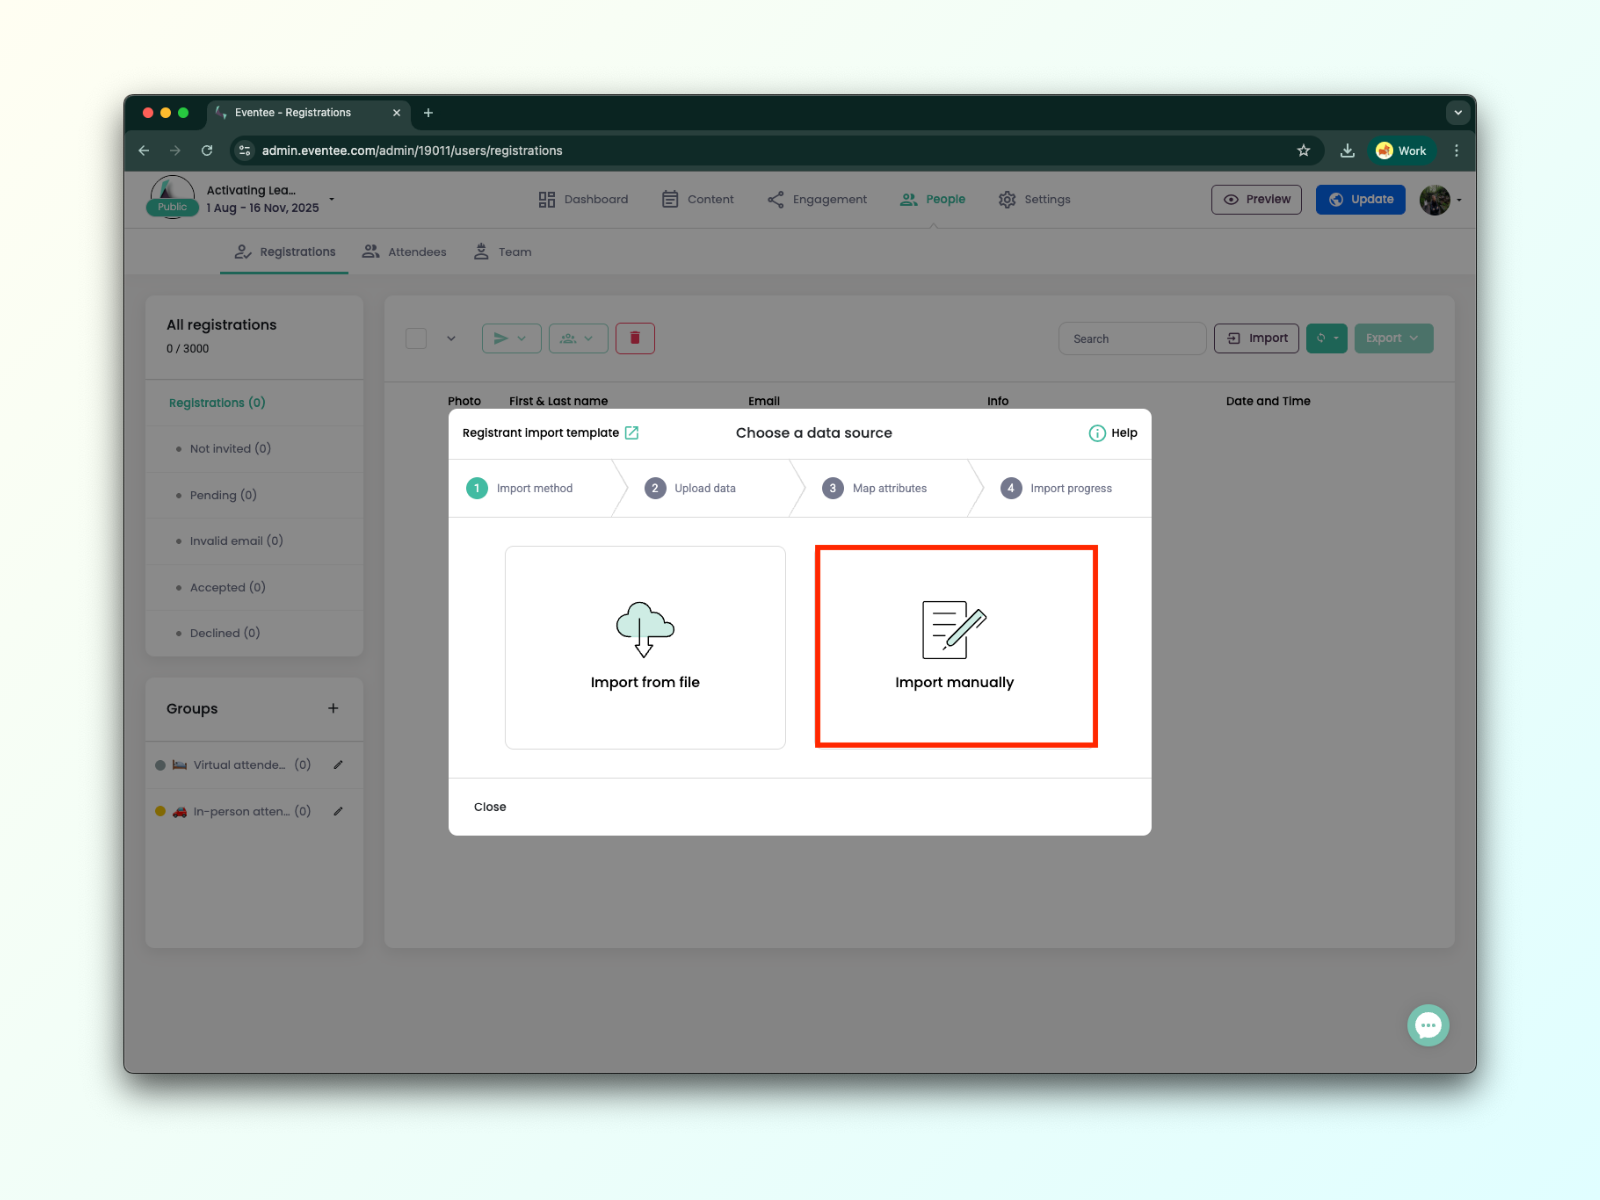
You’ll now have two options for importing registrants and sending them RSVPs: uploading a file or adding them manually.
Before uploading, please ensure your file meets all the necessary requirements for a successful import of registrants.
You can find the example file for registrant import here. Only the email field is required.
Now that you know where to start, let's talk about how to upload and map the file attributes to correctly link the data fields.
1A. In the Import dialog, select Import from file and upload your file with registrant information. We support .xls, .xlsx, .csv, and .tsv.
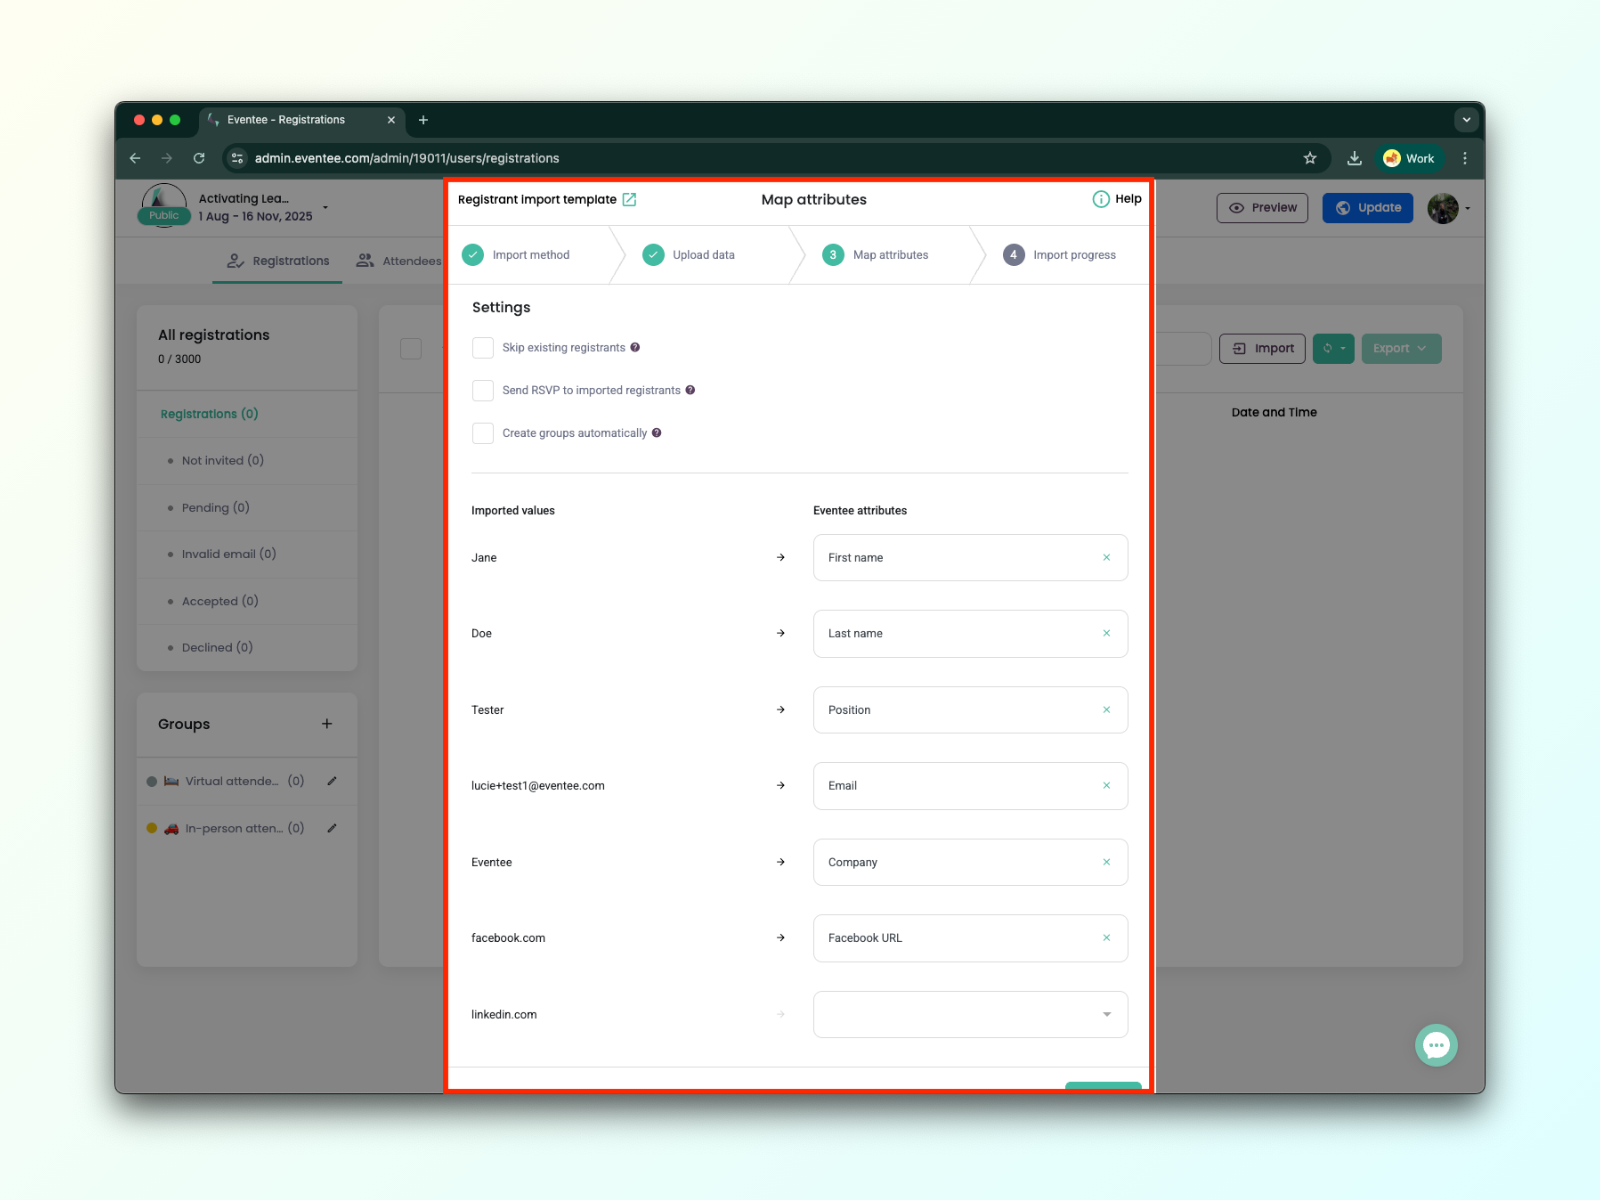
1B. Once your file is uploaded, hit Continue to proceed to the next screen, where you'll map values from your file to Eventee attributes. For every column of your file, select a corresponding value from the Eventee list.
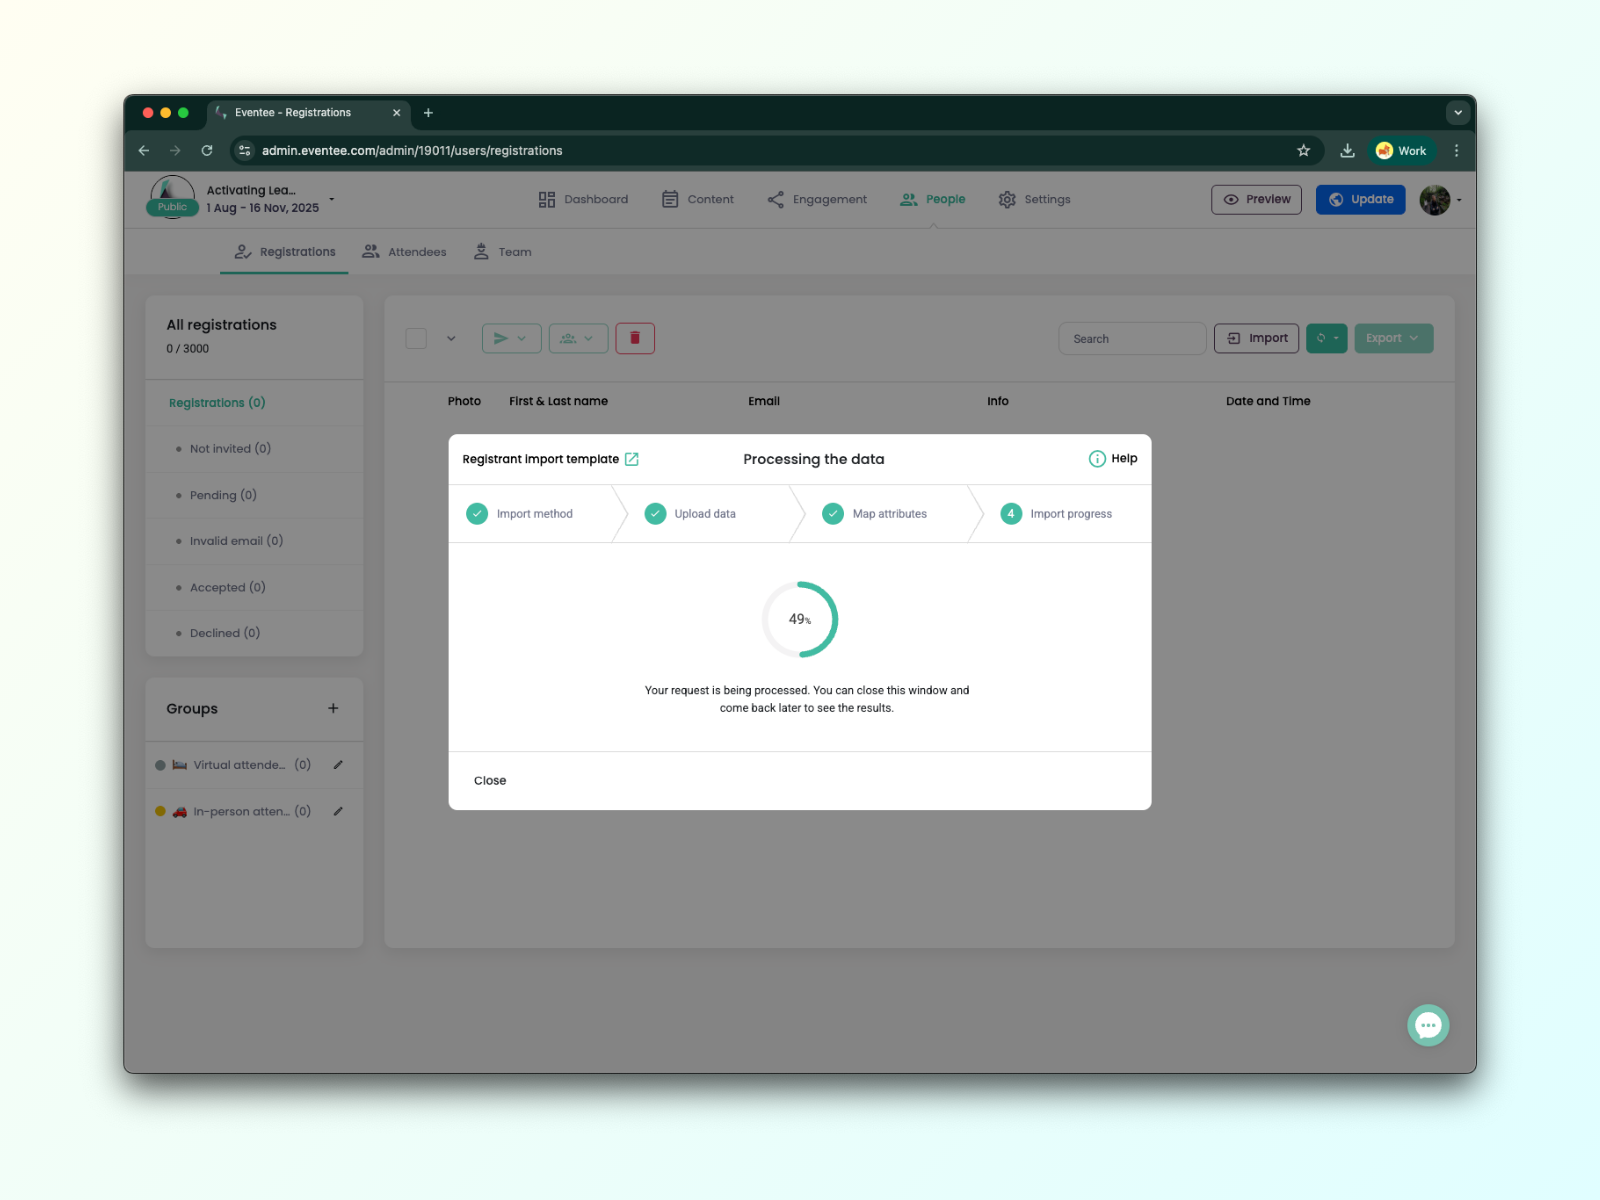
1C. Click Continue to let Eventee process your data. You can close this screen at any time, and check on progress later if needed. All done, good job!
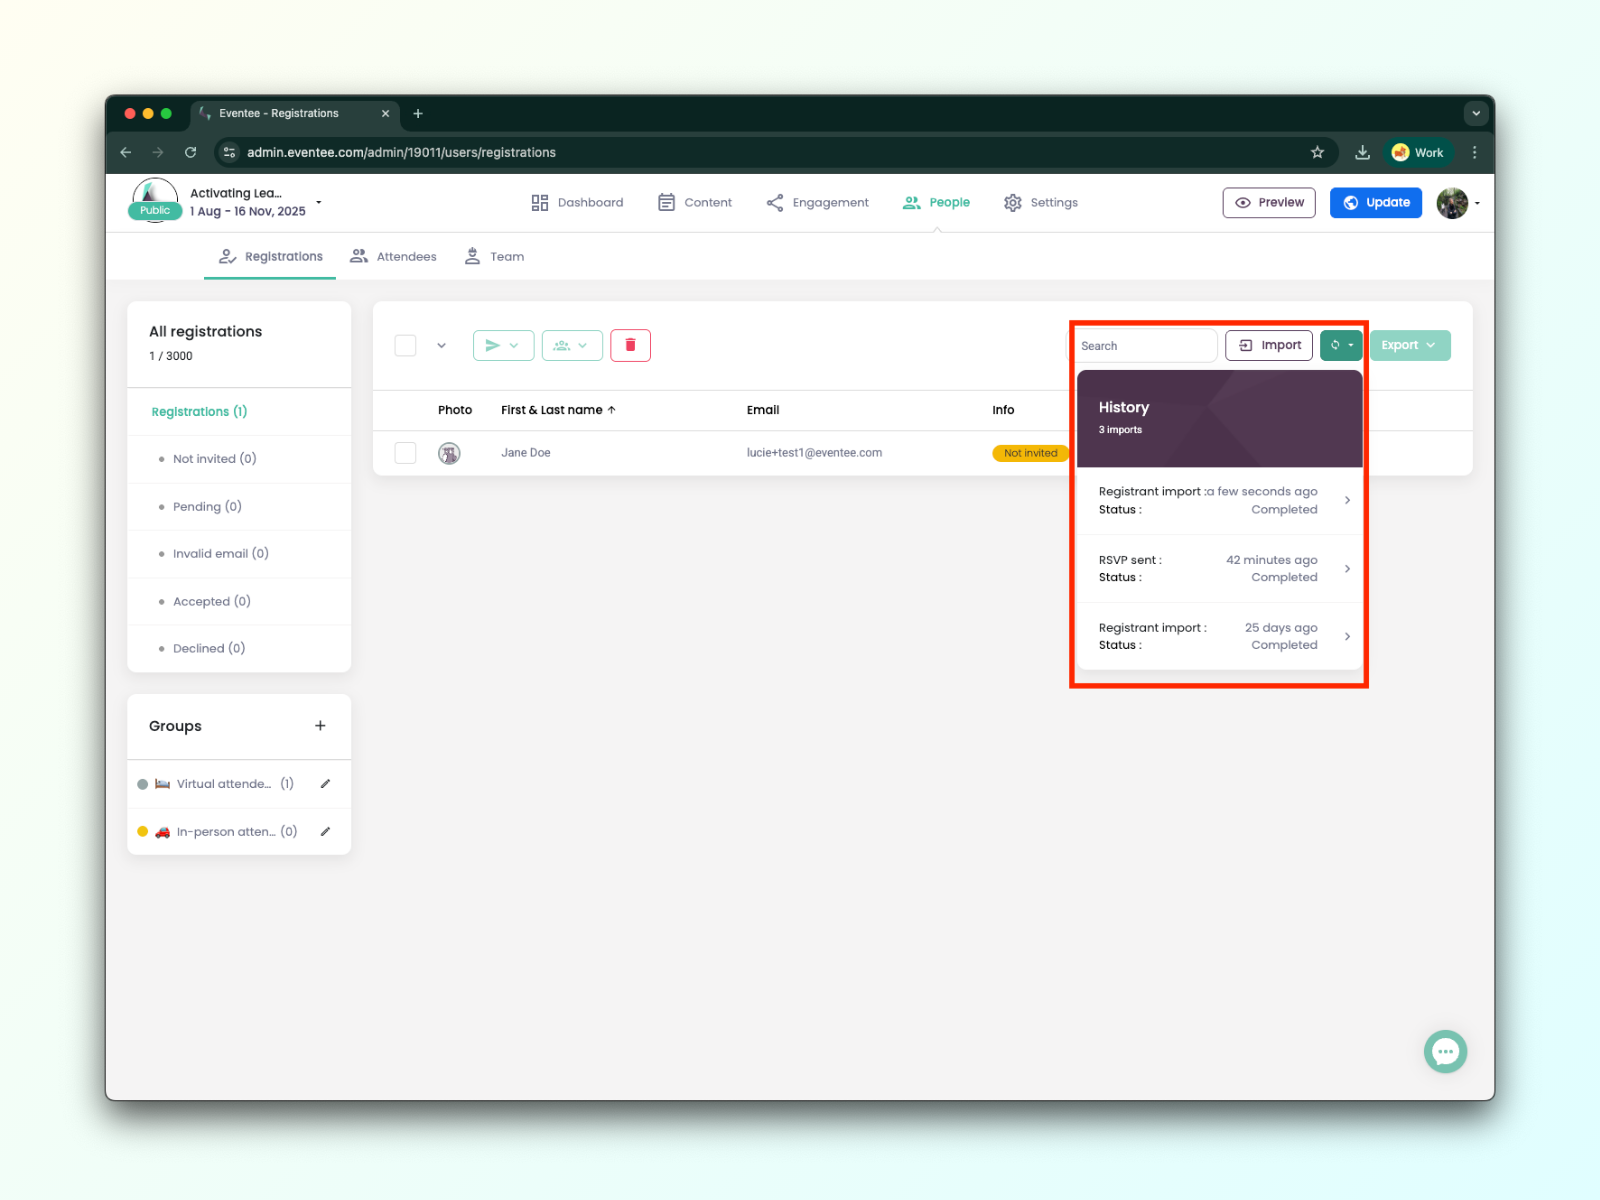
1D. You can check on the progress at any time through the History button.

The manual attendee import is ideal when you only need to add registrant emails or don’t have a file to upload. Even so, you can still include detailed information about each registrant, such as their name, company, position, and social media links.
2A. In the Import dialog, select the Import manually option.
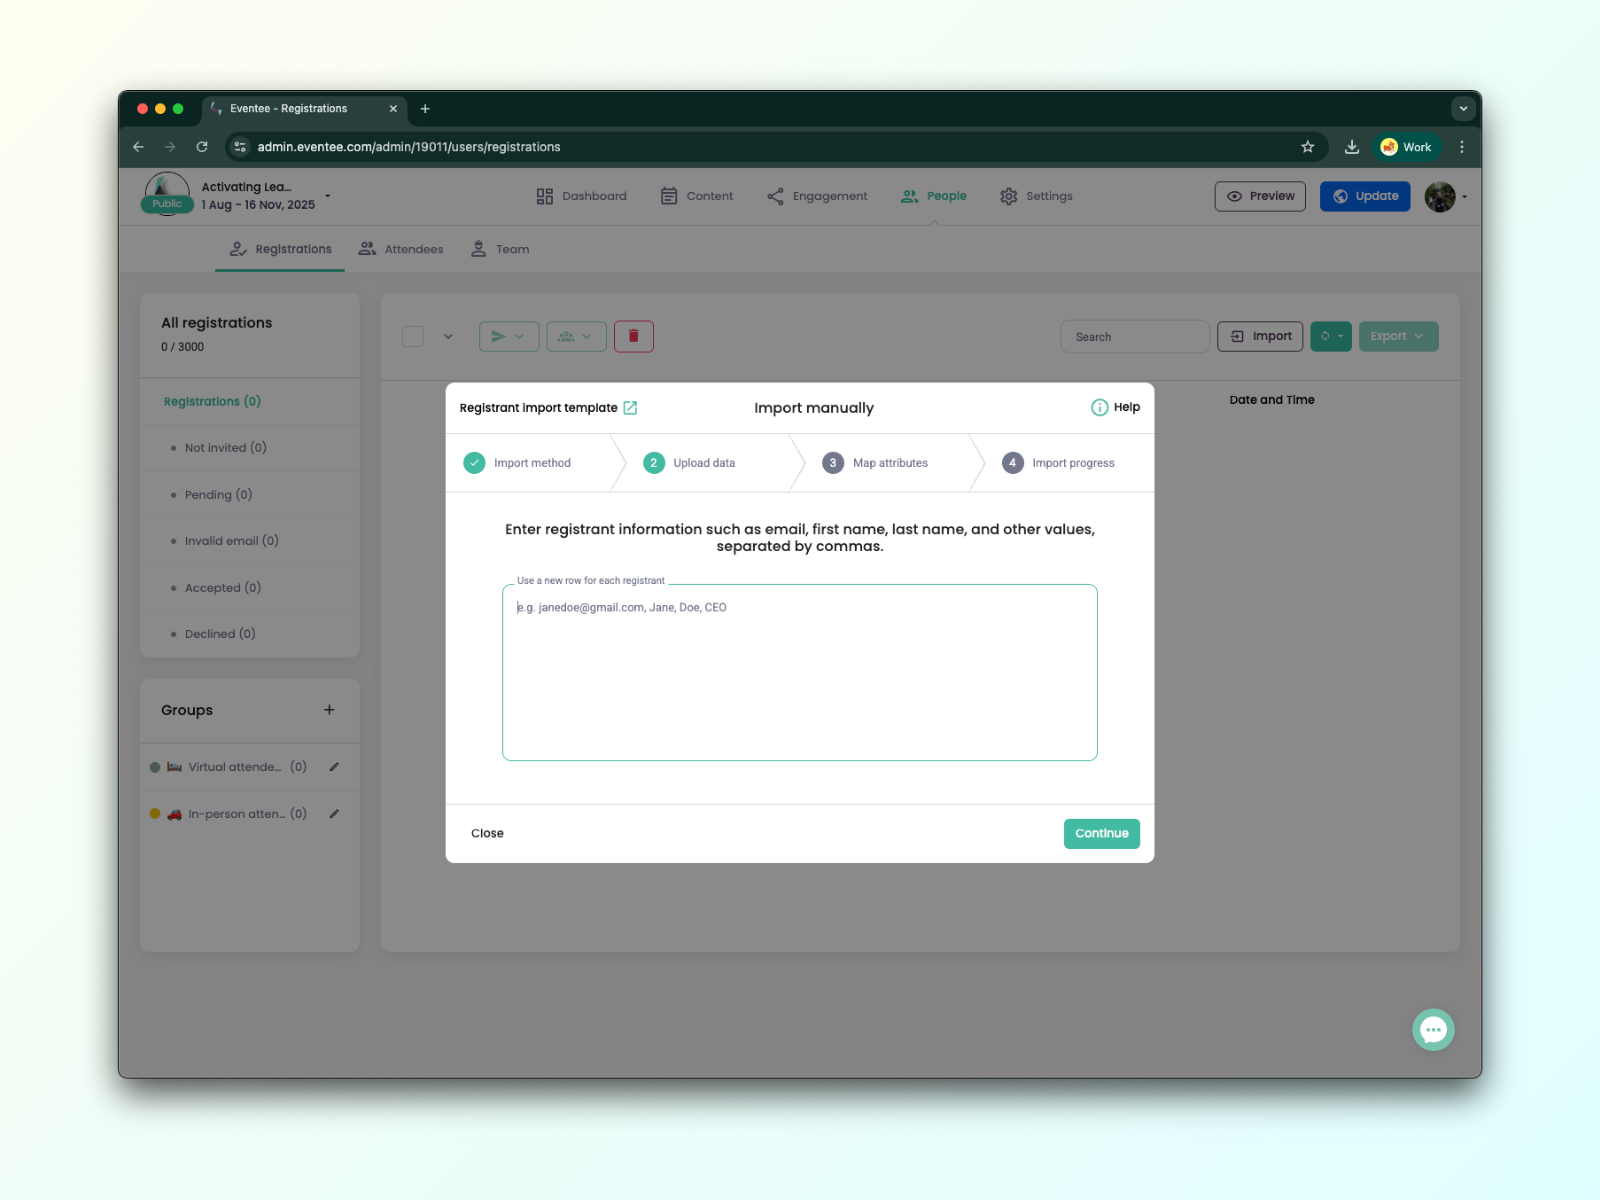
2B. Now, you can simply add your registrant emails or enter any additional values.
Required: email
Optional: first name, last name, bio, company, position, Facebook, LinkedIn, Twitter/X, website, photo link*, phone number
*Photo link - must be a link to a public photo ending with .jpg or .png (NOT Google Drive, OneDrive, DropBox etc.), if login or registration is needed, we will not be able to download it.
2C. On the next screen, you need to assign the values you have entered to Eventee attributes.

2D. In the next step, Eventee will process your data and send out invitations if you have checked the option in the previous step. You can close this dialog at any time without interrupting the processing.

2E. You can check on the progress at any time through the ‘History’ button.
Registration history
When you click on a registrant’s name, you can view their profile, including their registration history.

Understanding Registration Statuses:
Not invited - The RSVP was not sent to the registrant.
Pending - The registrant did not reply to the RSVP.
Invalid email - The registrant's email was not valid.
Accepted - The registrant responded yes to the RSVP.
Declined - The registrant responded no to the RSVP.
In the left column, you’ll see attributes of each registrant.
How to handle invalid registrants
In this case, the best option is always to invite the user with a different email address. However, if that's not possible, please message our support team, and they will look into it.
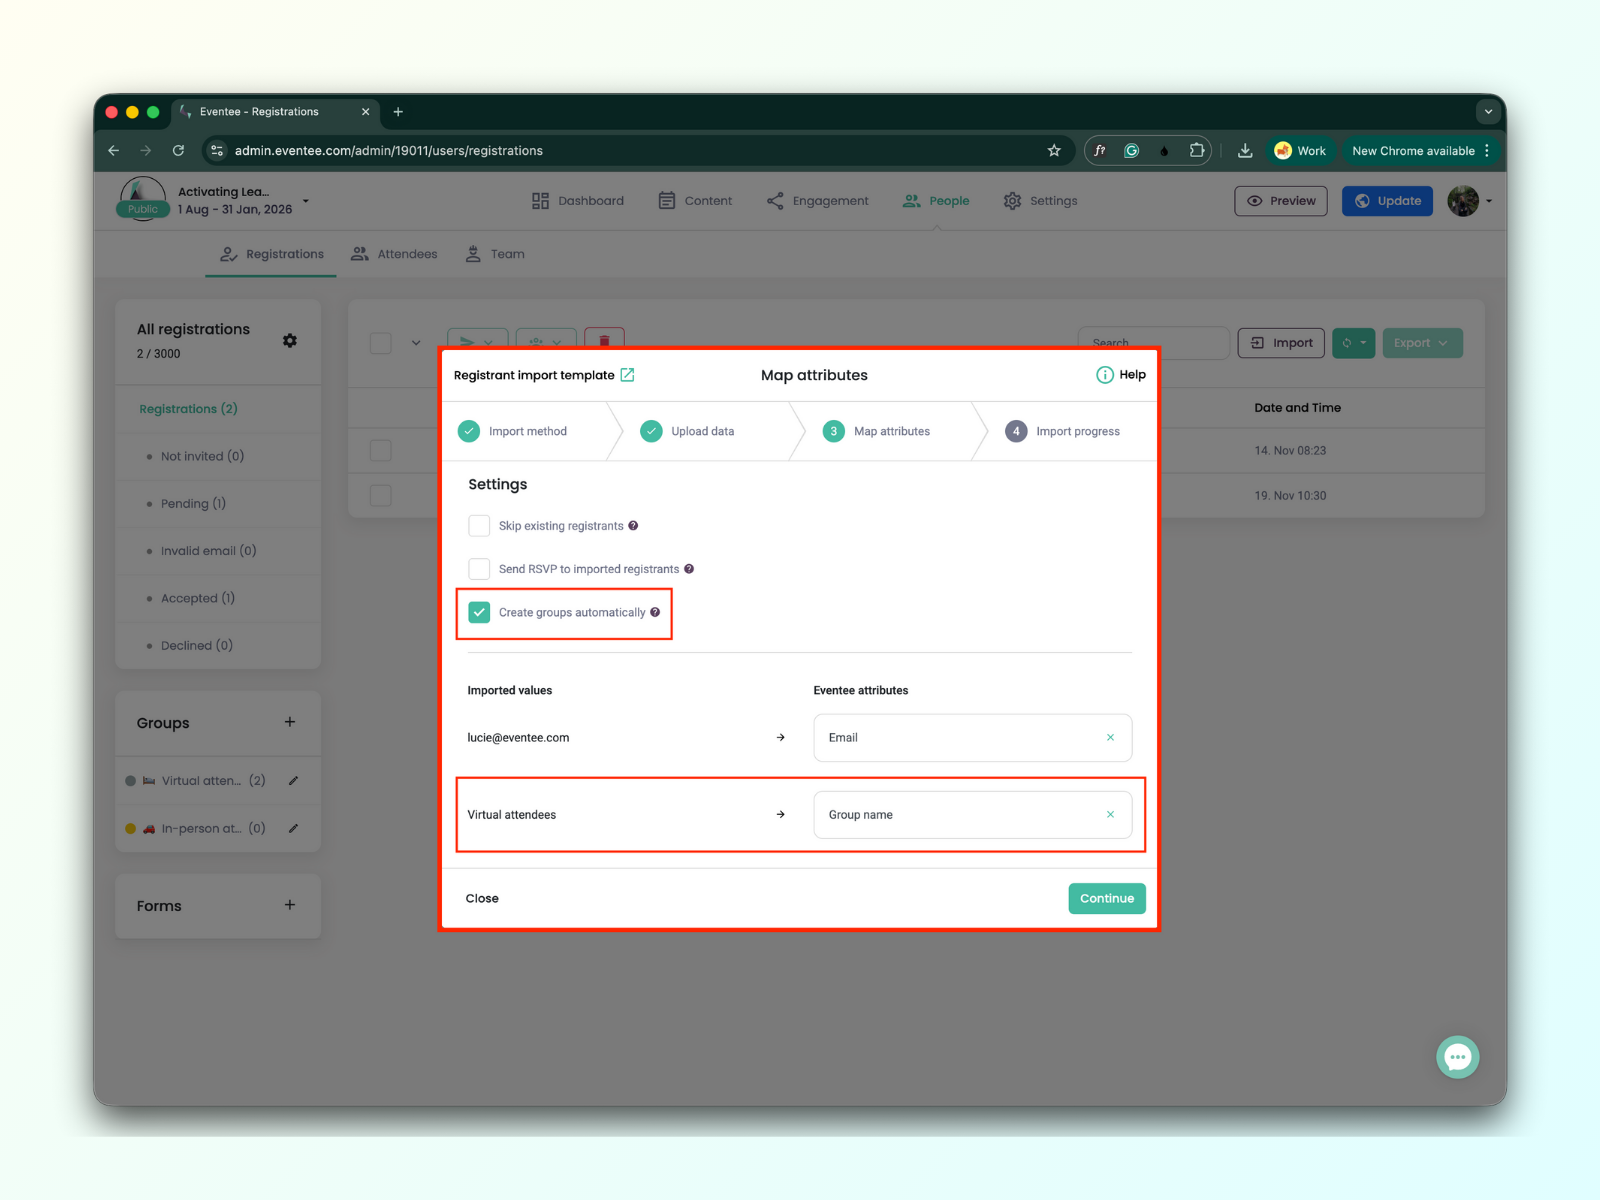
If you are using the groups feature, you can easily assign registrants to specific groups—or even create new groups—while importing them into the Eventee administration panel.
If you’re importing registrants via a file, follow these steps:
Add a new column to your file that represents the group name.
Fill in the group name for each registrant in your file.
During import, check the "Create Groups" box and assign the "Group Name" attribute.