Groups, a highly requested feature, is now live in Eventee and ready to use!
The Groups feature allows you to assign attendees to specific groups and control their access to certain features within the Eventee app.
For example, if you sell different types of tickets for your event—some including networking access and others not—previously, all attendees either had access to networking or none did. Now, you can specify which attendees have access and which do not.
This feature extends beyond networking; you can also control access to:
Newsfeed: allows access to the feature, and you can also send posts only to specific groups.
Social Wall: allows access to the Social wall.
Session Ratings: allows giving session ratings for the group.
Gamification: allows participation in the Gamification feature.
Schedule: allows attendees to see the whole event schedule.
To create your first group, navigate to: Settings → Features → Groups → Manage
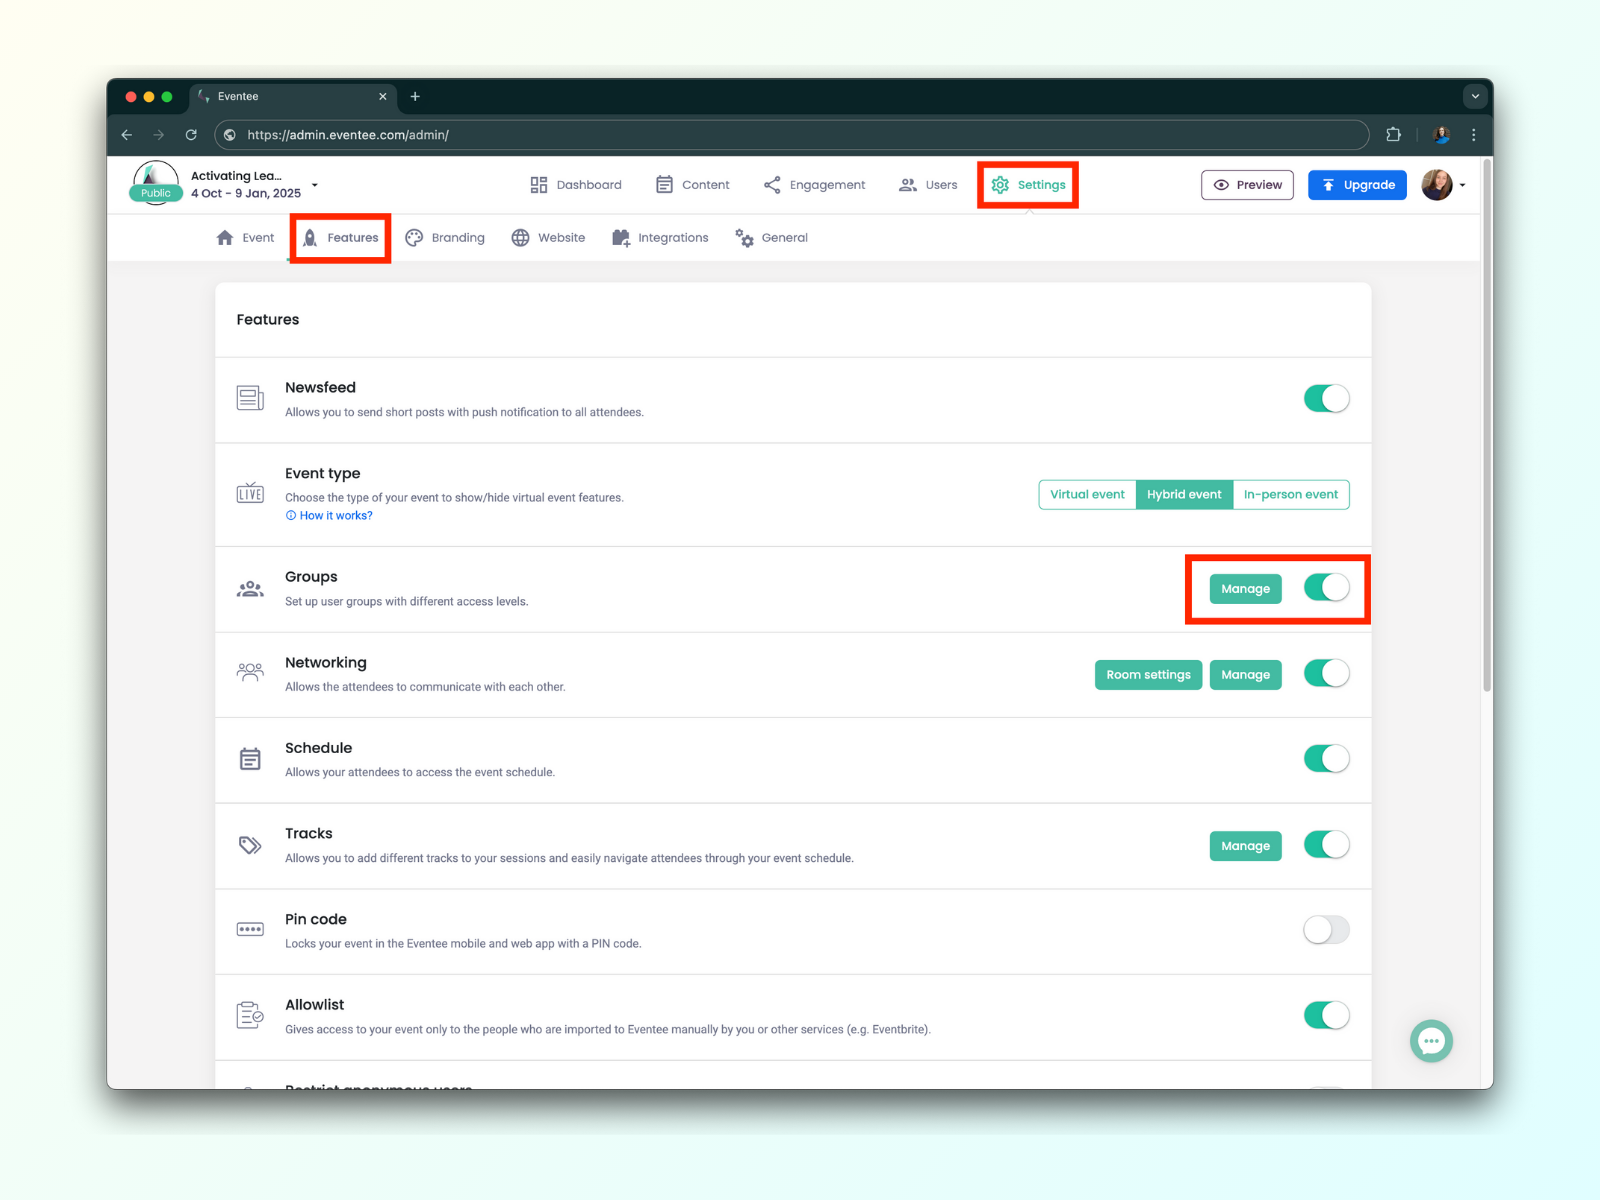
The only required field is the group name (a private name visible only to you and your team). You can also optionally:
Add a public name (visible to attendees in the app)
Assign a color to help differentiate groups (won’t be visible to attendees)
Select which features the group can access
If you use a ticketing platform, specify a ticket name to automatically assign attendees into groups.

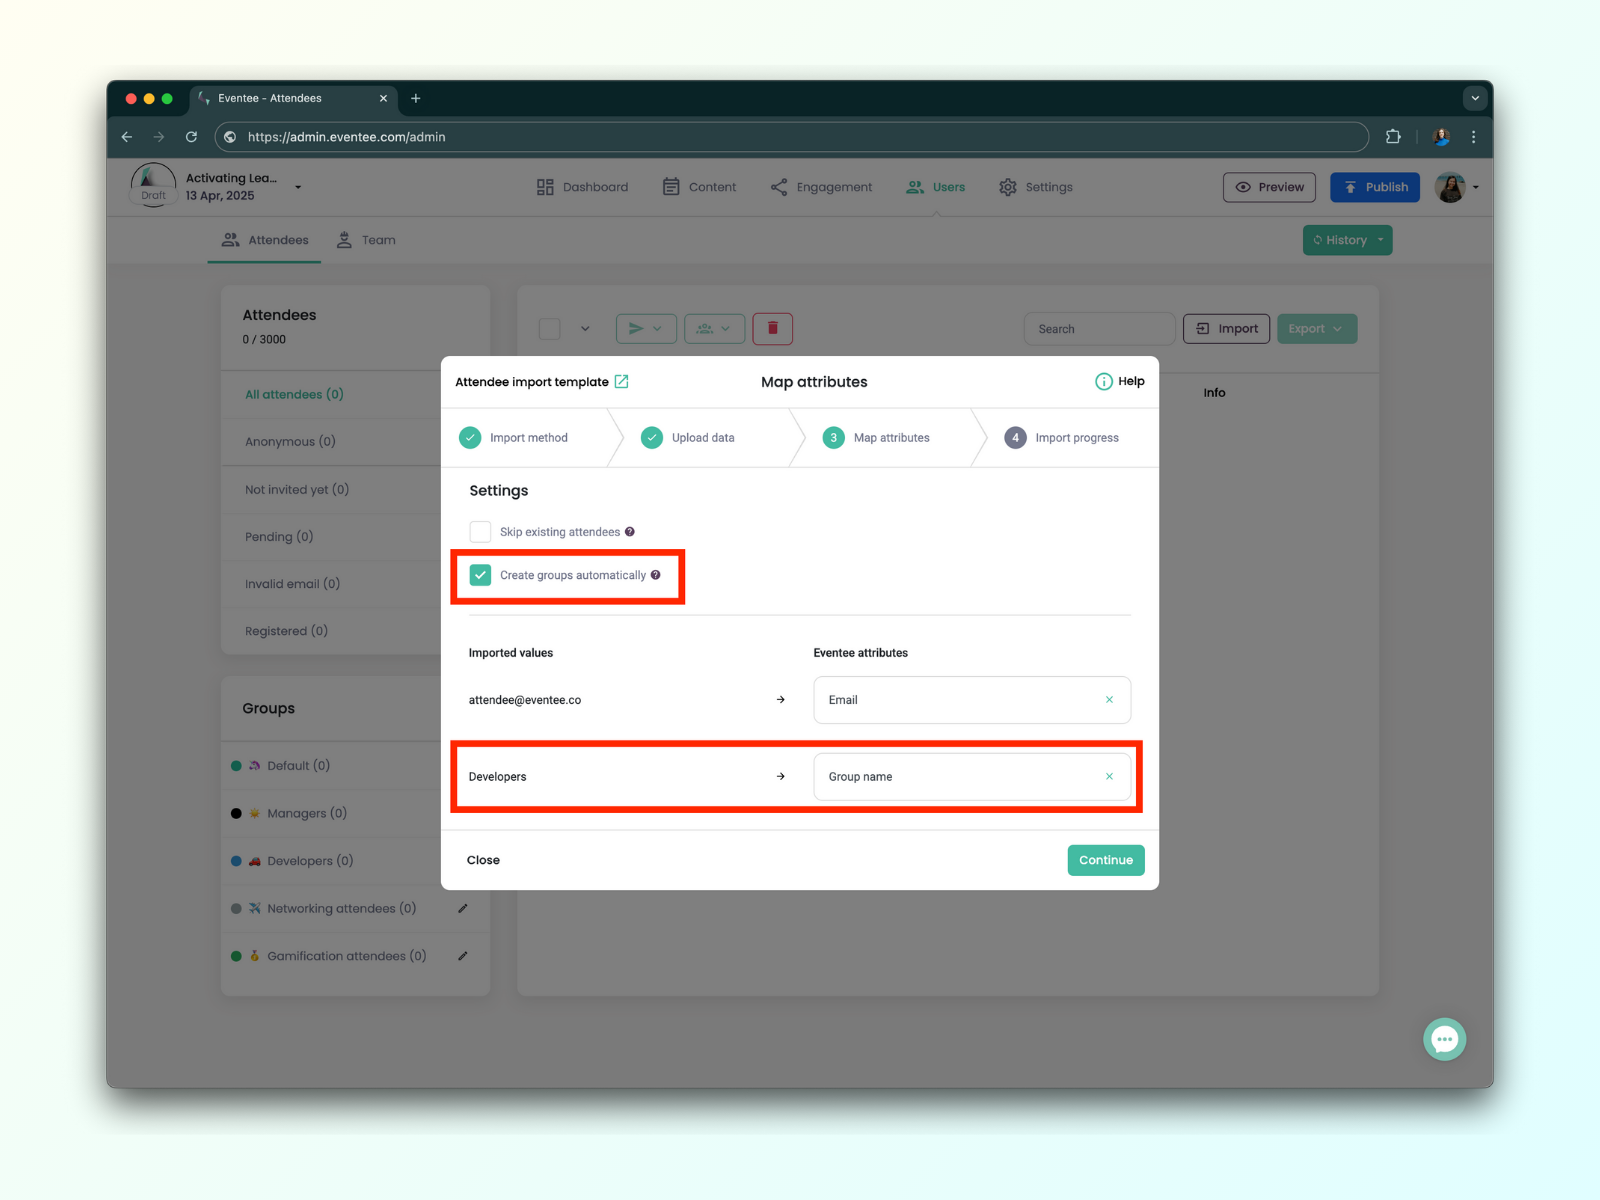
You can easily assign attendees to specific groups—or even create new groups—while importing them into the Eventee administration panel.
If you’re importing attendees via a file, follow these steps:
Add a new column to your file that represents the group name.
Fill in the group name for each attendee in your file.
During import, check the "Create Groups" box and assign the "Group Name" attribute.

If you sell tickets through an integrated platform, you can assign ticket names to groups. When syncing ticket sales with Eventee, attendees who purchase a specific ticket will automatically be assigned to the corresponding group.
For example, if you have an "Early Bird" ticket that grants attendees early networking access, you can:
Enable Networking for the "Early Bird" group.
Add the ticket name at the bottom.
Save the settings and disable Networking for all other groups.
Now, only early bird attendees can network until you adjust the group settings.
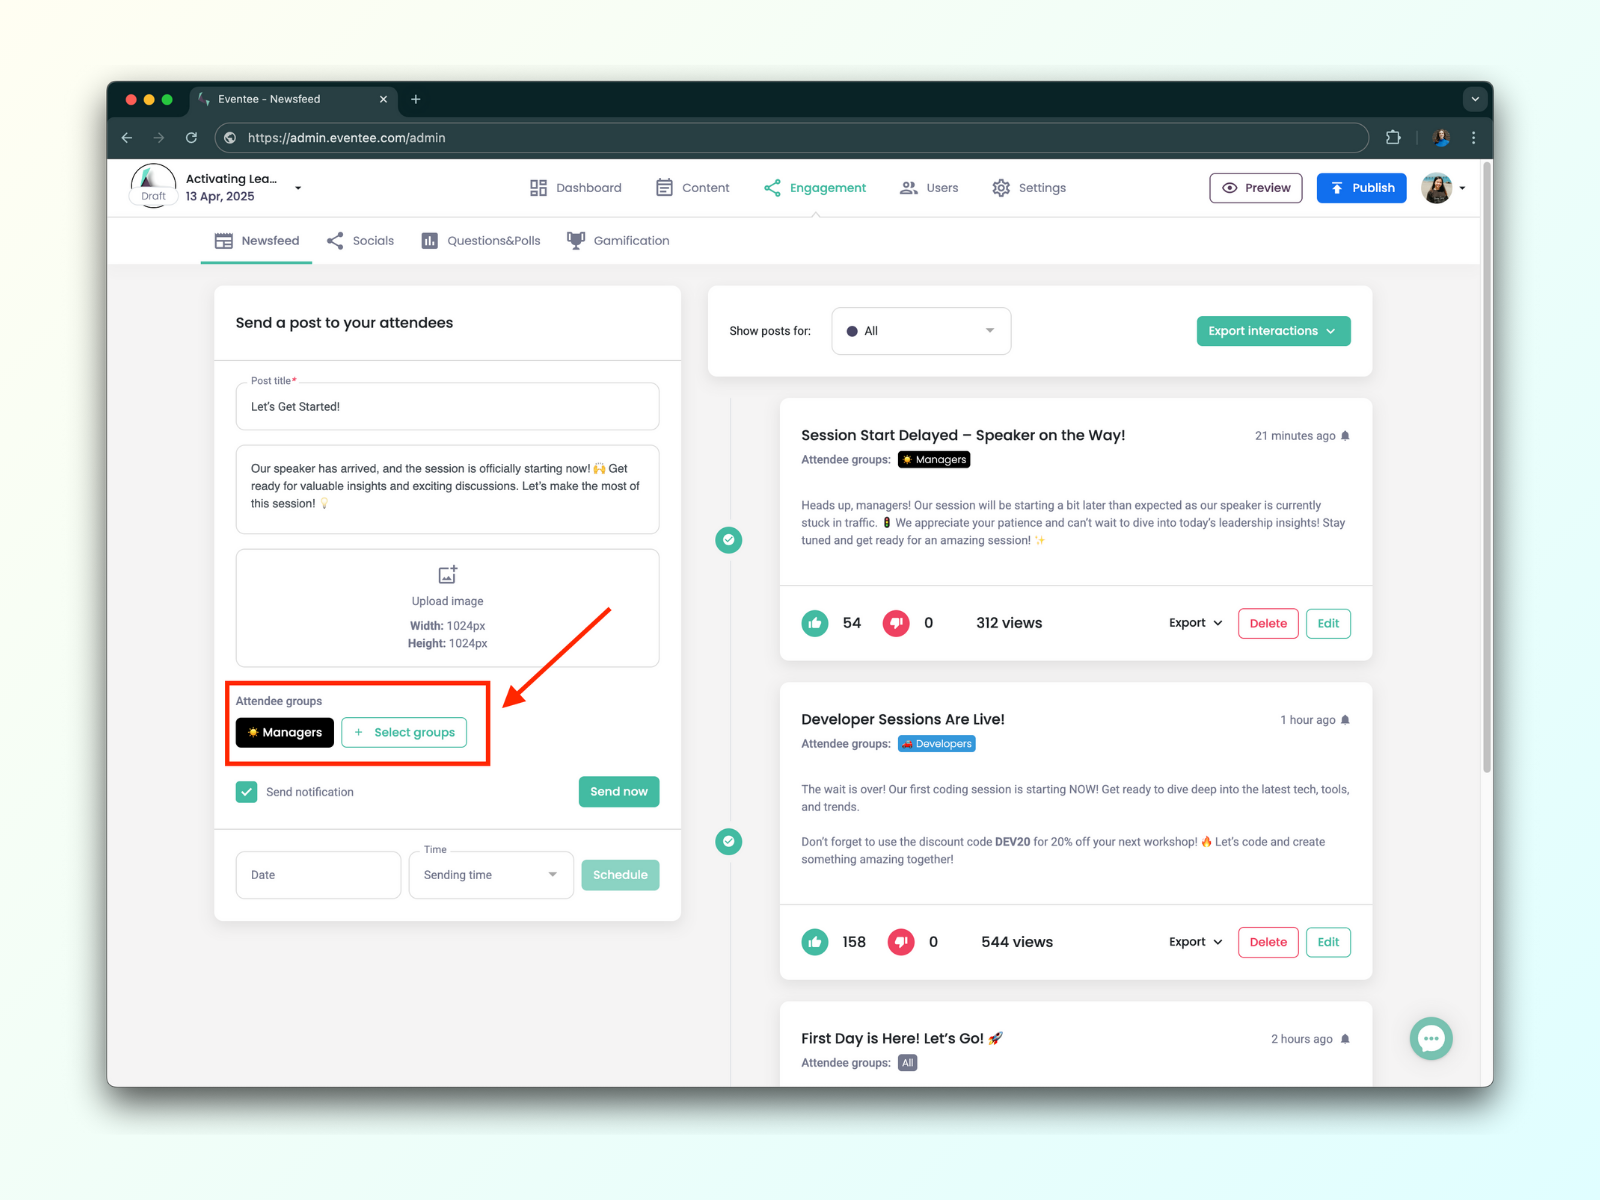
Beyond limiting feature access, you can also use Groups to send targeted Newsfeed posts.
For instance, at an IT event, you may want to inform developers and managers about specific sessions or booths while sending other general reminders to all attendees.
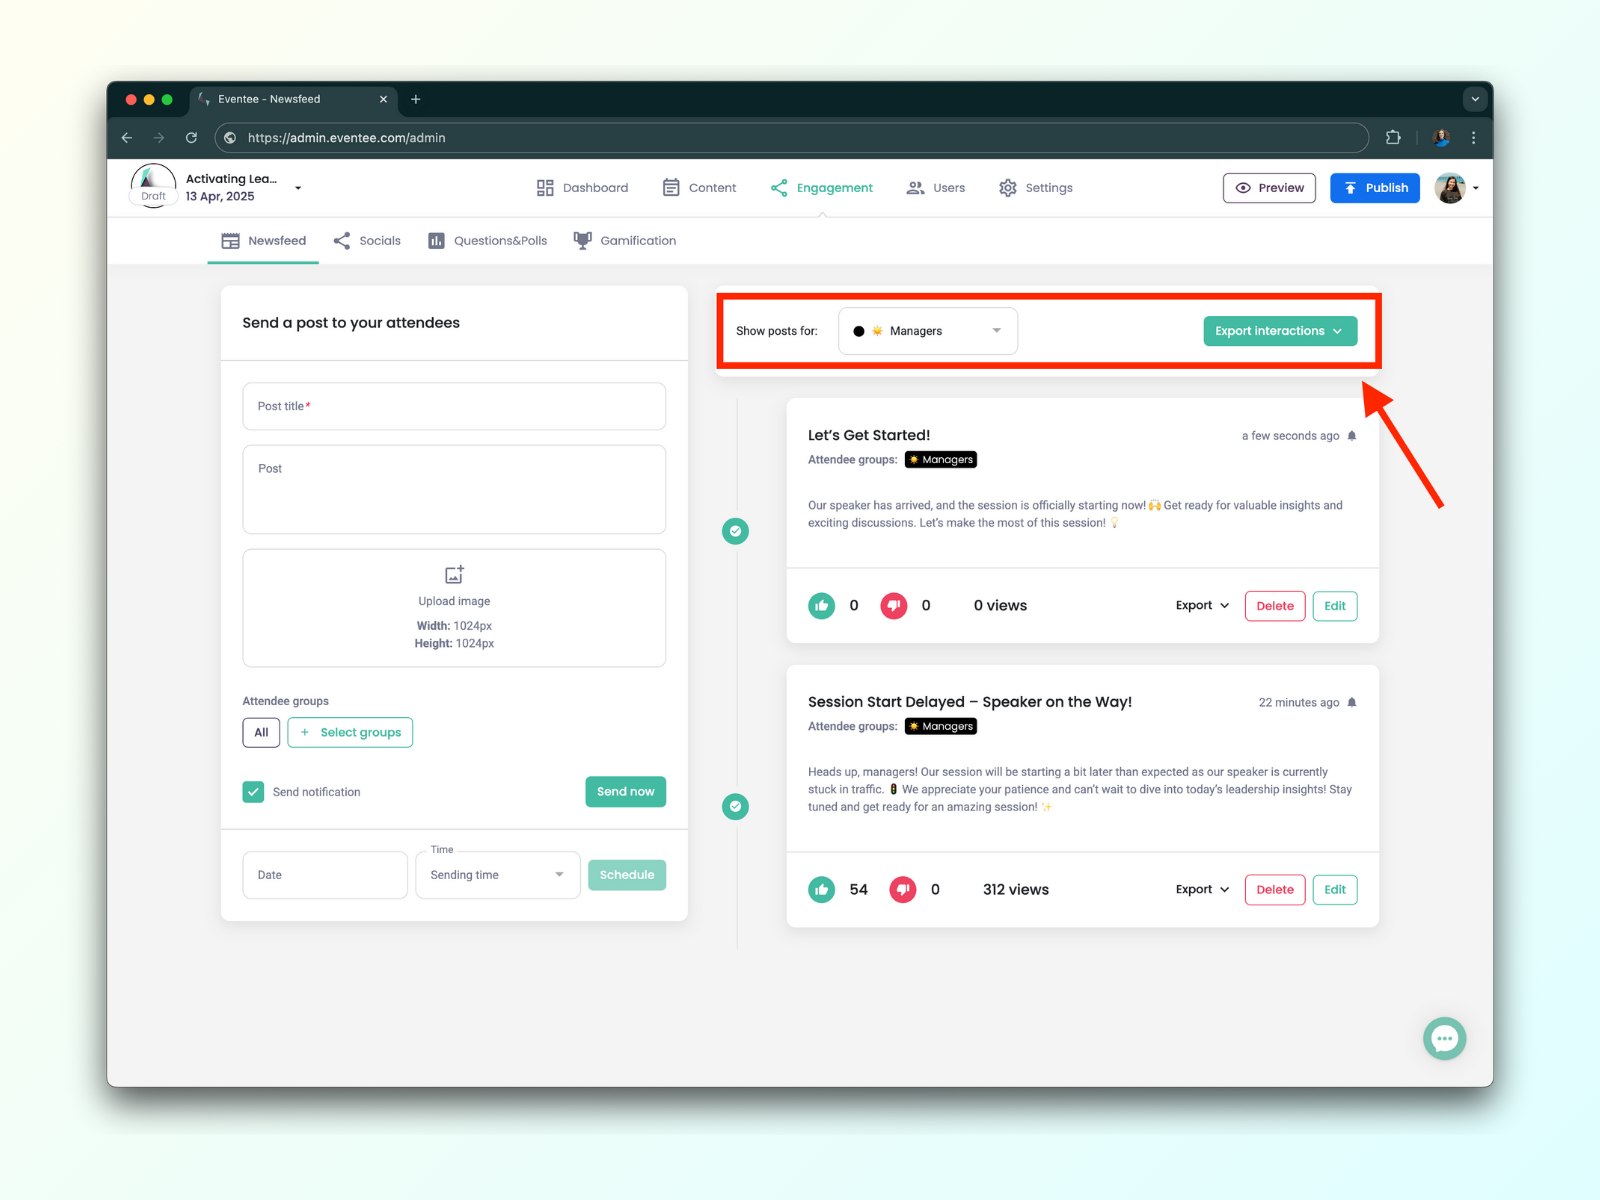
Additionally, you can export post interactions by group, making it easier to track engagement. You can also choose to export data for all groups at once.
In Users → Attendees, you can filter attendees by group and send them targeted invitations or reminders to download the app.
This is particularly useful if you plan to invite attendees in phases.
You can update group settings at any time—before, during, or after the event. You can also reassign attendees whenever needed.
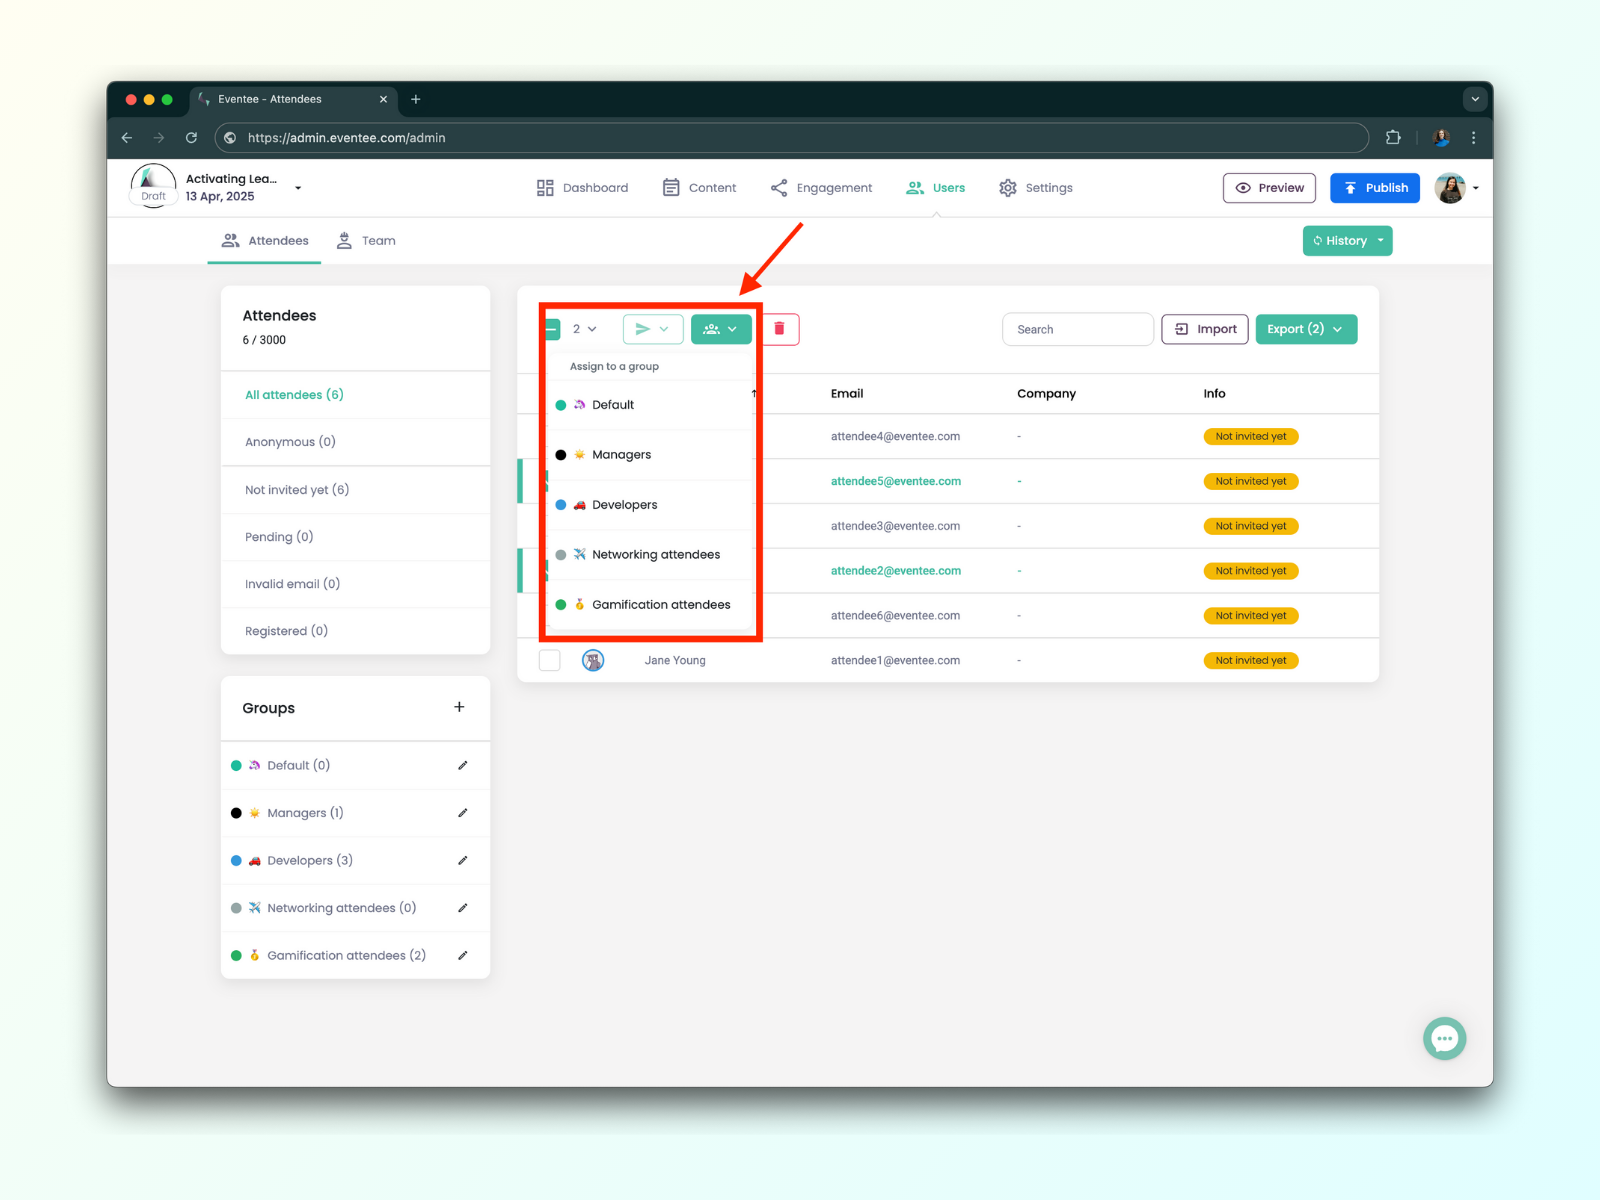
To reassign attendees:
Go to Users → Attendees
Select the attendee(s)
Click the green button next to invitations and choose another group
To modify access:
Go to Users → Attendees
Locate the groups in lower left corner.
Click on the pencil button next to specific group’s name.
Enable or disable features, and hit the Save button.

With the Groups feature, you have complete control over attendee access and communication, making it easier than ever to manage your event!
Unfortunately, you can only control access to entire sessions, not their individual content. This means you cannot disable specific elements such as streams, descriptions, speakers, files, etc.
However, if you are hosting a hybrid event and don’t want in-person attendees to see the stream, you can easily achieve this by creating duplicate sessions—one with the stream and one without—and then making each session visible only to the appropriate audience (in-person or virtual attendees).