Follow this step-by-step guide to create a label, set up your printer, and start printing high-quality badge labels in minutes:
At first, you have to create a label using the label editor. Learn more about how the label editor works.
The second step after creating a label is to install and connect the printer based on the platform you will use for printing. Find detailed info in the technical documentation for badge label printing.
Once your printer is connected, you can follow these steps to perform your first test print:
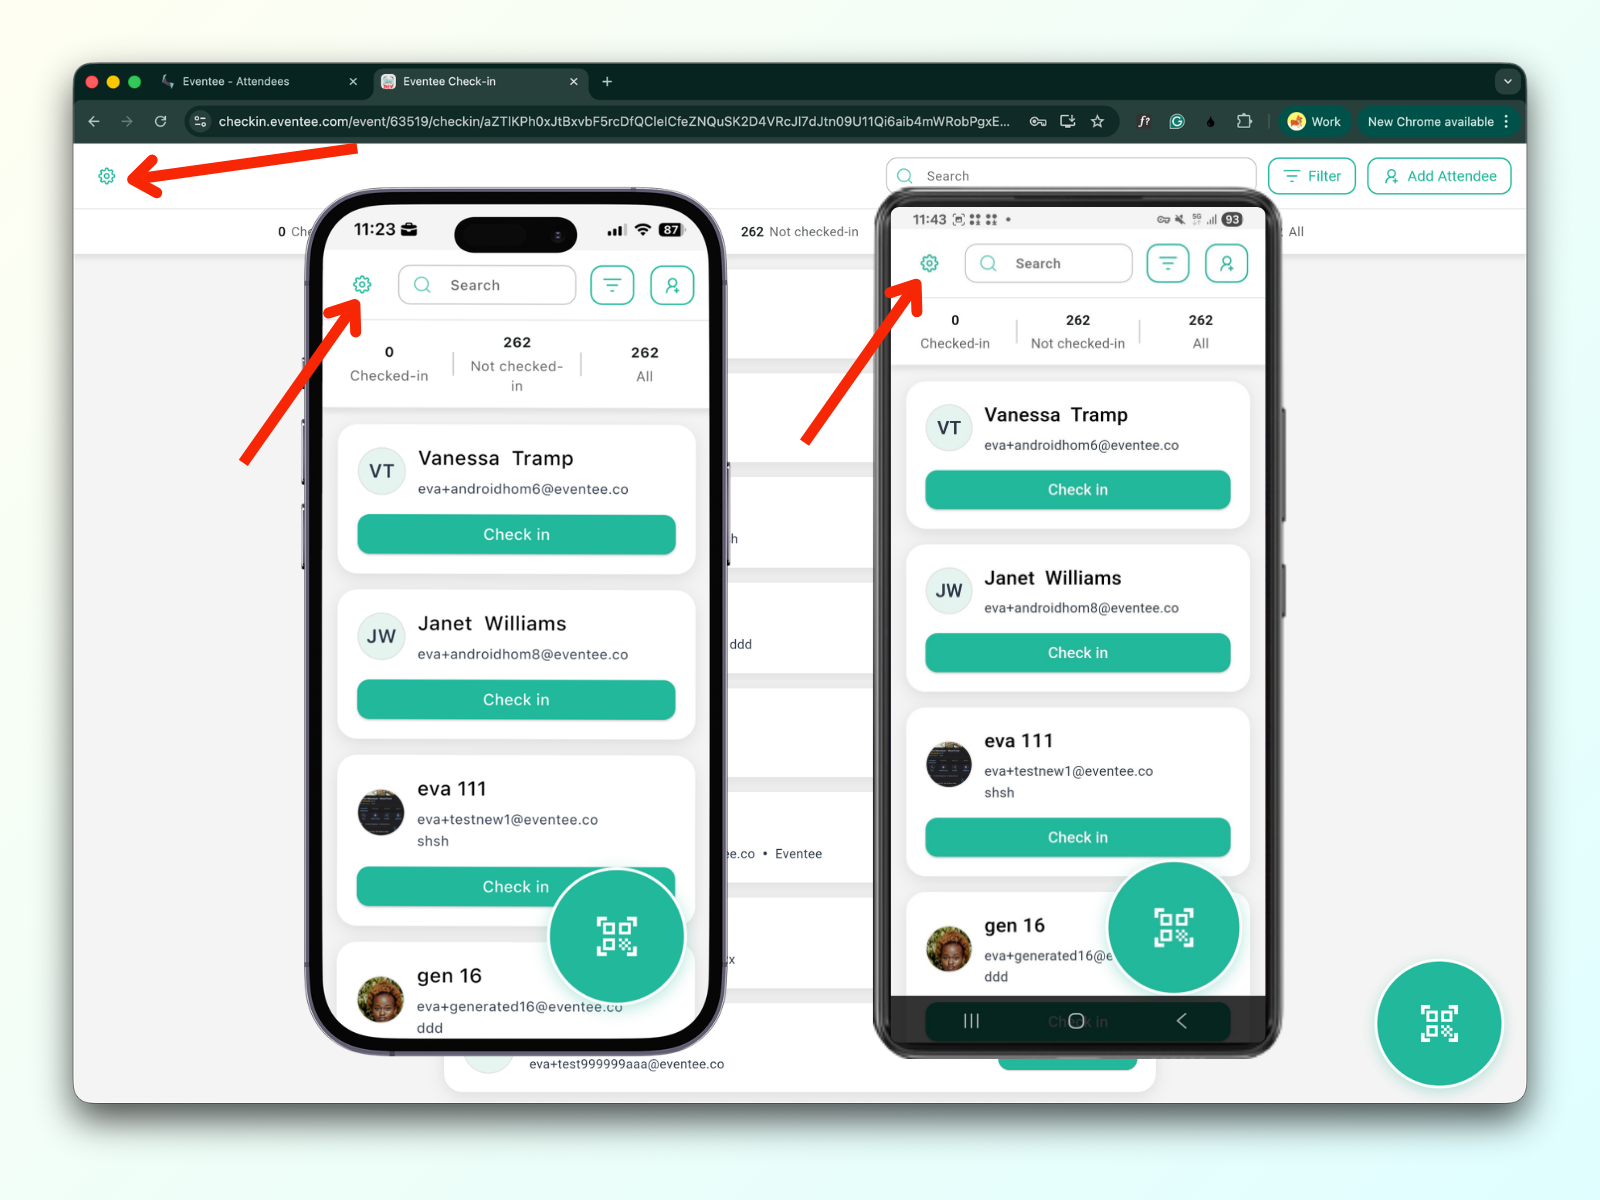
Open check-in app for your event
How to open the check-in app can be found in the article: How does eventee check-in app work.
Click the settings button on the left of the top menu.
Scroll to badge label printing settings
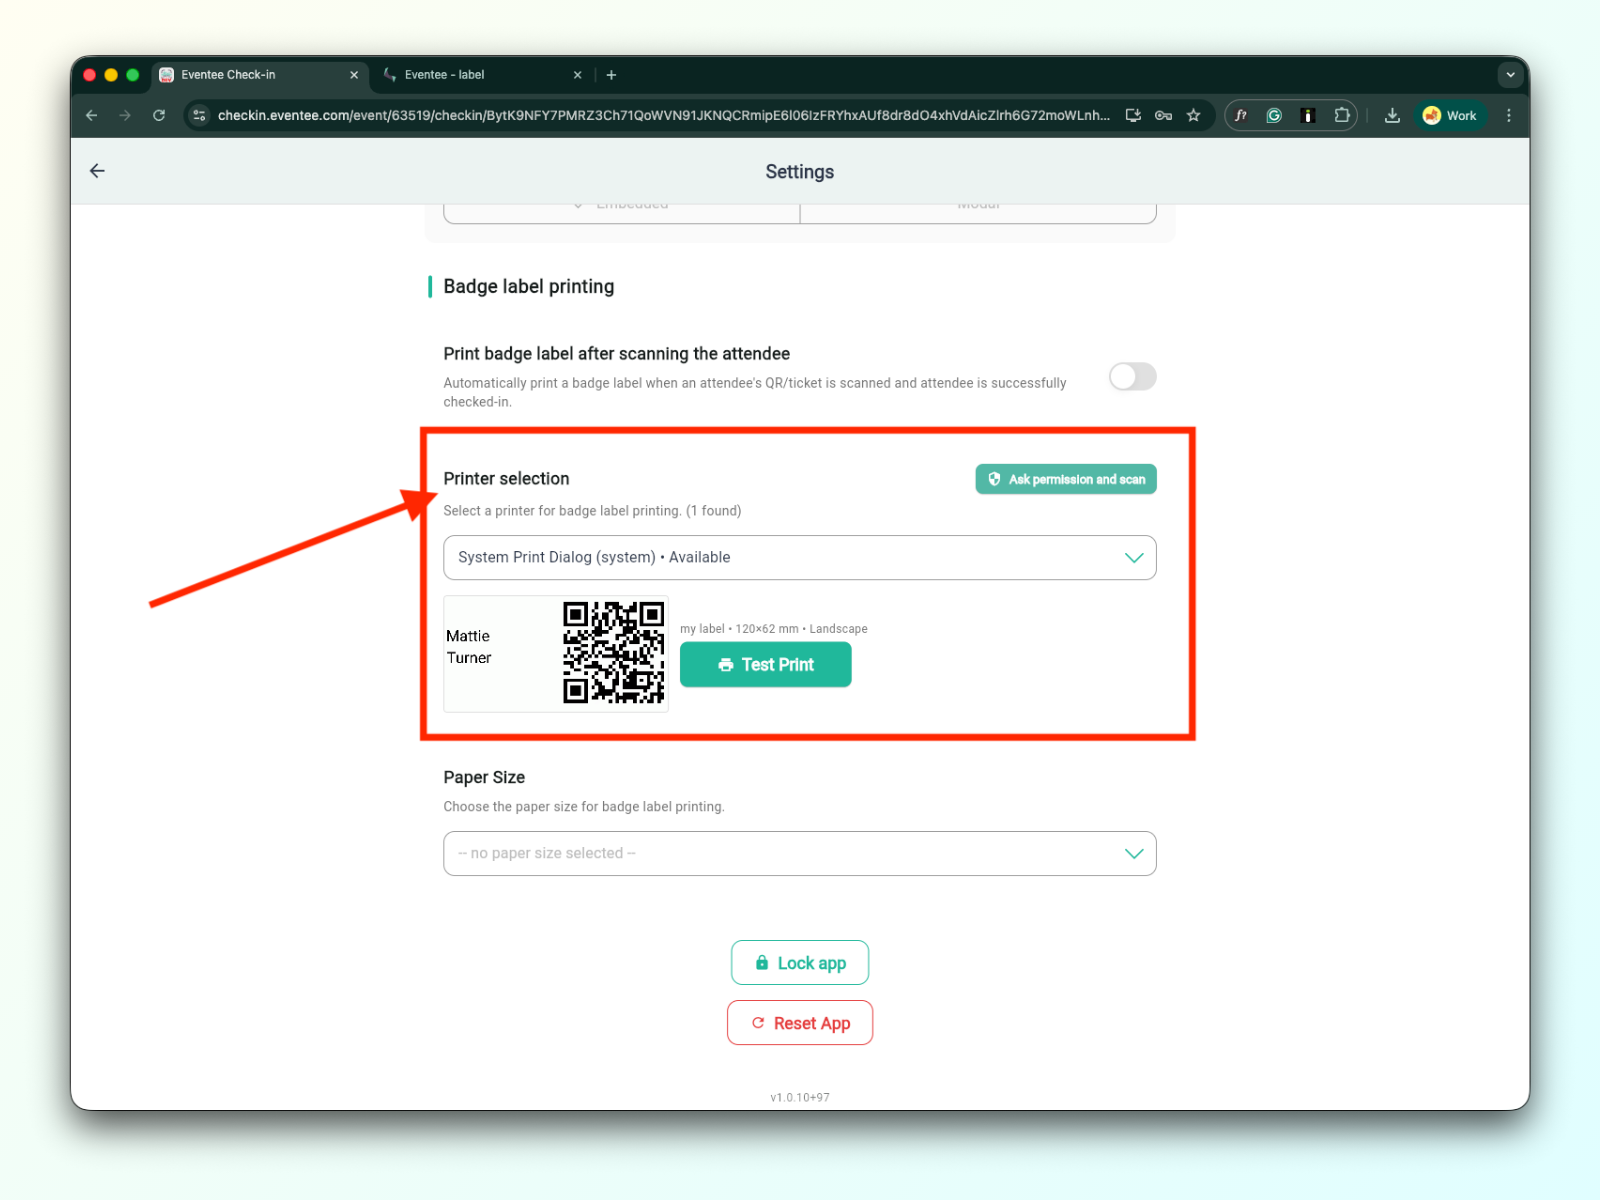
If everything is set up correctly, the connected printer is visible and ready for printing.
Click on the green “Test print” button