In this article, you’ll learn how to customize your event’s program using the Groups feature.
You’ll be able to:
Assign sessions to specific attendee groups
Make sessions, days, or stages visible only to certain groups

Assigning attendees to sessions has never been easier! You’ll just need two things: a session and an attendee group.

Here’s how to assign a session to a group:
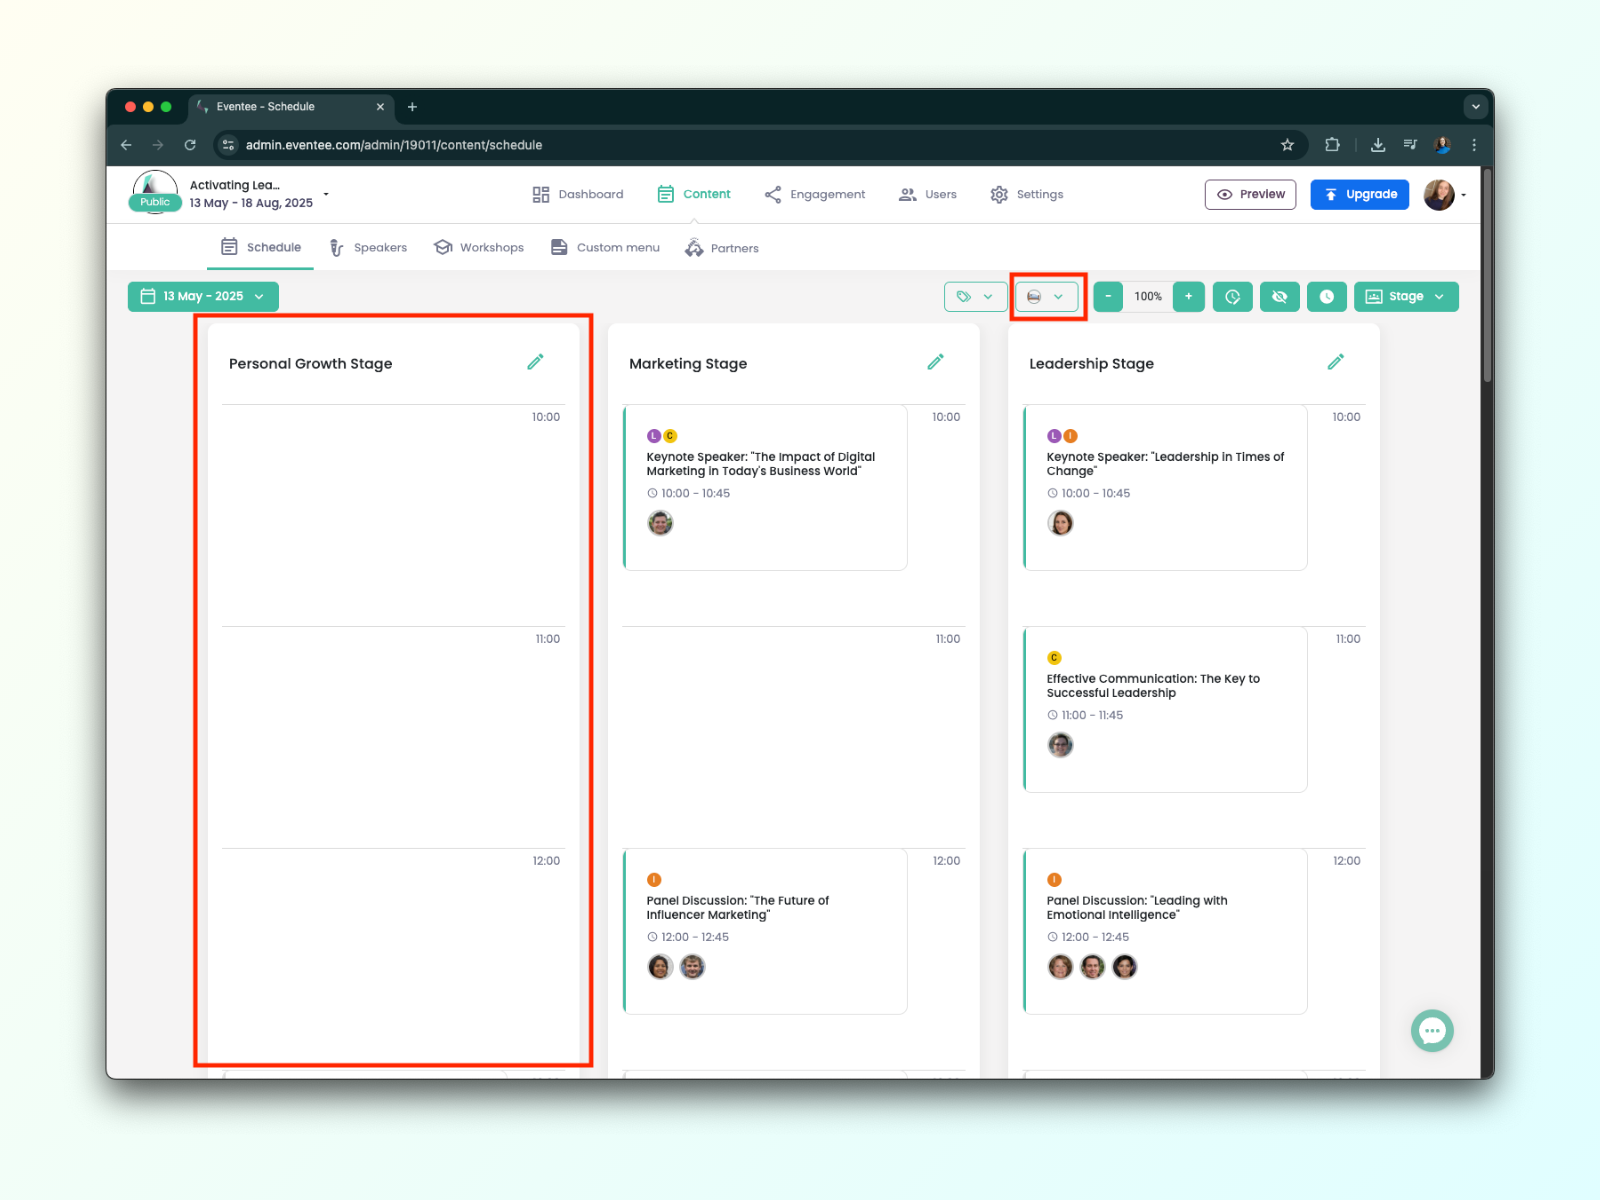
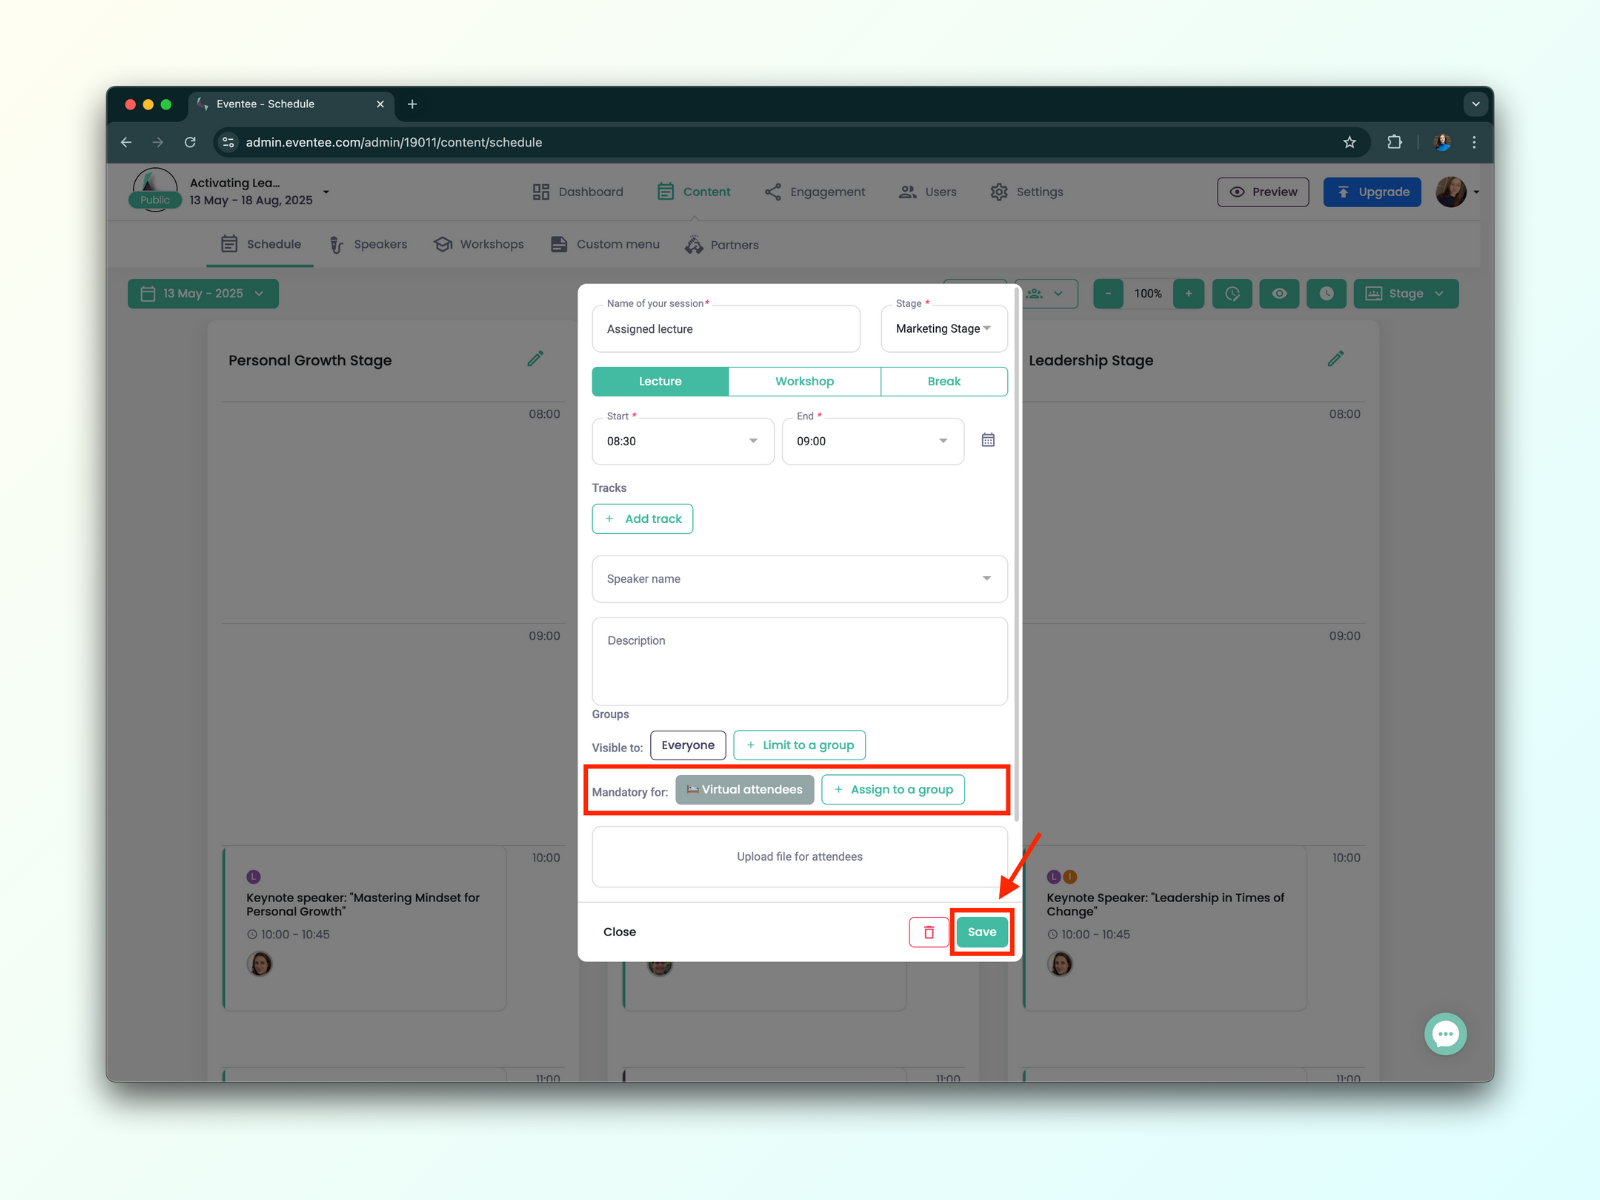
Go to Content → Schedule, then open (or create) the session you want to assign.
Scroll down and click the Advanced button.
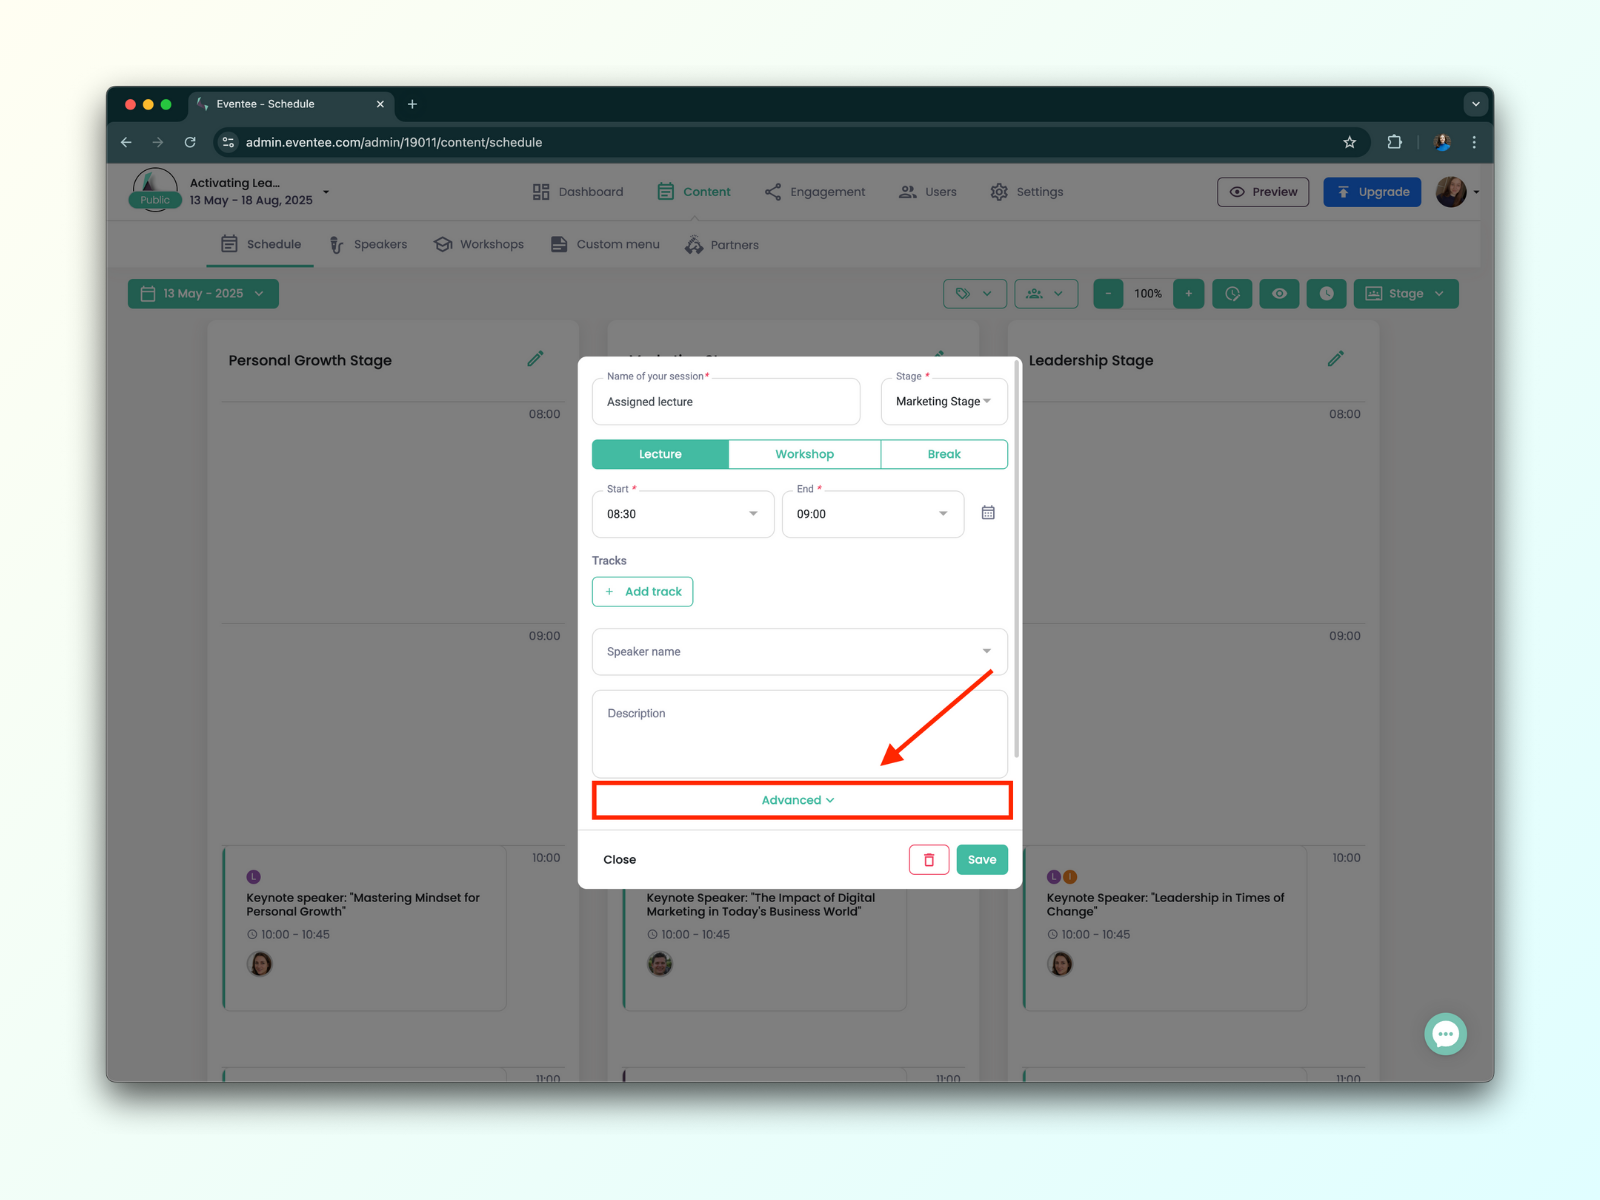
Under Advanced, you’ll see two options: Visible and Mandatory.
To assign groups, use the Mandatory setting.
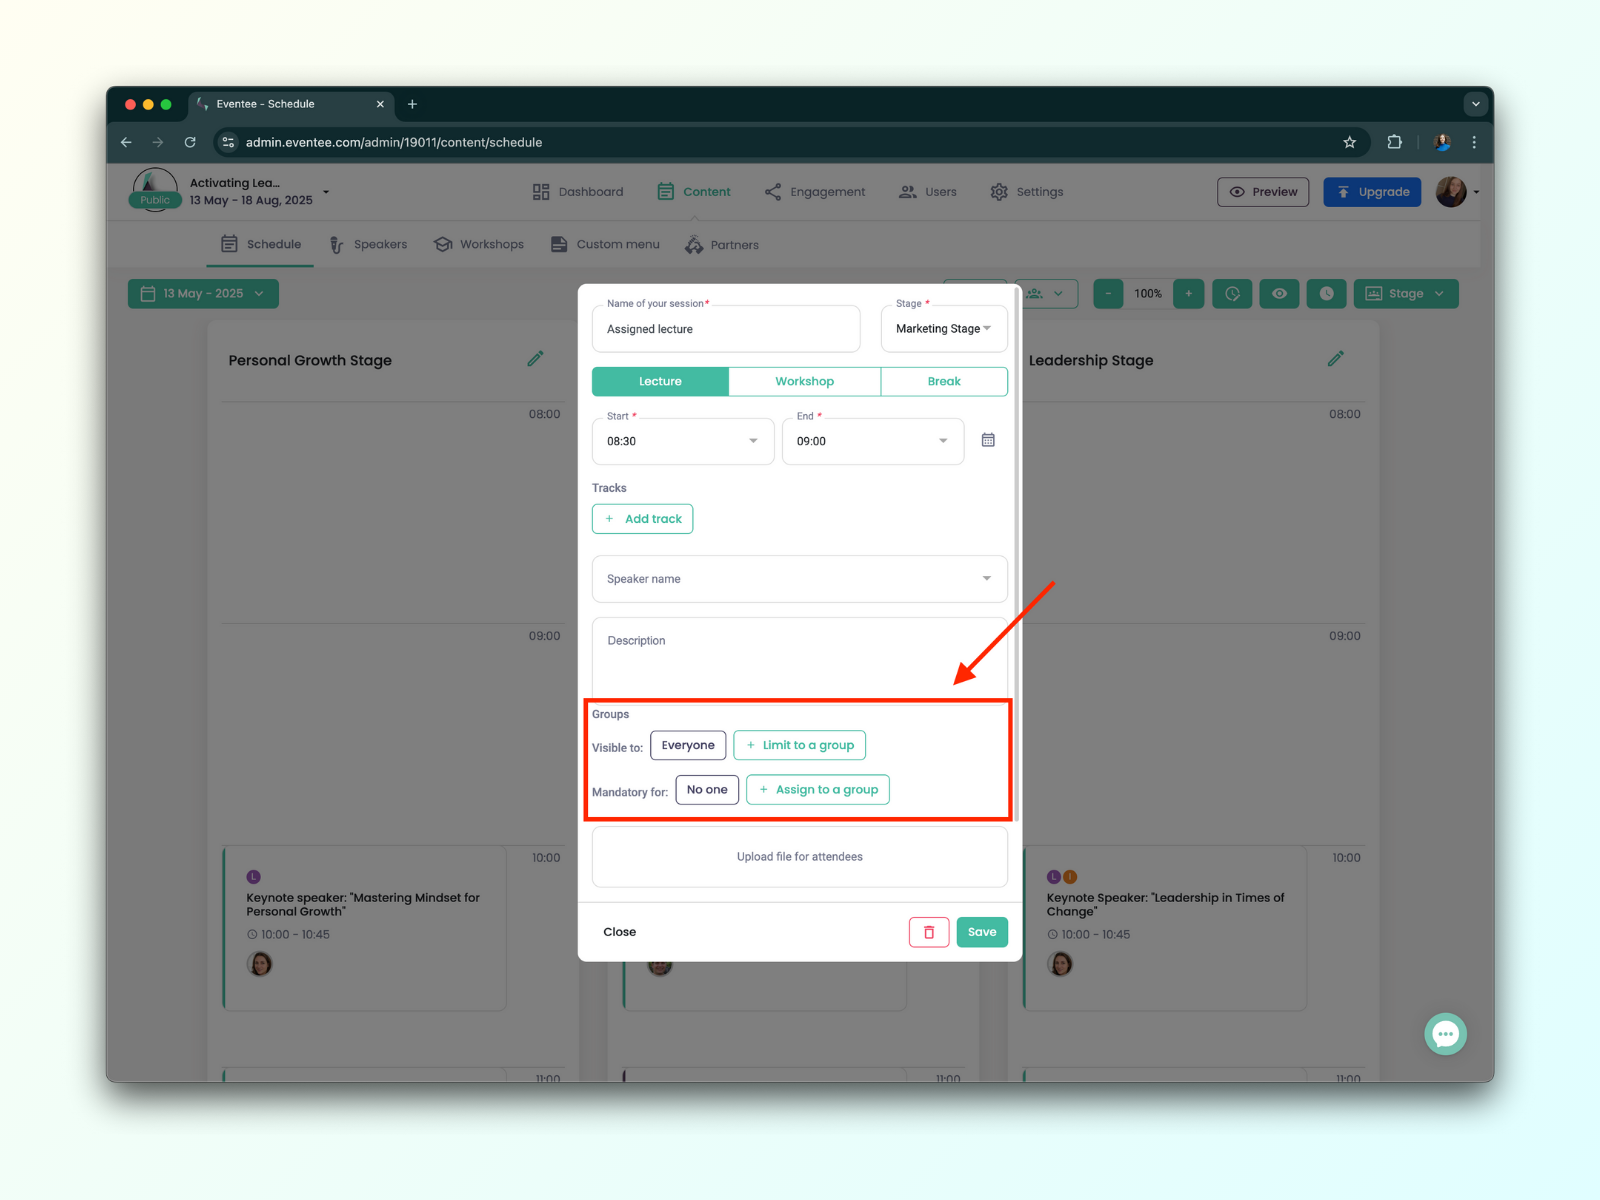
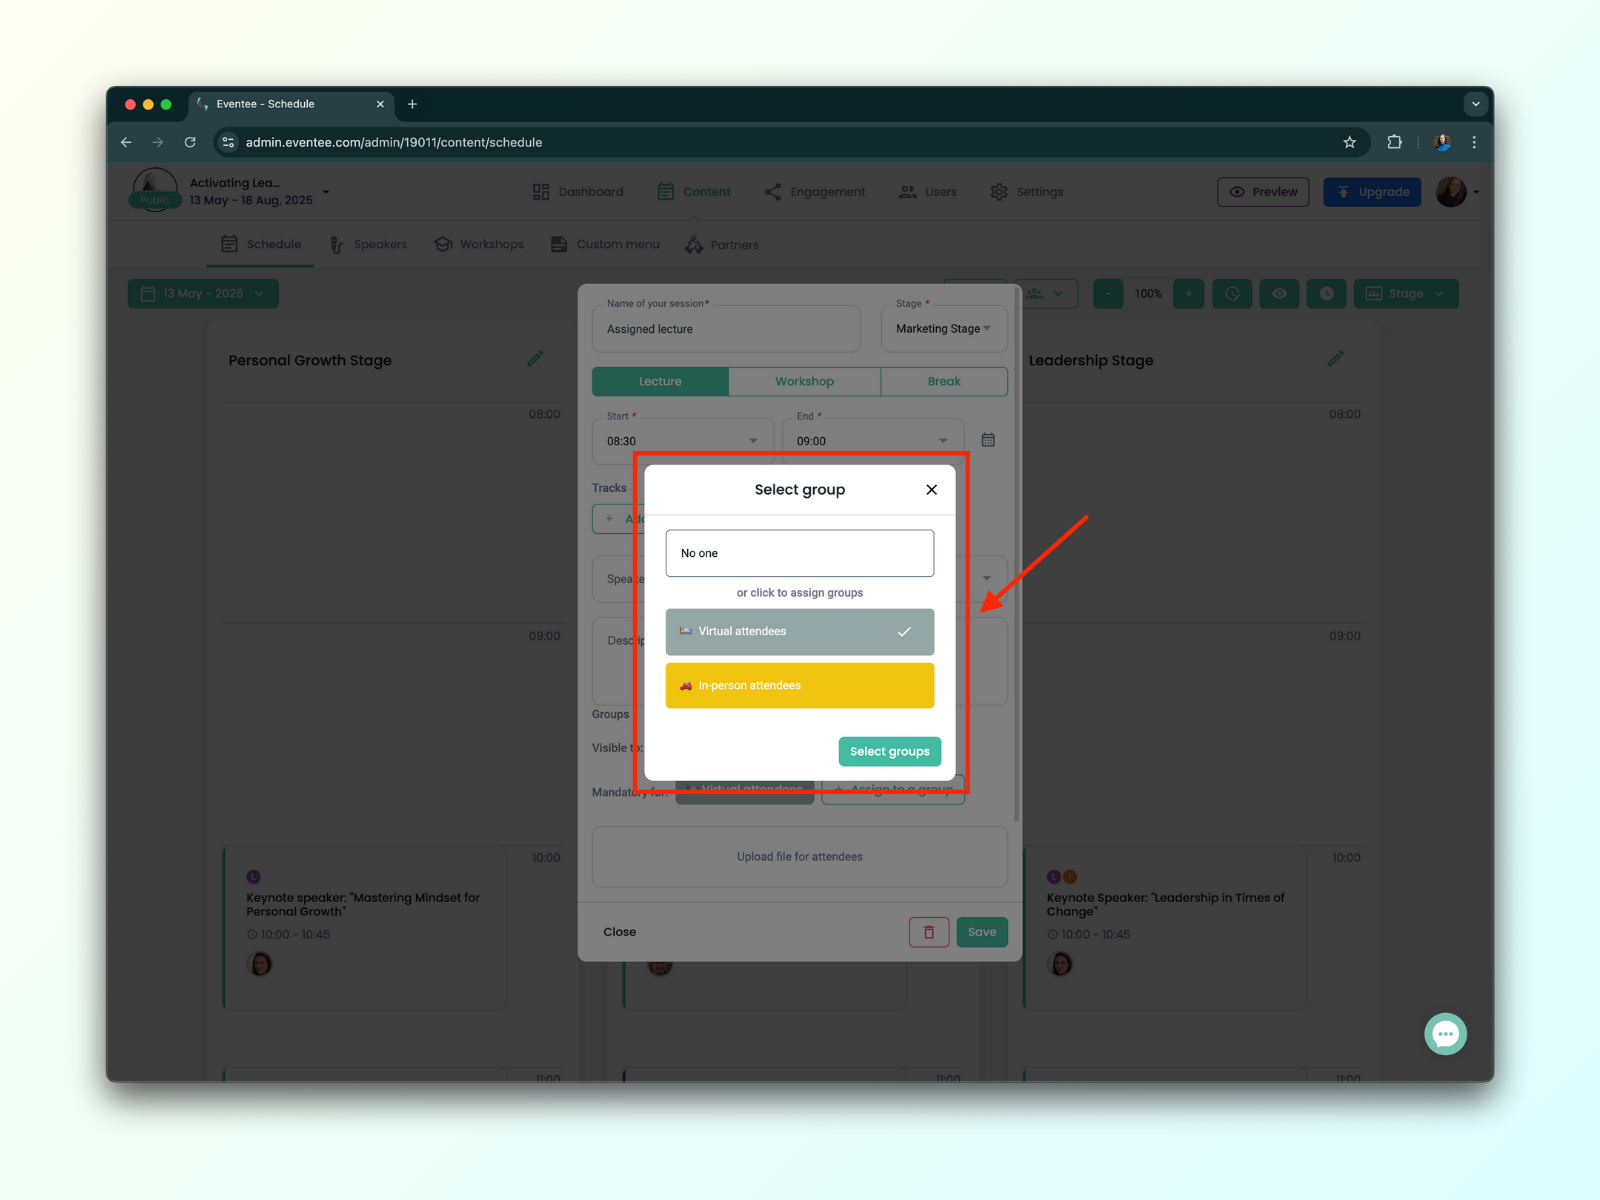
Choose Assign attendee to a group, then select the group(s) you want.
If assigning doesn’t work, it likely means the group doesn’t have access to the Schedule. Update the group’s permissions first.
Once you’ve finished assigning, click Save. That’s it!
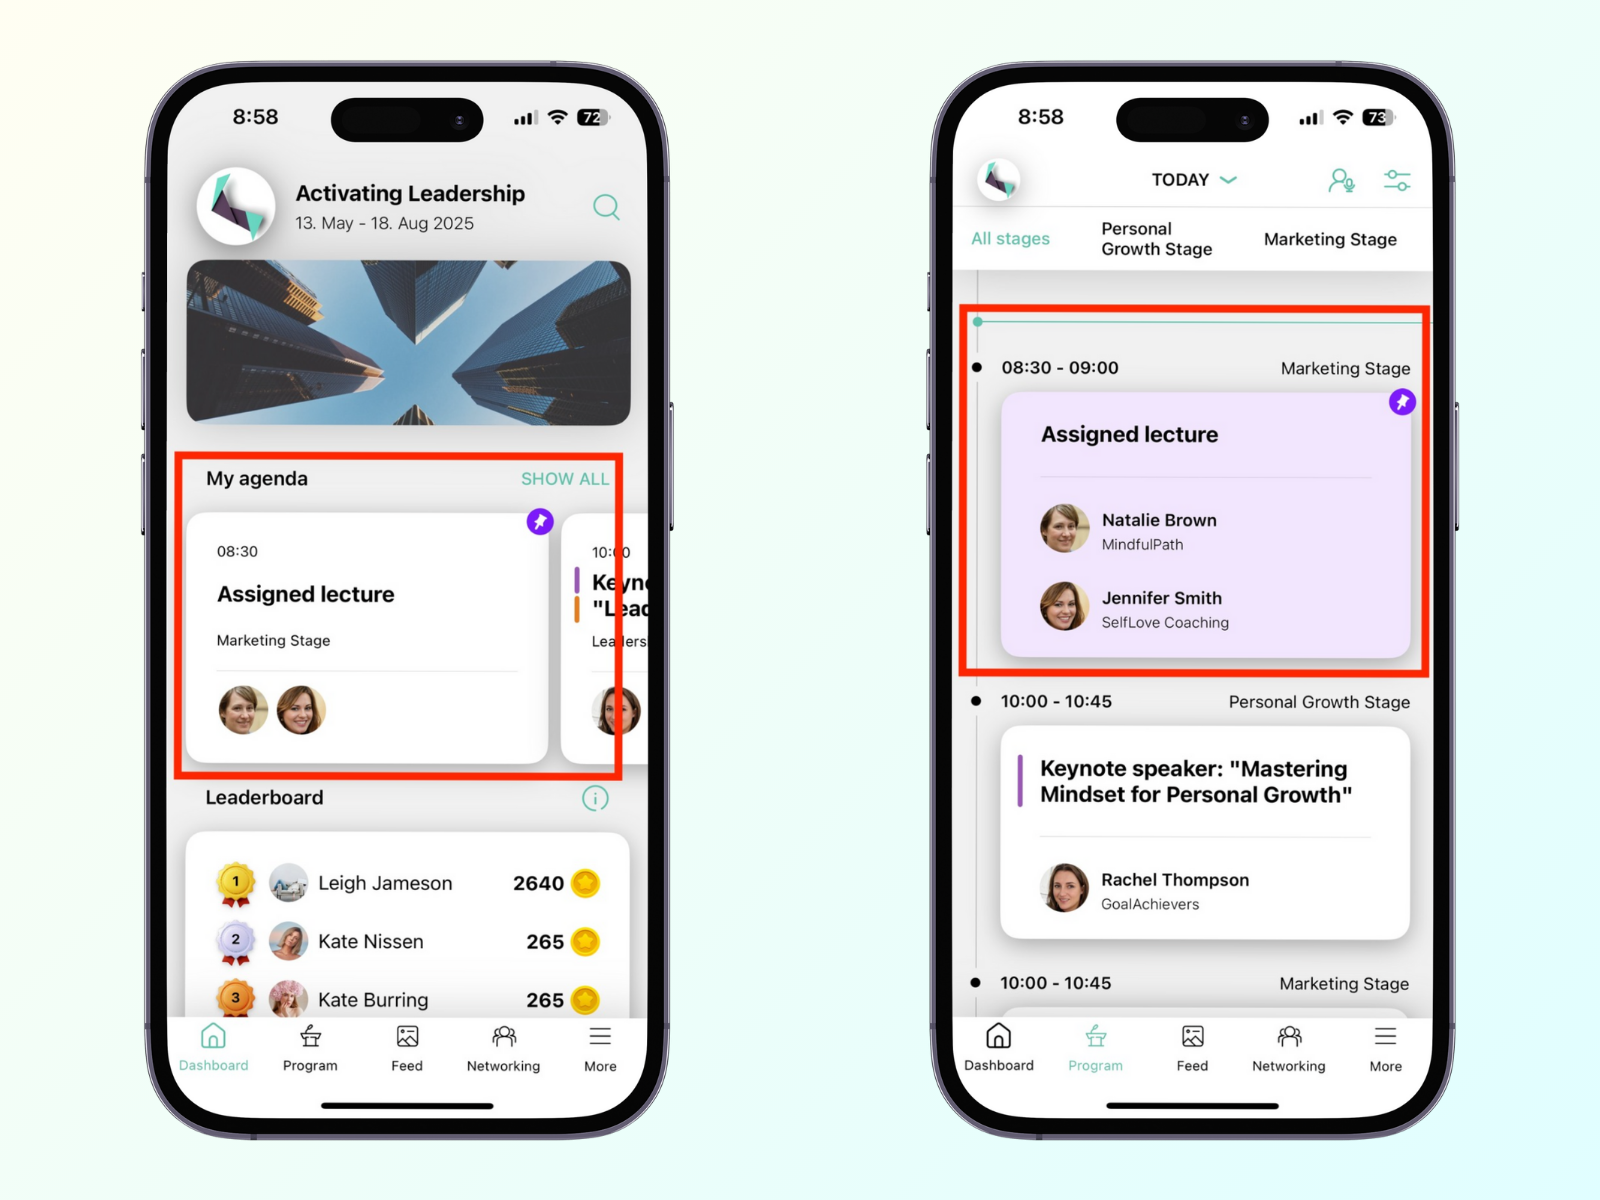
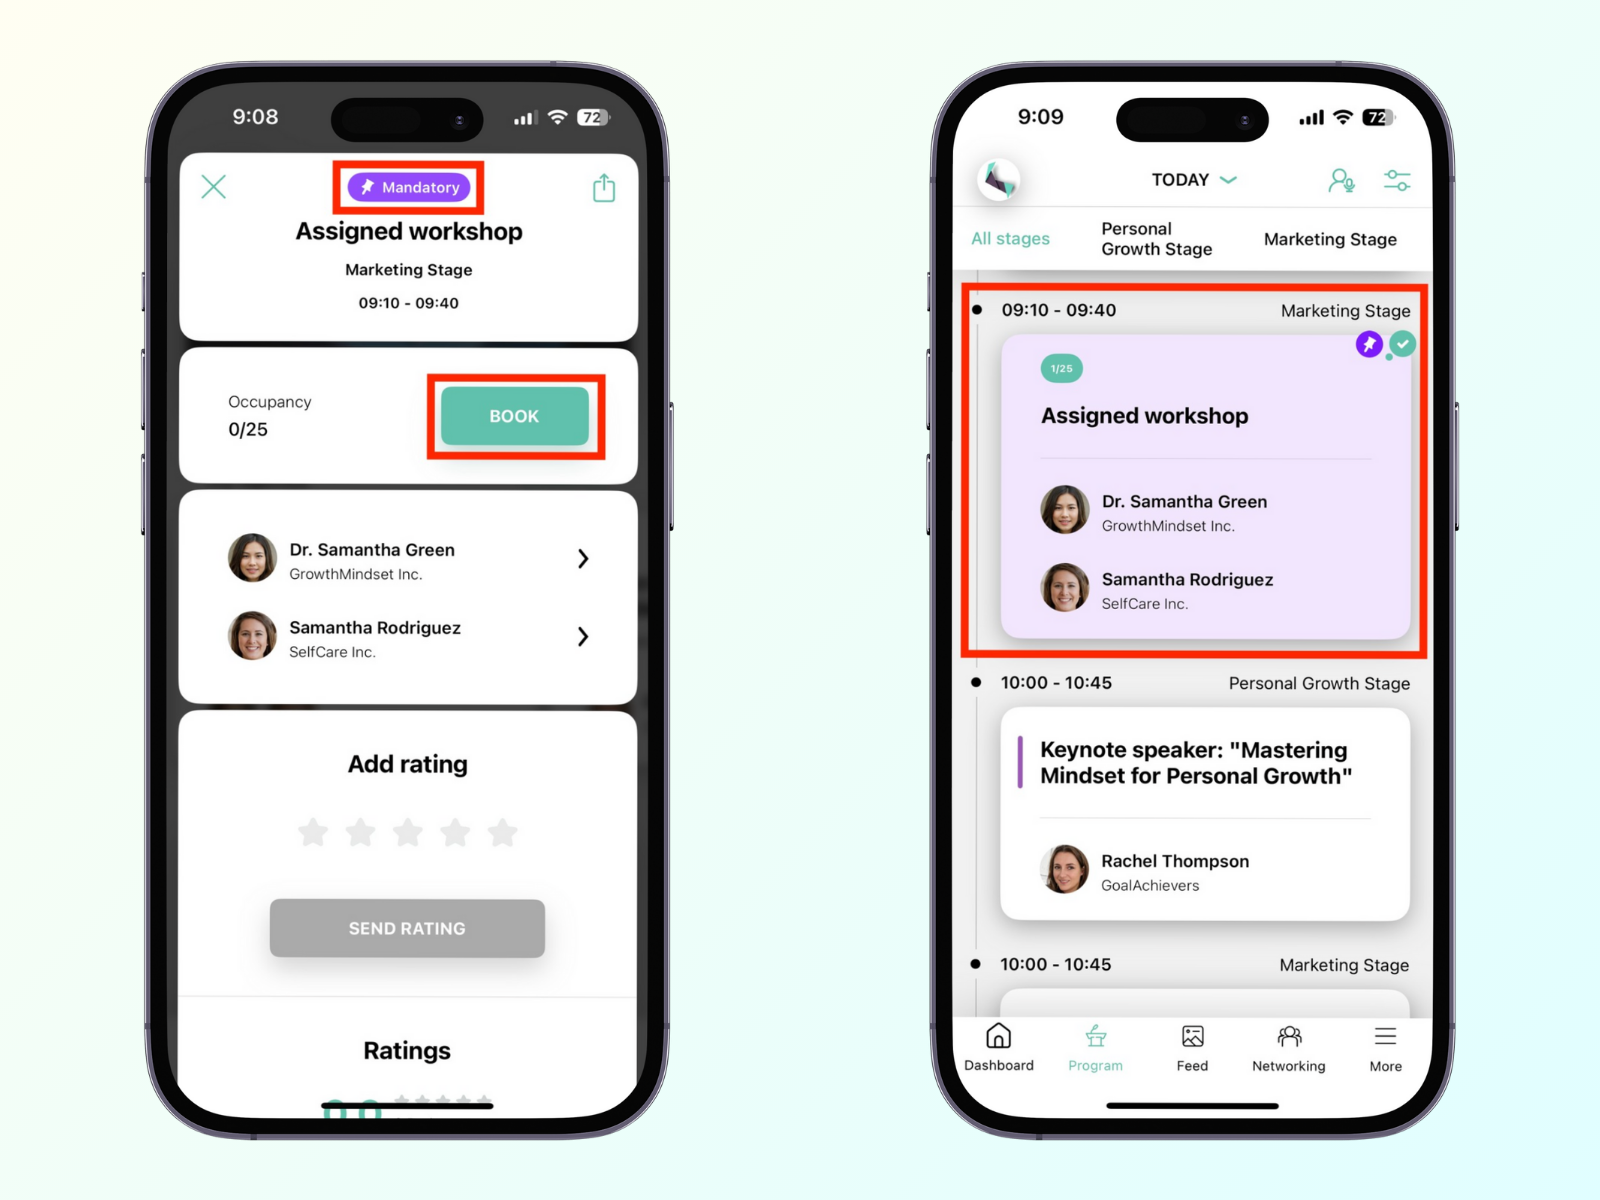
Assigned (or mandatory) sessions are automatically added to an attendee’s My Agenda—as long as that feature is enabled for the event. These sessions are also easy to spot in the main Schedule view, as they appear with a purple background.
For workshops, attendees still need to manually book a spot to prevent overbooking. However, since the session already appears in their agenda, booking is usually just a formality.
Sometimes, you may want to hide certain sessions from specific attendees. For example, in a hybrid event, in-person attendees might have access to workshops, while virtual attendees do not.
In such cases, you can control which attendee groups can see specific sessions. As before, make sure your attendee groups and sessions are already set up.
Here’s how to customize session visibility:
Go to Content → Schedule, and open (or create) the session you want to modify.
Scroll down and click the Advanced button.

Under Advanced, you’ll see two options: Visible and Mandatory.
For visibility settings, use the Visible option.
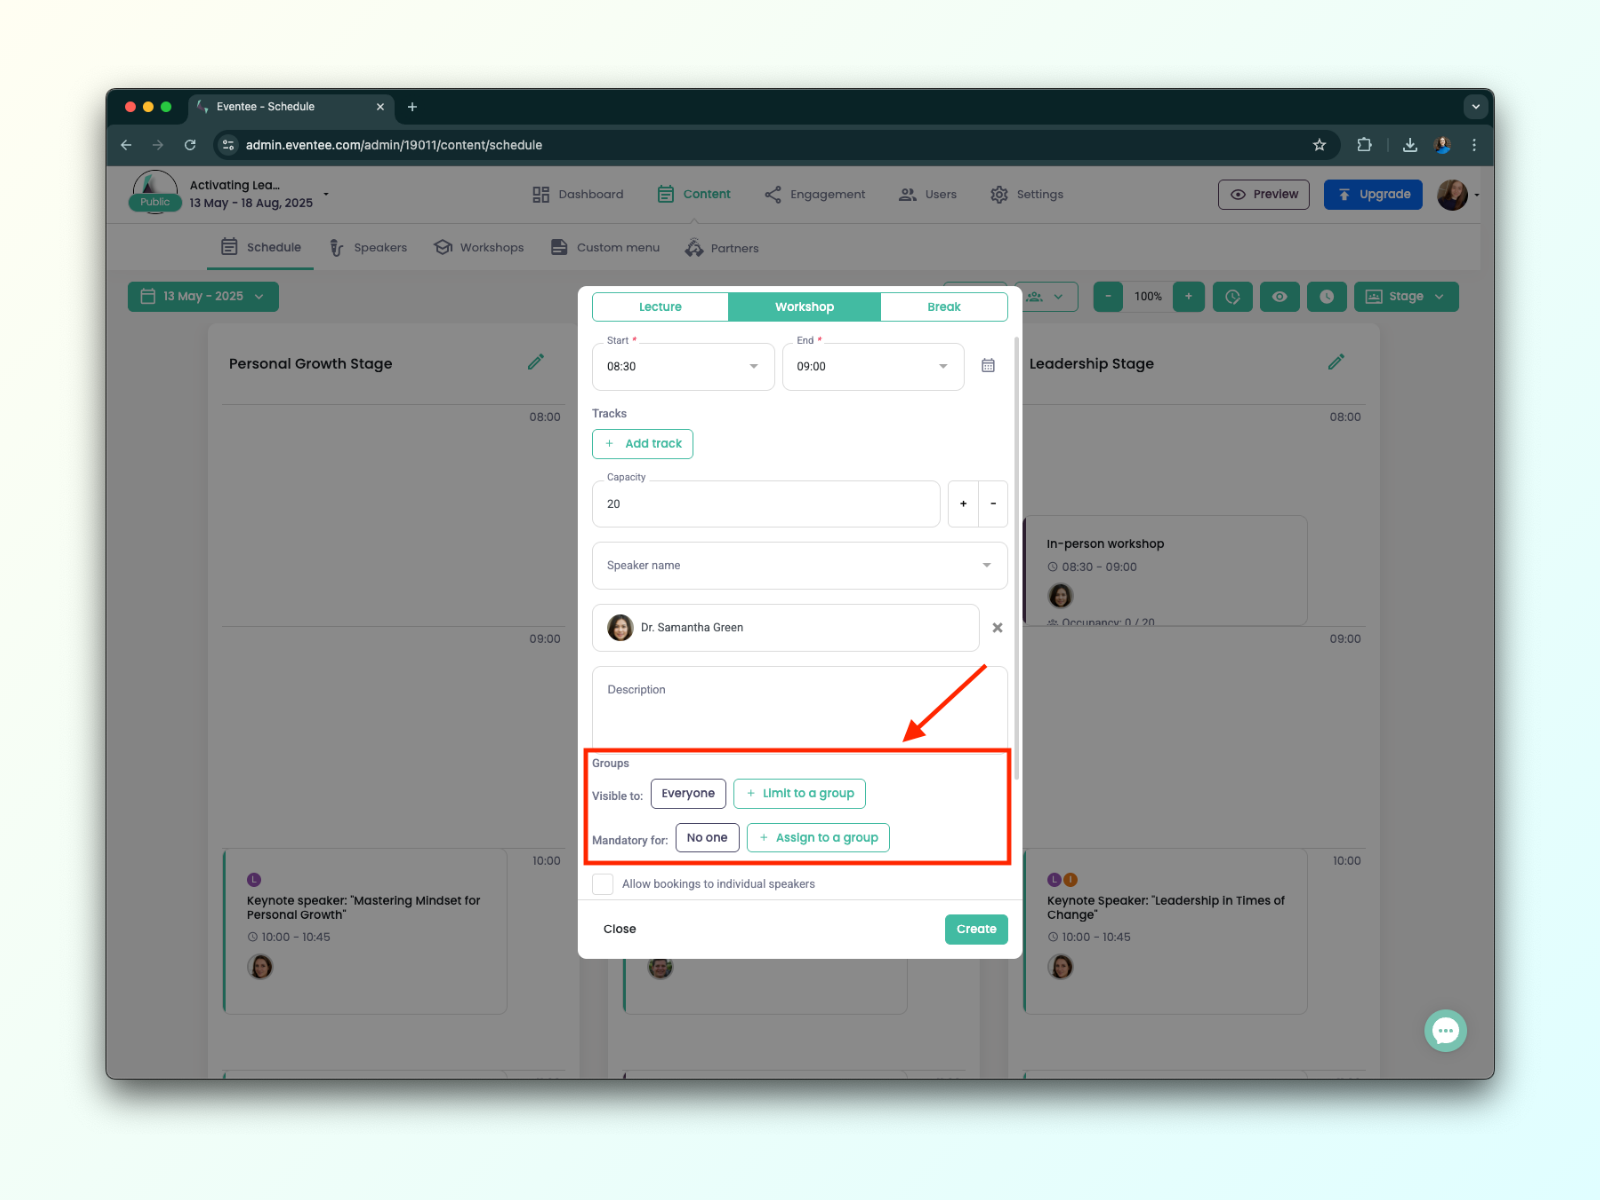
Select Limit to a group. (By default, all sessions are visible to everyone—this setting restricts that access.)
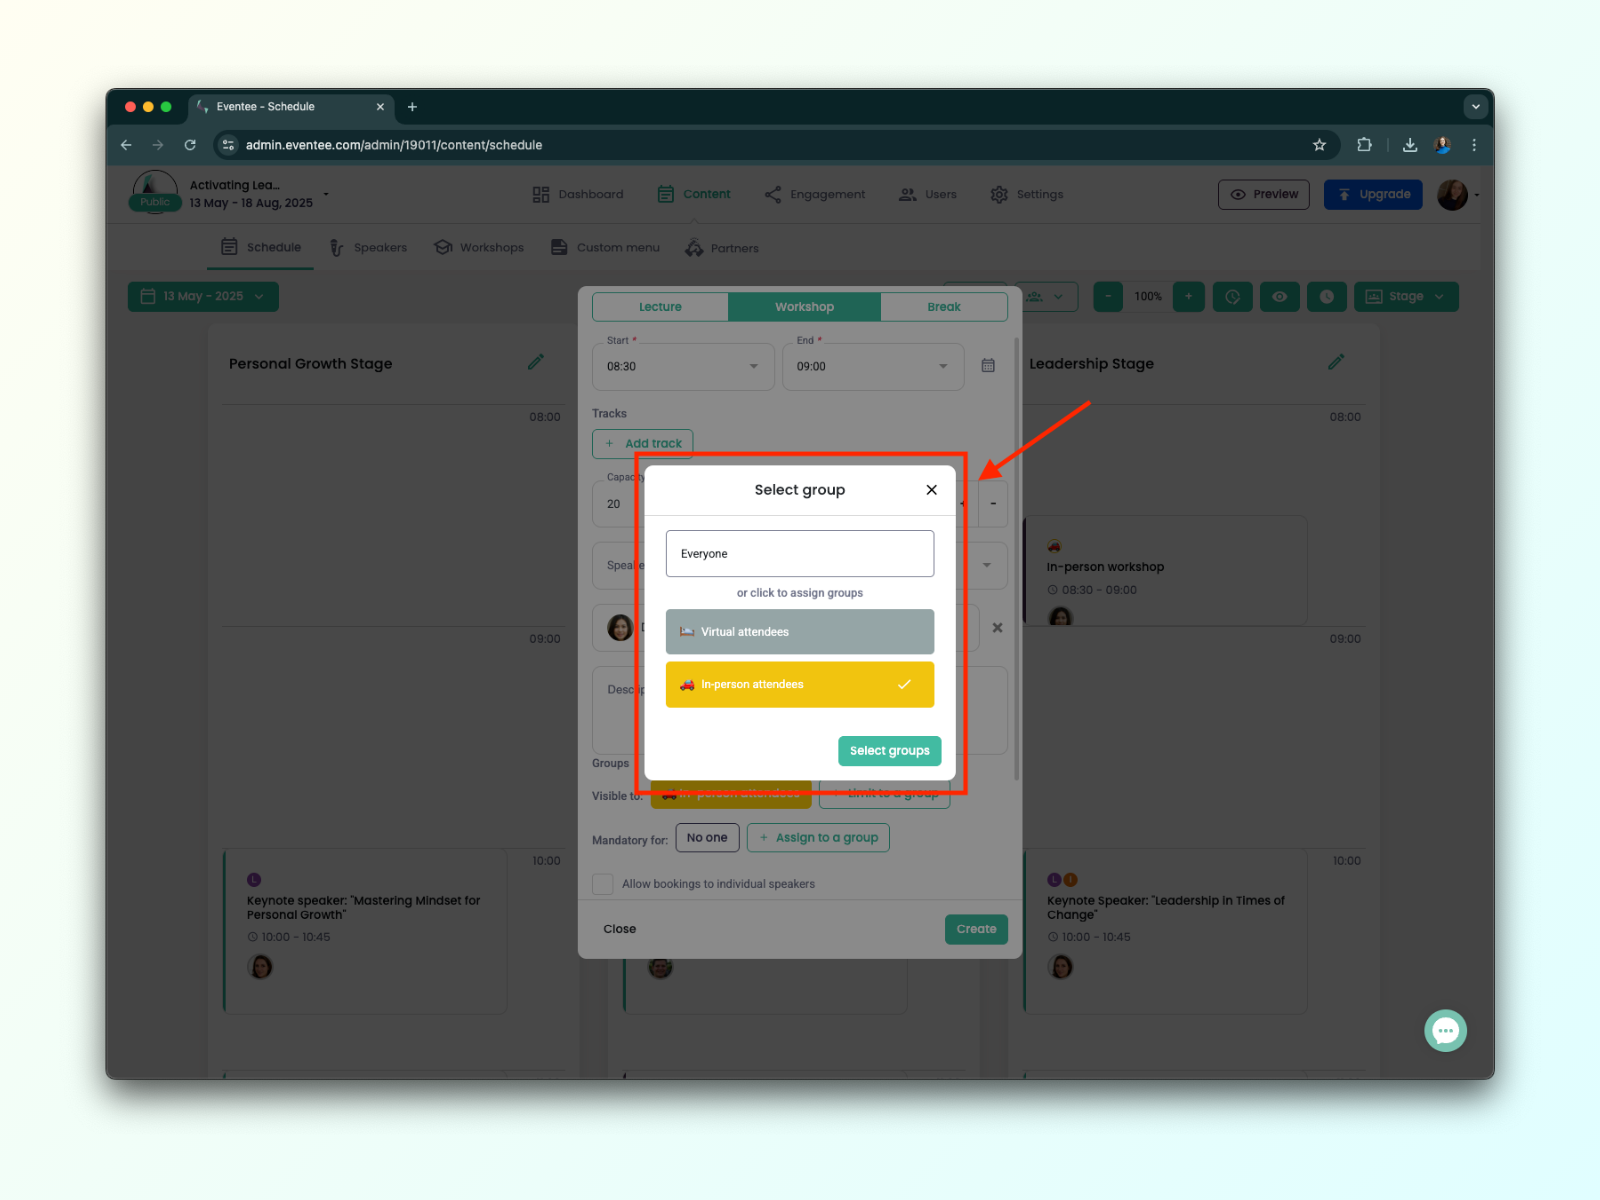
Choose which groups should be able to see the session. Groups not selected will no longer see it in their schedule.
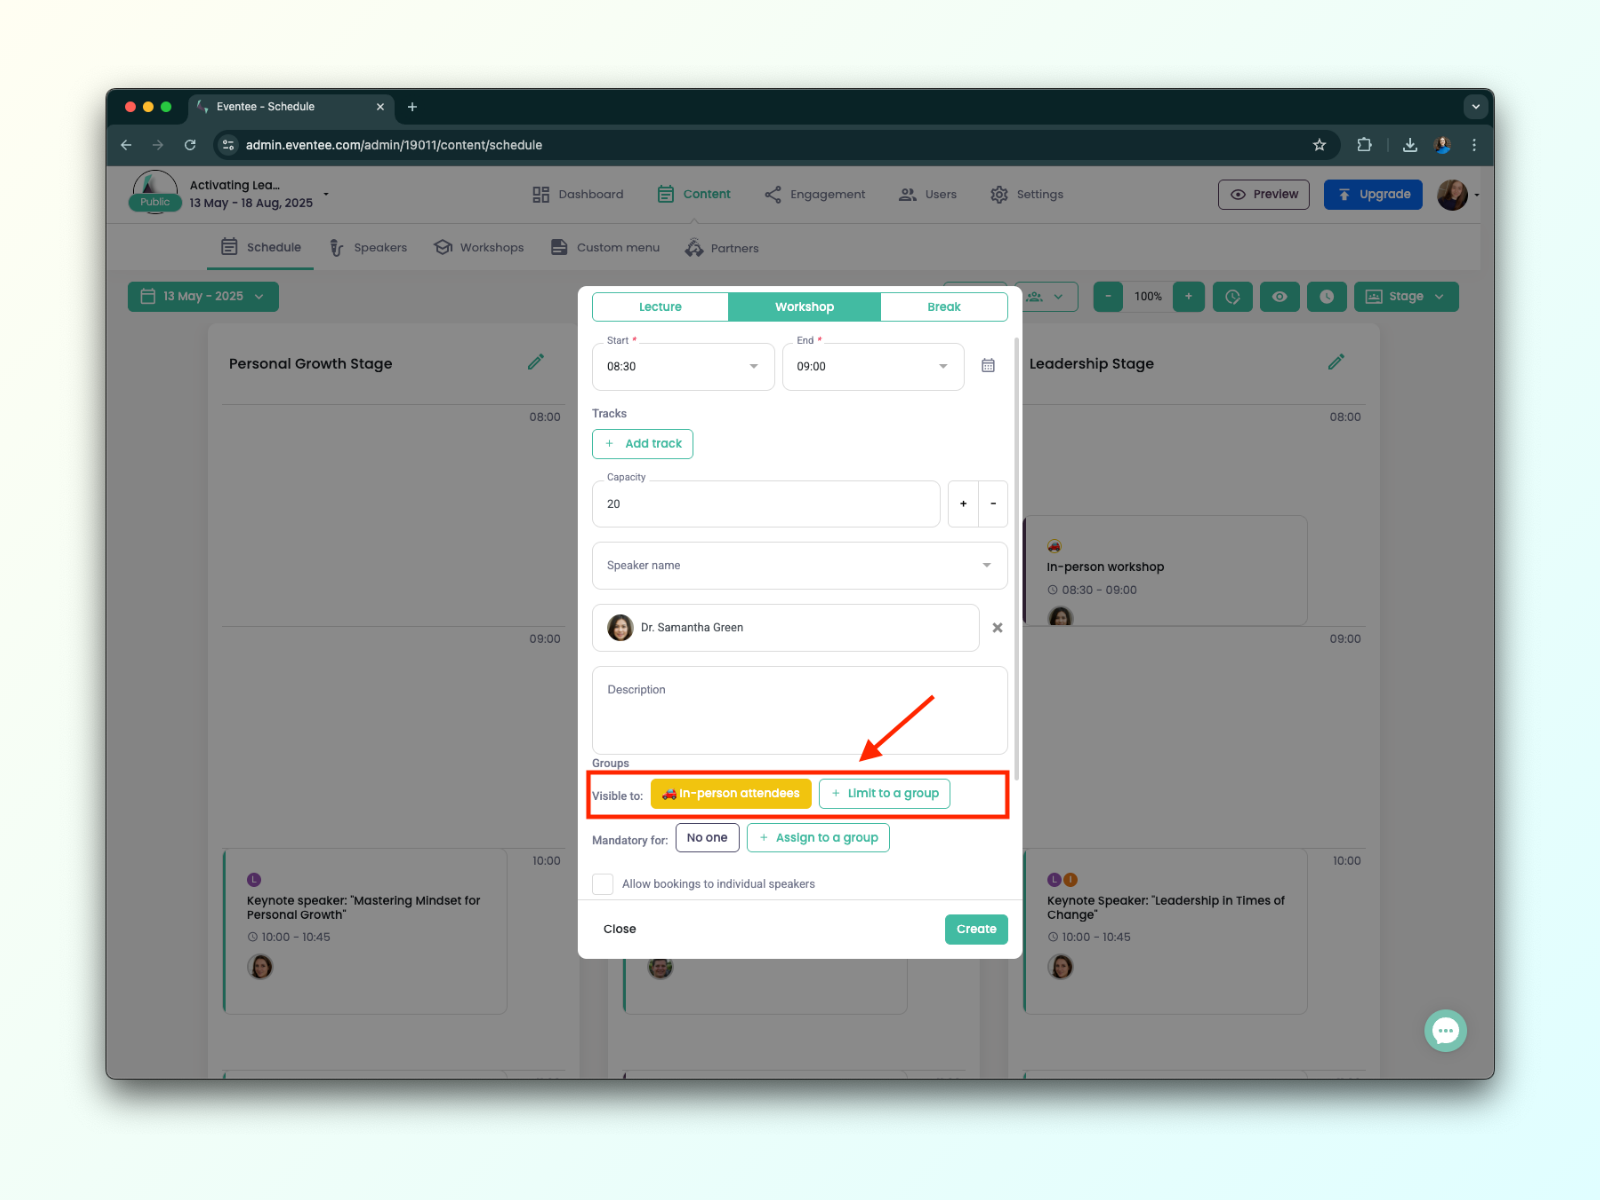
Once you've selected the appropriate groups, click Save—and you’re done!
Need to quickly check which sessions are visible to a specific group? This feature makes it easy!
Here’s how to do it:
Go to Content → Schedule.
On the right side of the page, locate the green button with the people icon.
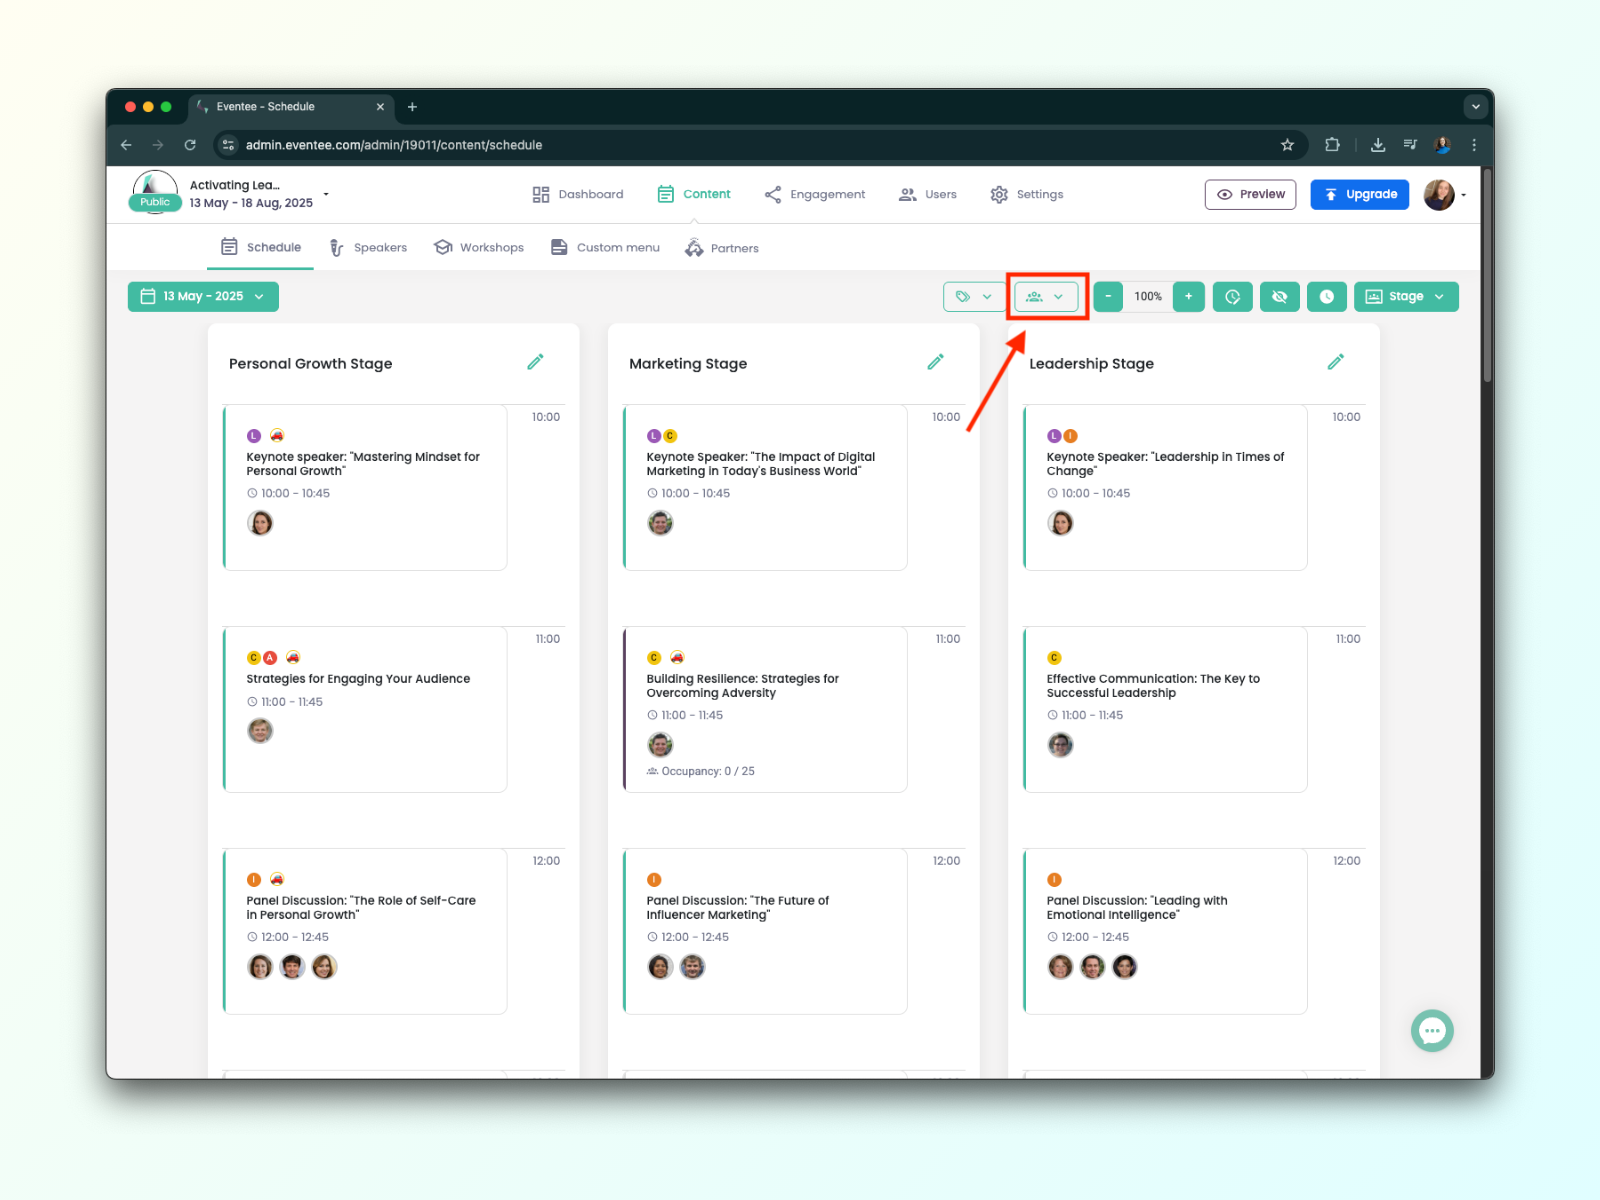
Click the button and select the group you want to view.
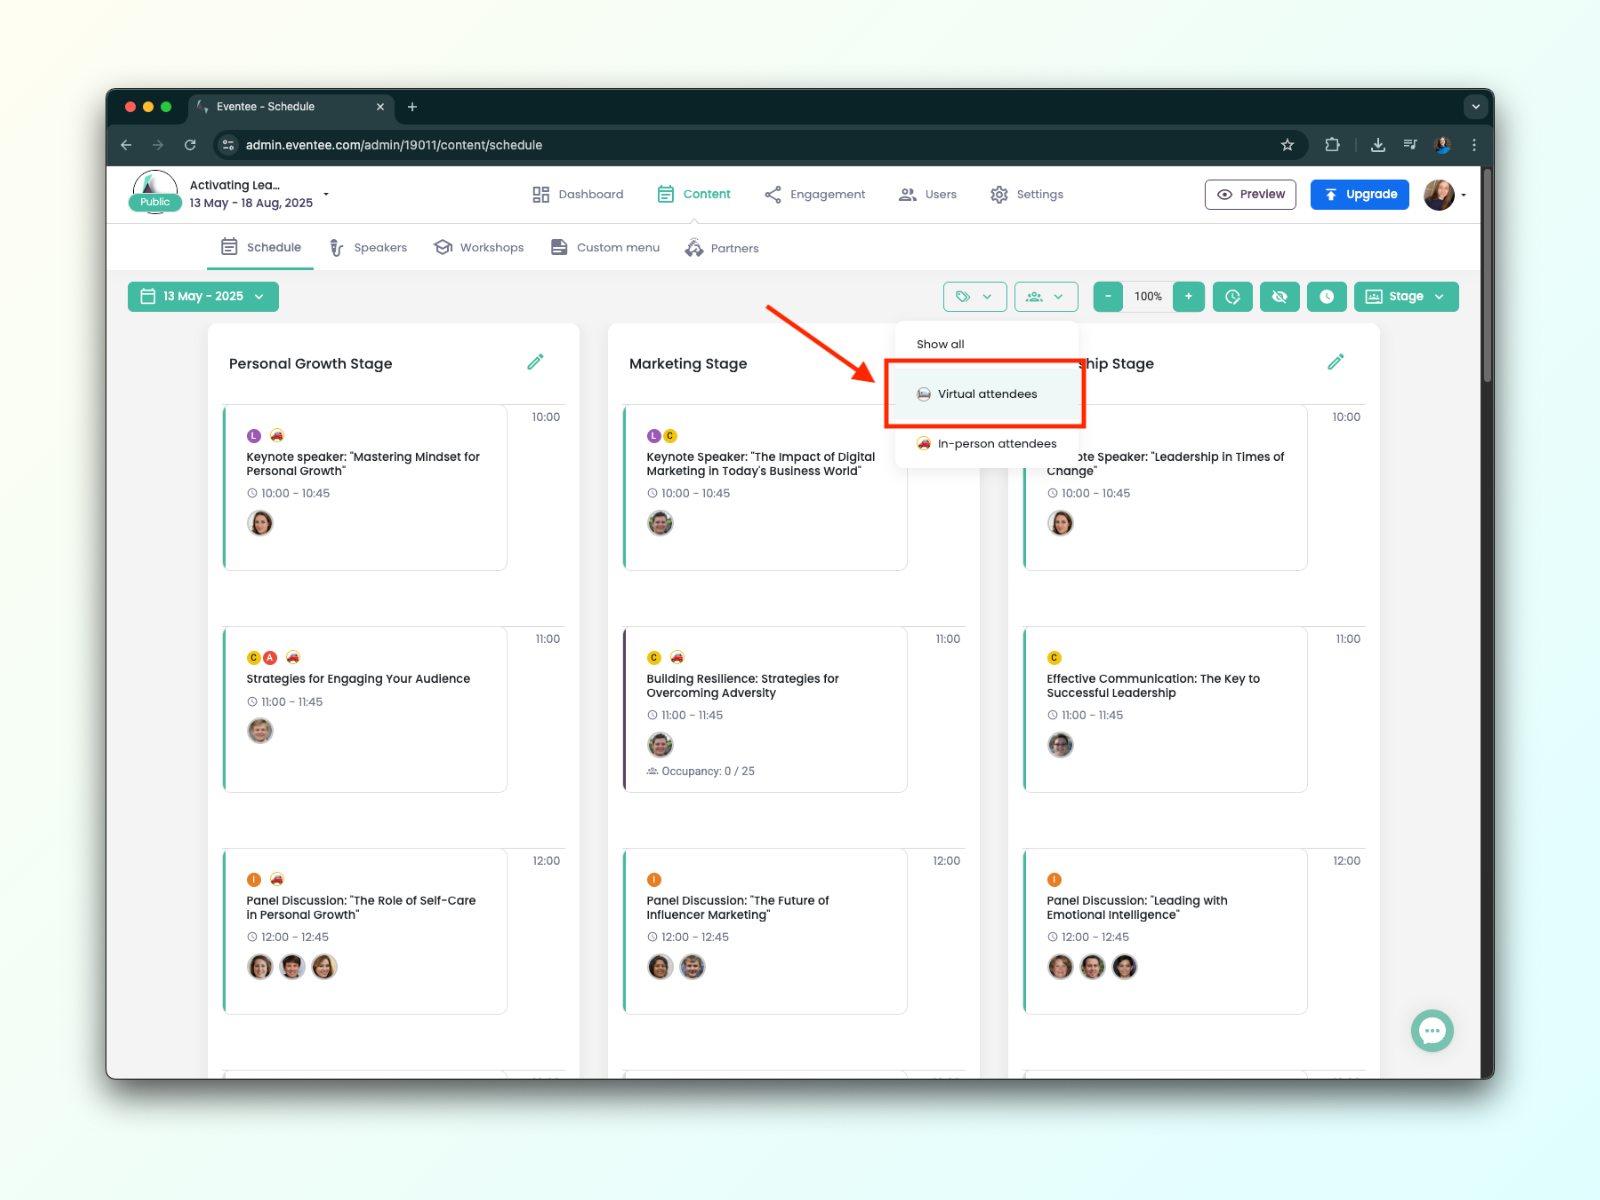
The schedule will automatically update to show only the sessions that are visible to that group, including any assigned (mandatory) sessions.