A session check-in is a simple way to track attendance for your lessons and workshops. By checking attendees in, admins get an accurate, real-time count of who actually showed up.
This capability is part of the broader check-in feature. Please check our pricing to see whether the feature is available on your plan or must be purchased as an add-on.
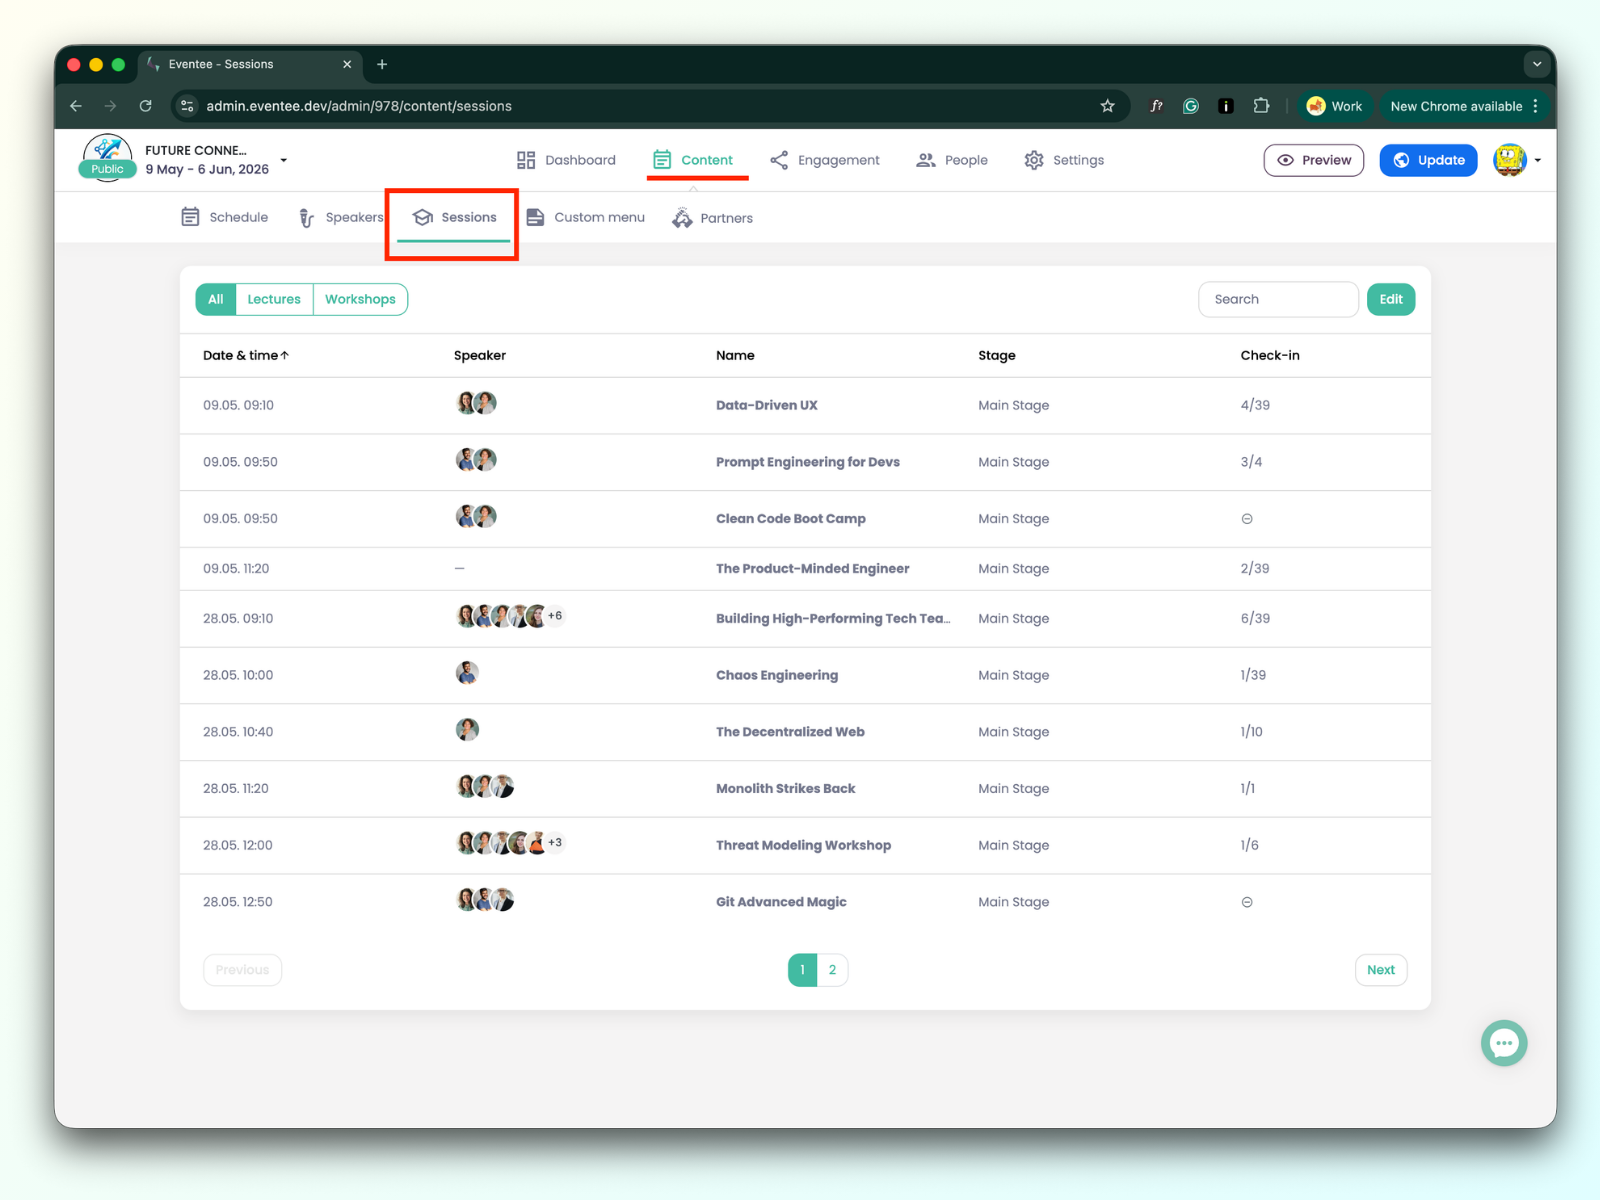
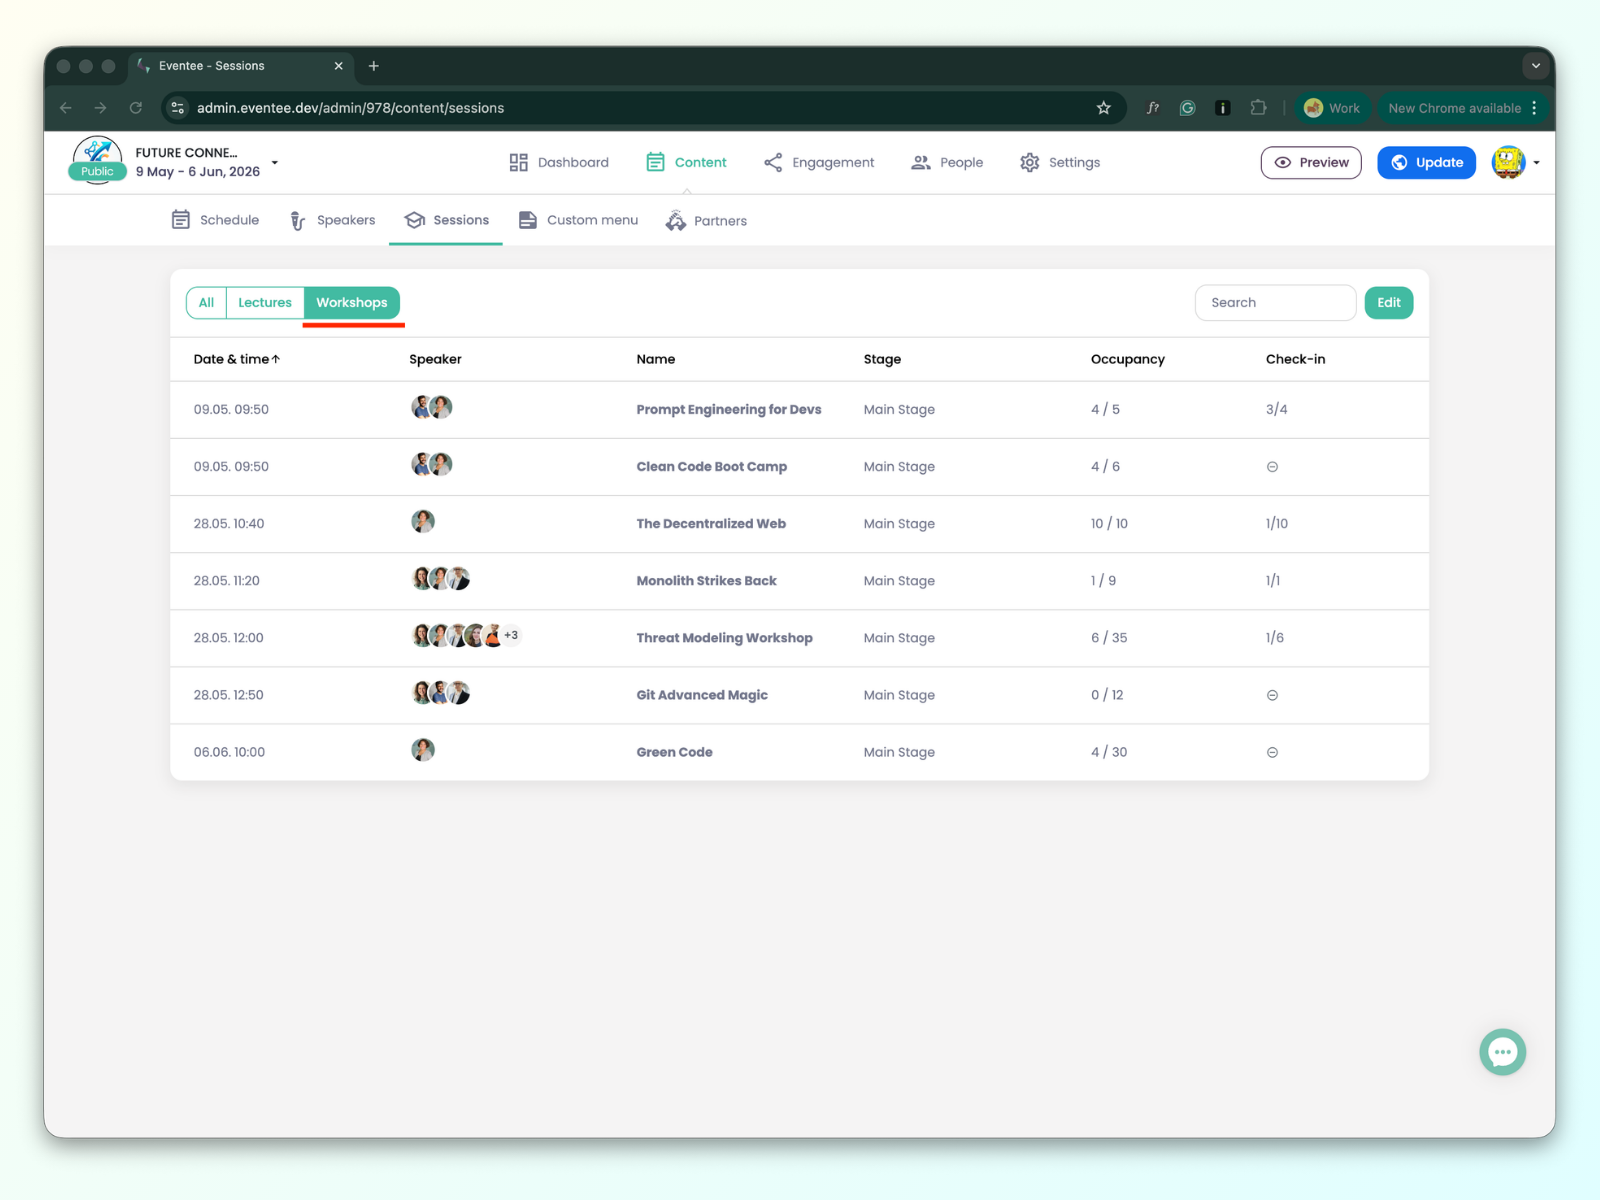
You manage your sessions by navigating to Content -> Sessions, where you can see all sessions that you created in the Schedule page.
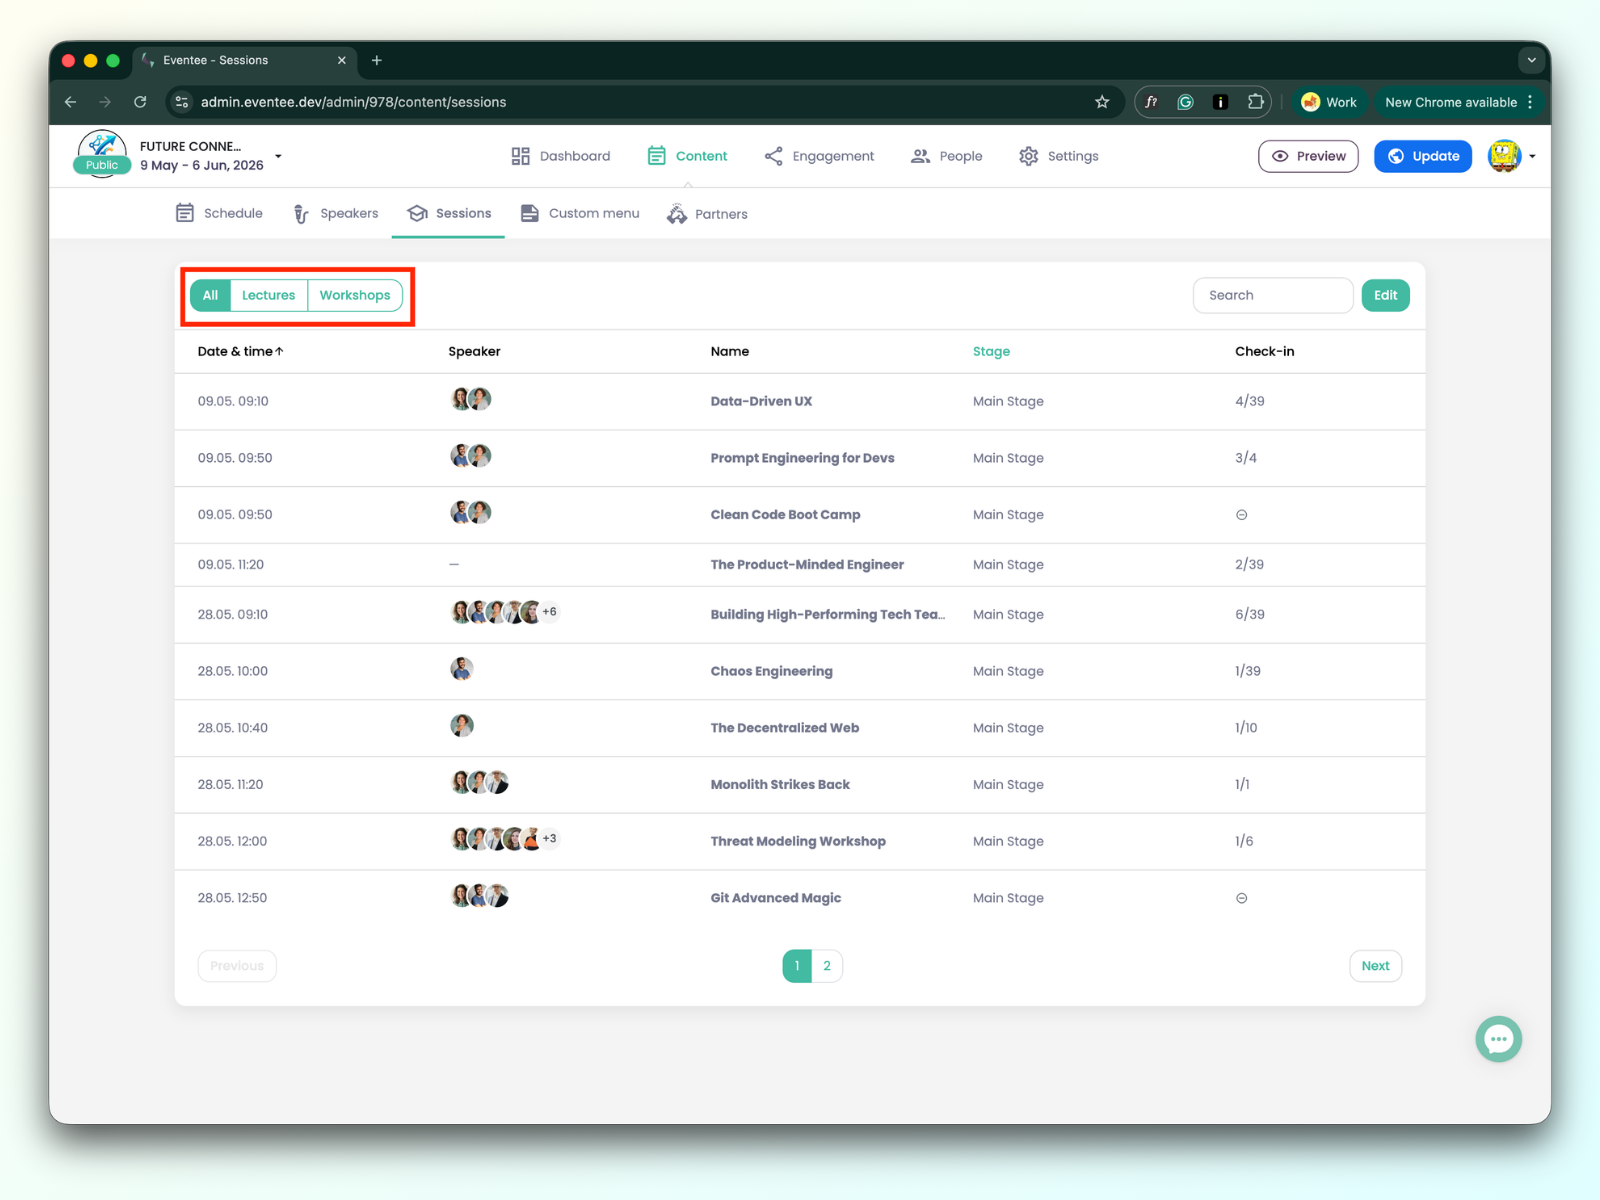
On the left side above the table, there are three tabs: All, Lectures, and Workshops. Clicking them lets you filter the view to show all sessions, only lectures, or only workshops.
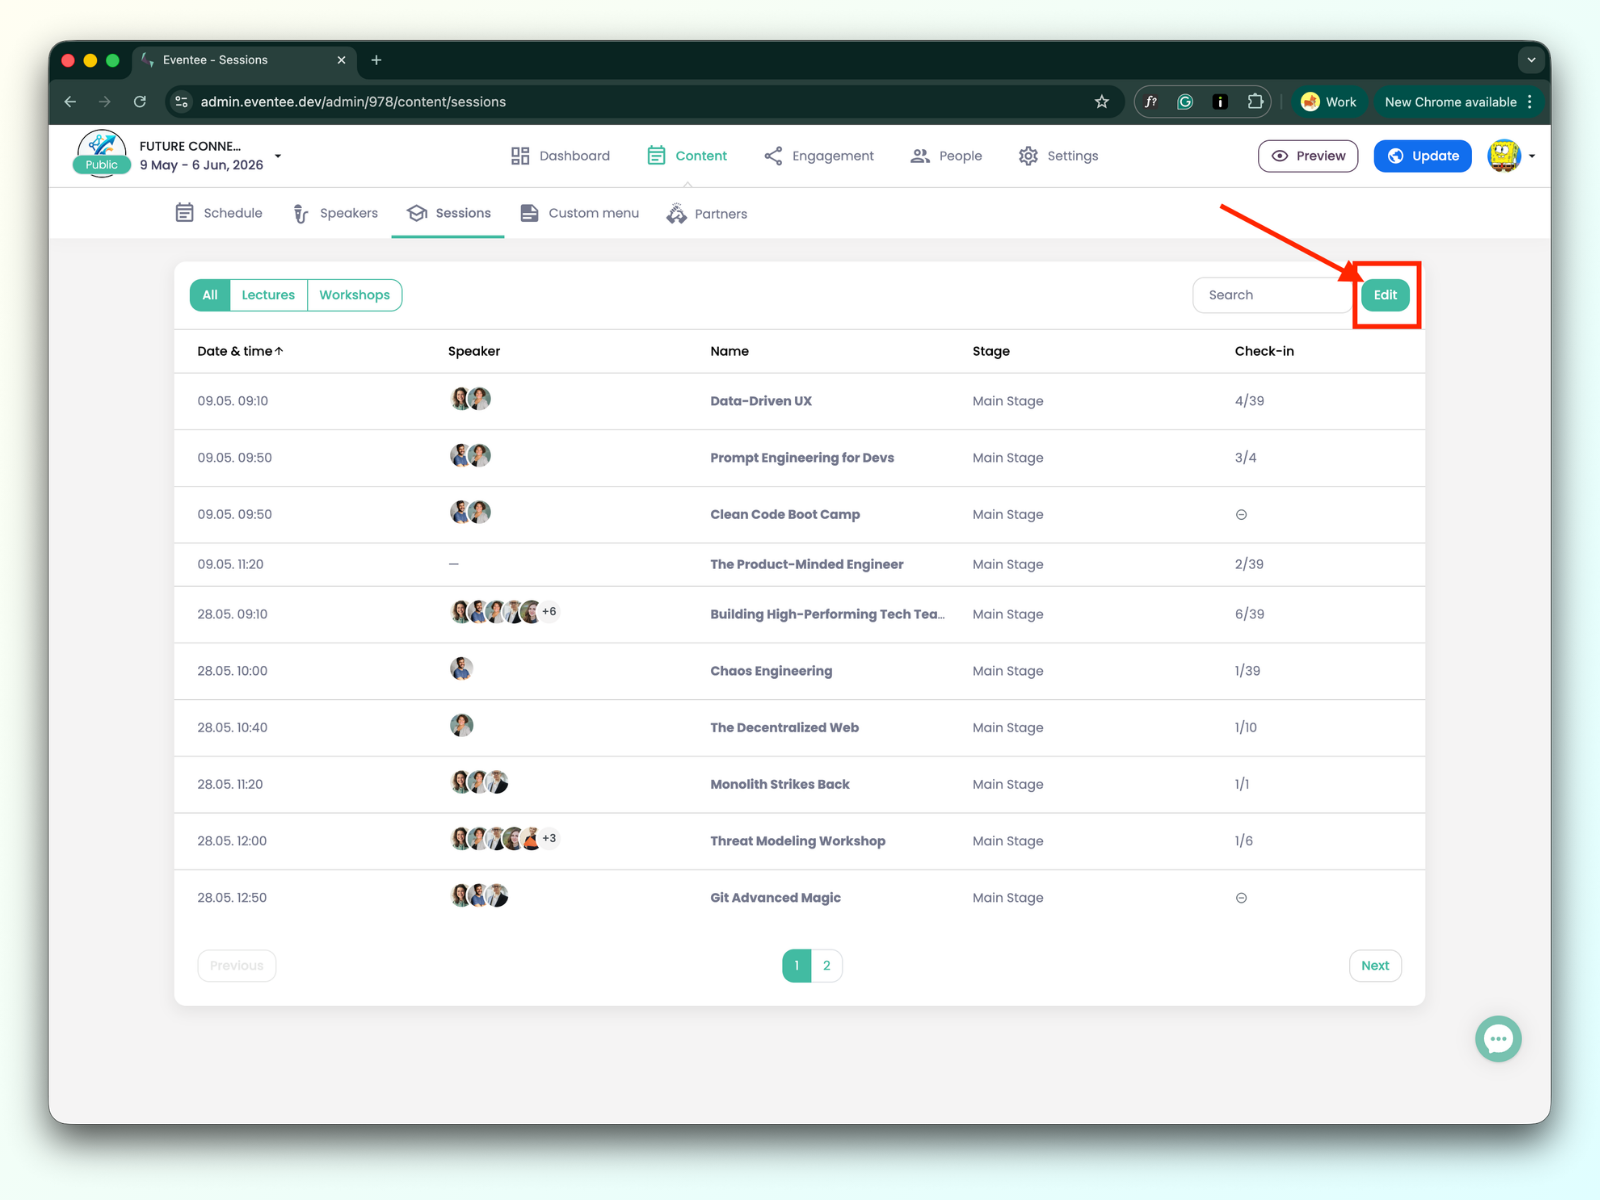
On the right side, there is a search bar to find a specific session, along with an Edit button. This button is essential, as it allows you to enable check-ins for individual sessions.
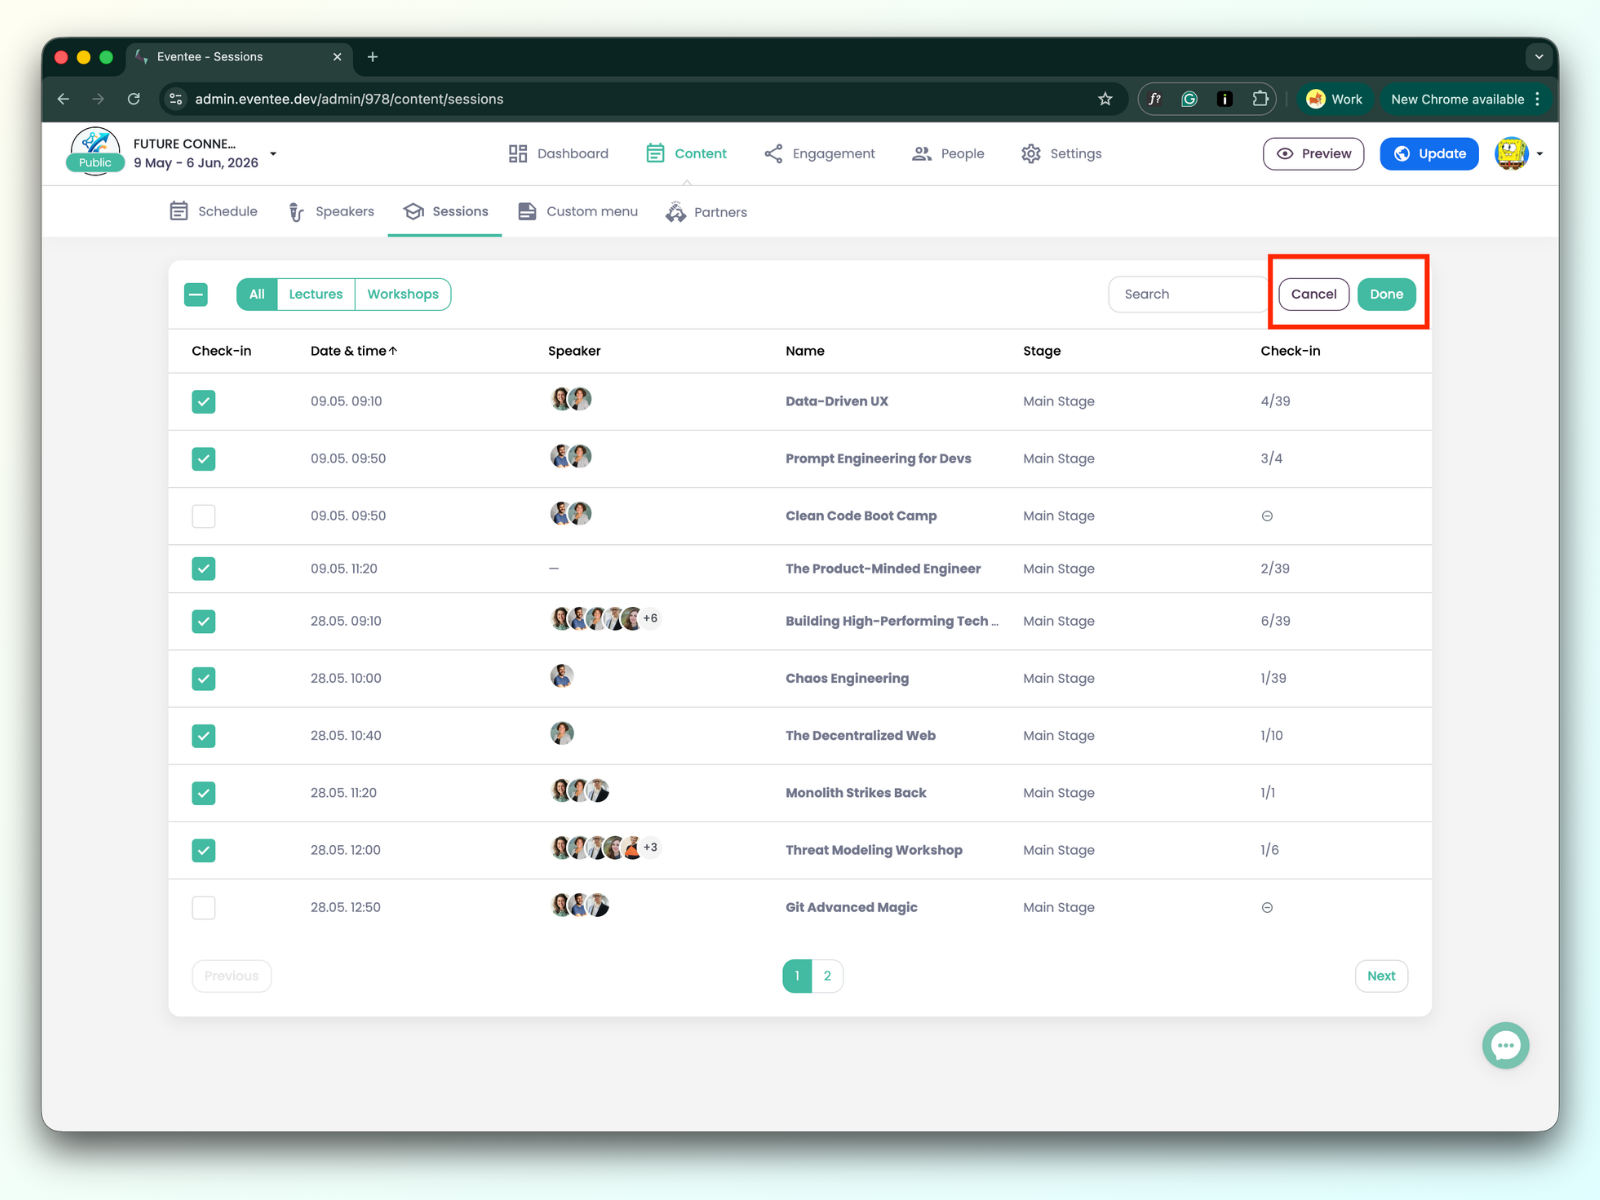
Clicking the Edit button adds a new column to the left side of the table, with a checkbox to enable check-in.

Select and check the sessions where you want to use check-in, then click Done to save your changes (or Cancel to discard them). You can disable and re-enable check-in at any time.
Check-in could be done for the following types of sessions:
Lecture
Simple workshop
Mentored workshop - A workshop type where attendees can register for a specific speaker. Read more in this article: https://help.eventee.com/en/articles/158-create-your-event-agenda.
Clicking the particular session with the check-in enabled redirects you to the session details.
To check in attendees, click the QR code icon to open the check-in app.

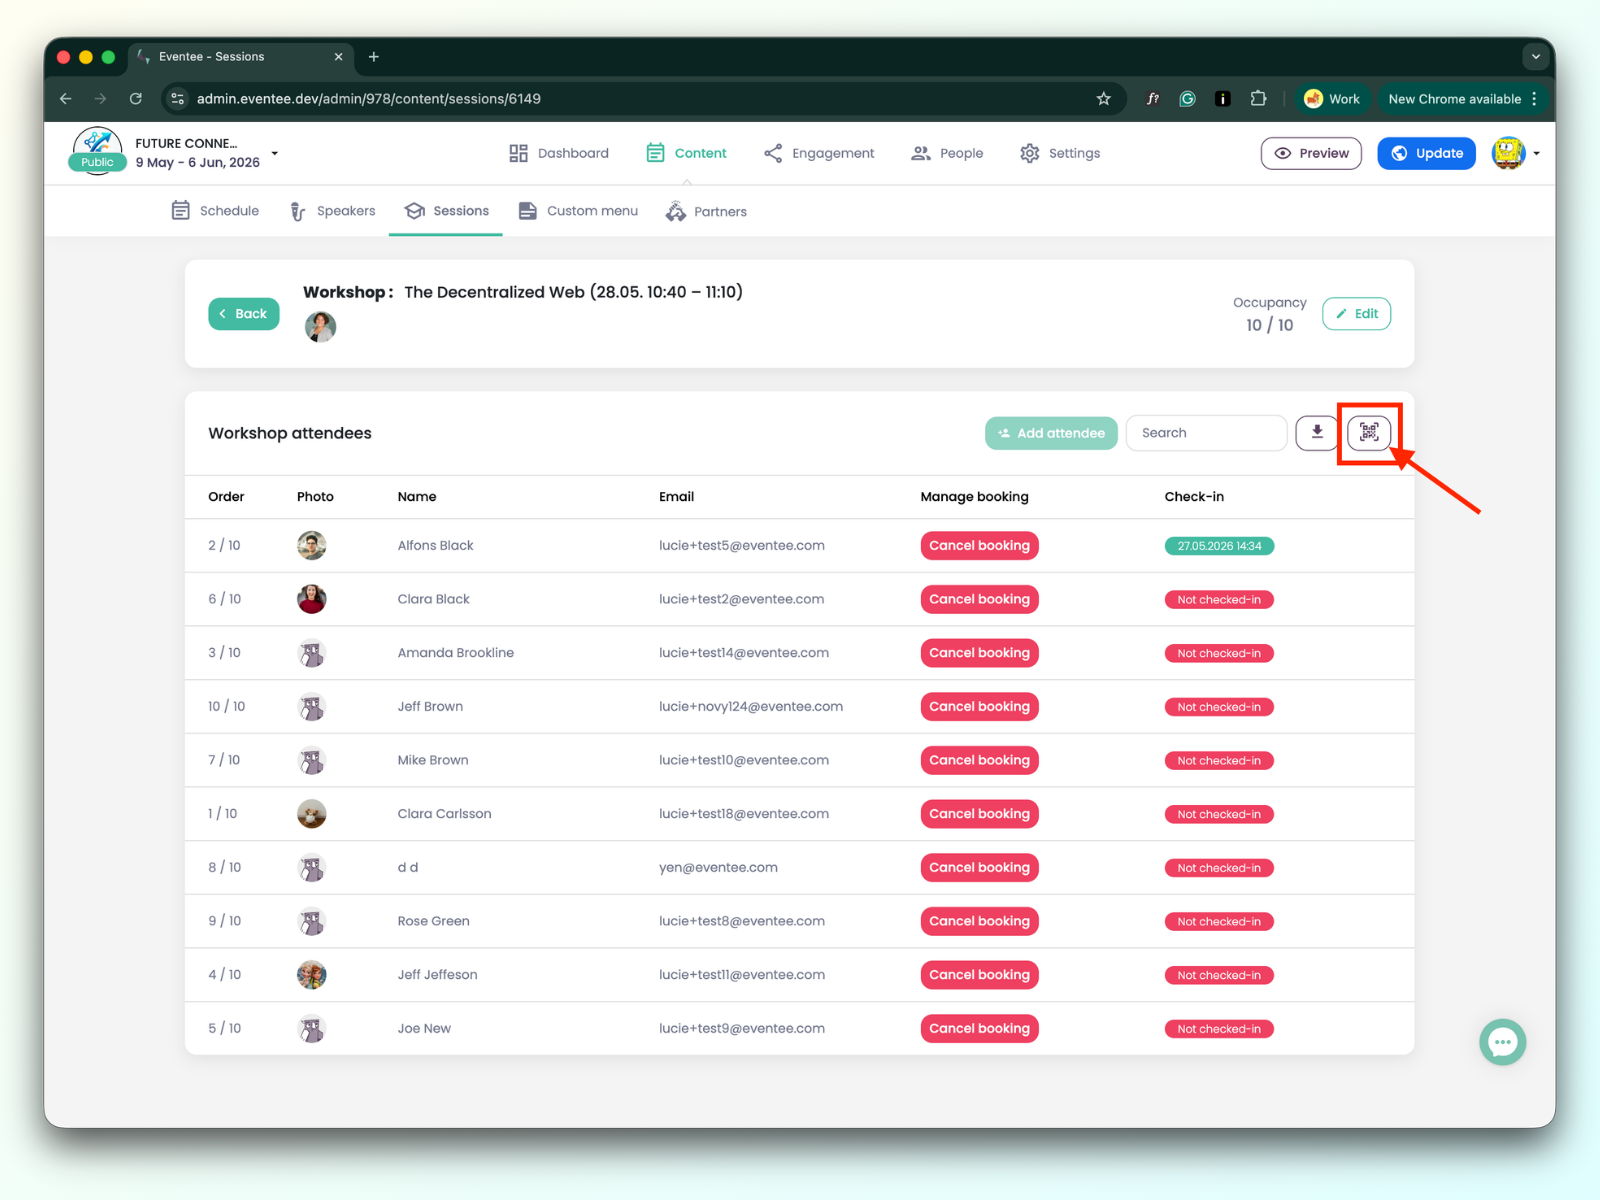
To learn how to proceed within the check-in app, please refer to this article: how the session check-in in the check-in app works.
Understanding the data table:
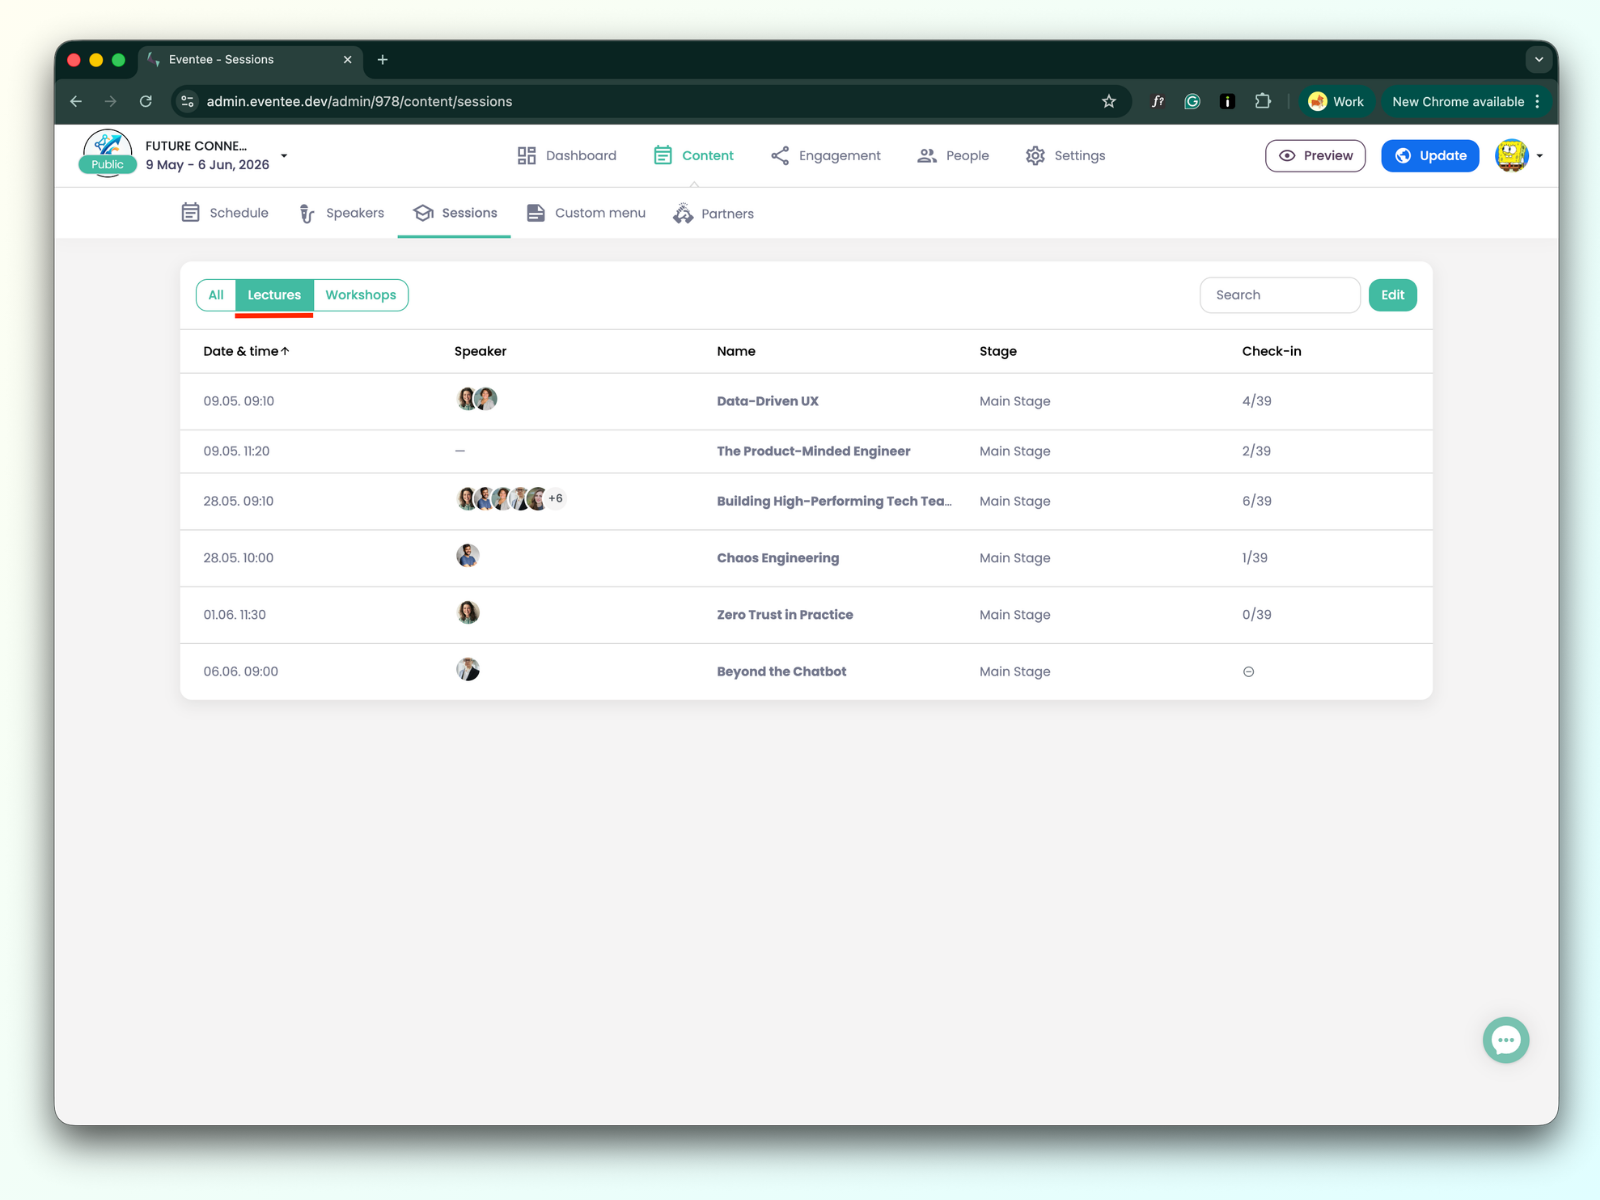
Date & Time: When the lecture takes place.
Speaker: The list of speakers for the lecture.
Name: The title of the lecture.
Stage: The name of the stage where the lecture takes place.
Check-in: e.g., 12 / 38 (12 is the number of already checked-in attendees; 38 is the total number of attendees, excluding anonymous users).
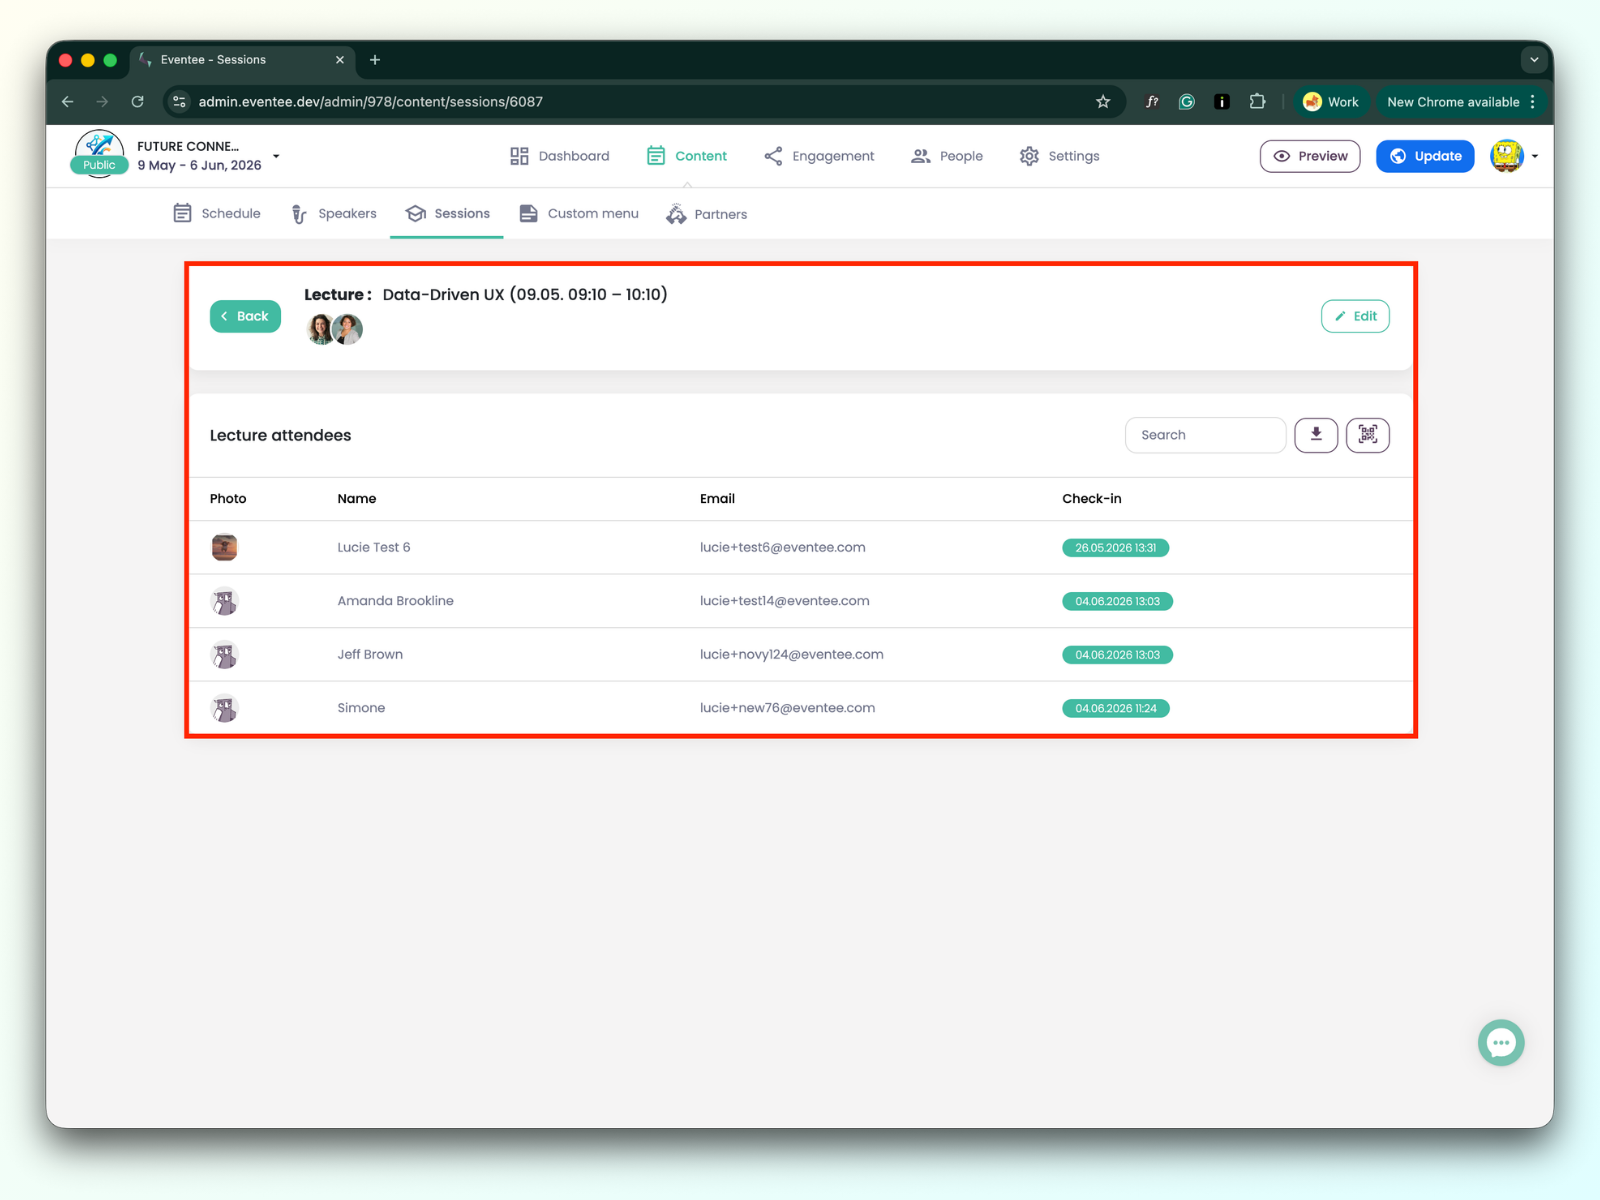
Clicking any lecture redirects you to the lecture details.
You can edit the lecture data by clicking the edit button. Besides that, you can use the search bar to find an already checked-in attendee, export the data, or open the check-in app.
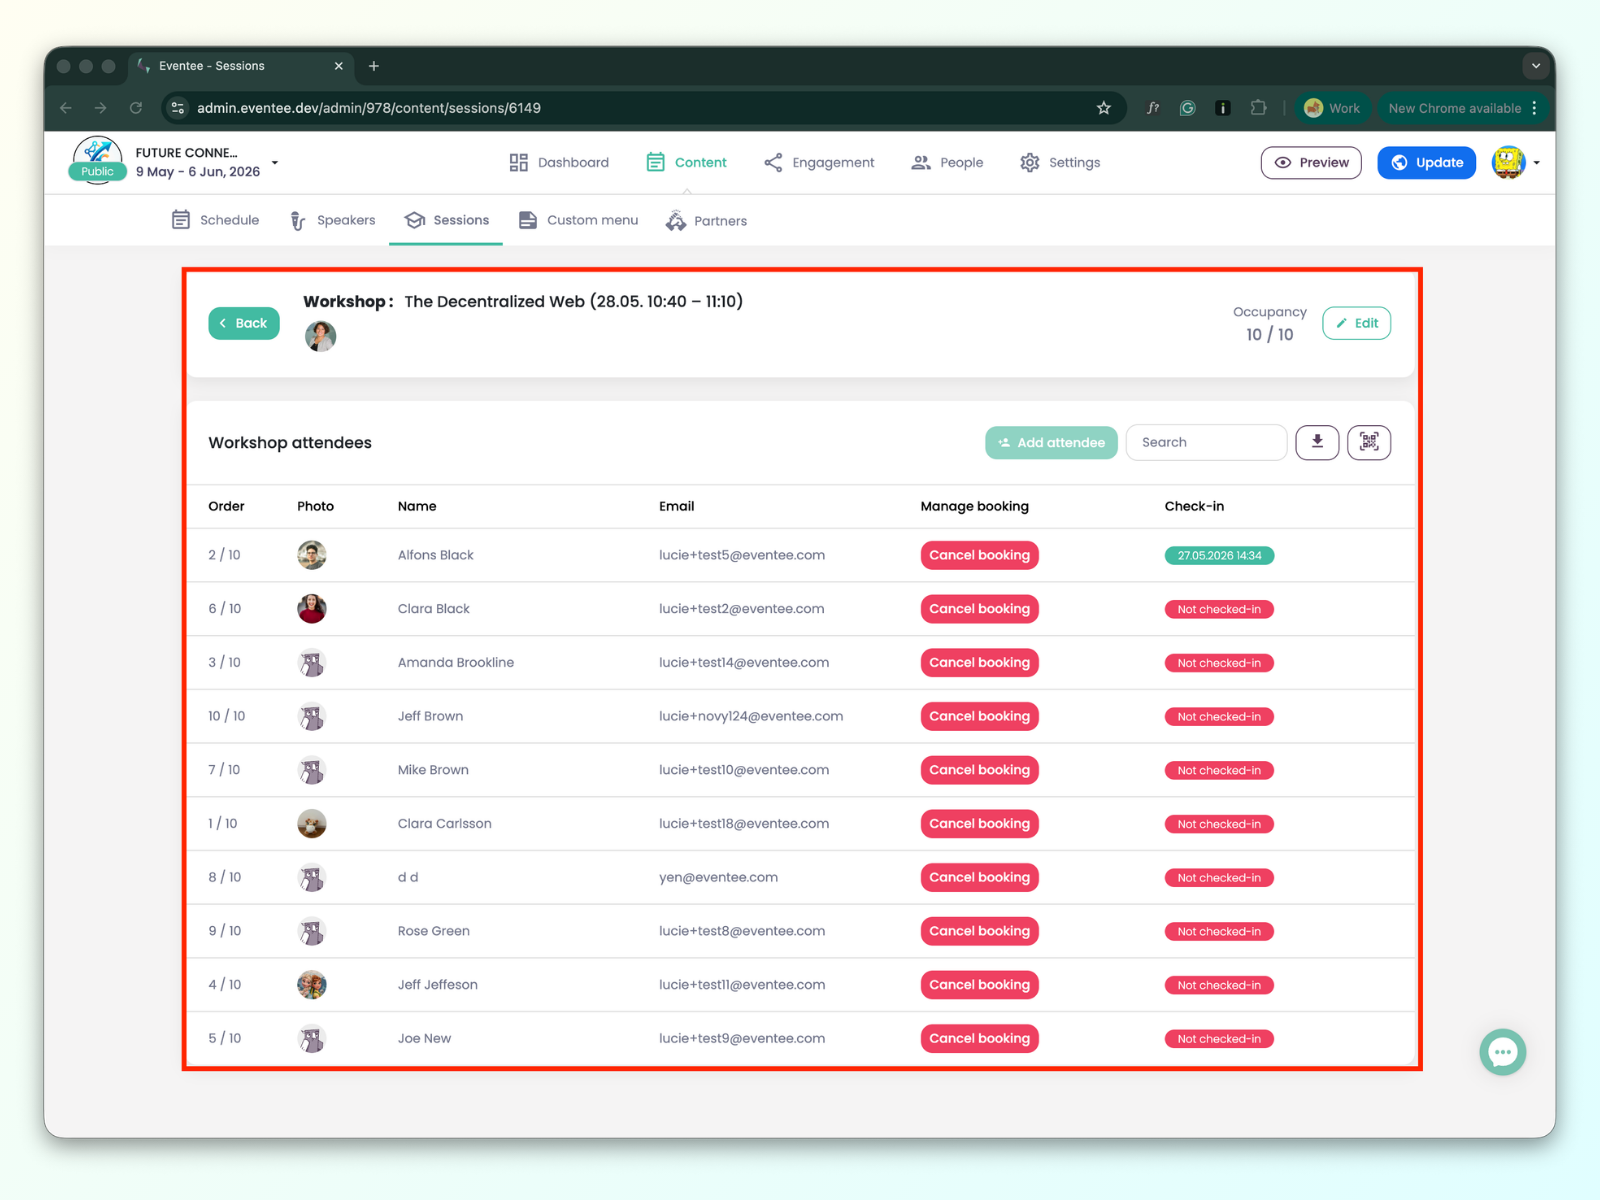
Date & Time: When the workshop takes place.
Speaker: The list of speakers for the workshop.
Name: The title of the workshop.
Stage: The name of the stage where the workshop is held.
Occupancy: e.g., 6/30 (6 is the total number of attendees who booked the workshop; 30 is the occupancy limit)
Check-in: e.g., 10 / 25 (10 is the number of already checked-in attendees; 25 is the total number of attendees who booked the workshop).
There are two kinds of workshops:
Simple workshop - a simple workshop is a workshop where attendees can’t book a slot with a specific speaker. This means the workshop settings have 'allow booking to individual speakers' disabled.
Mentored workshop - a mentored workshop is a workshop where attendees can book a slot with a specific speaker. This means the workshop settings have 'allow booking to individual speakers' enabled.

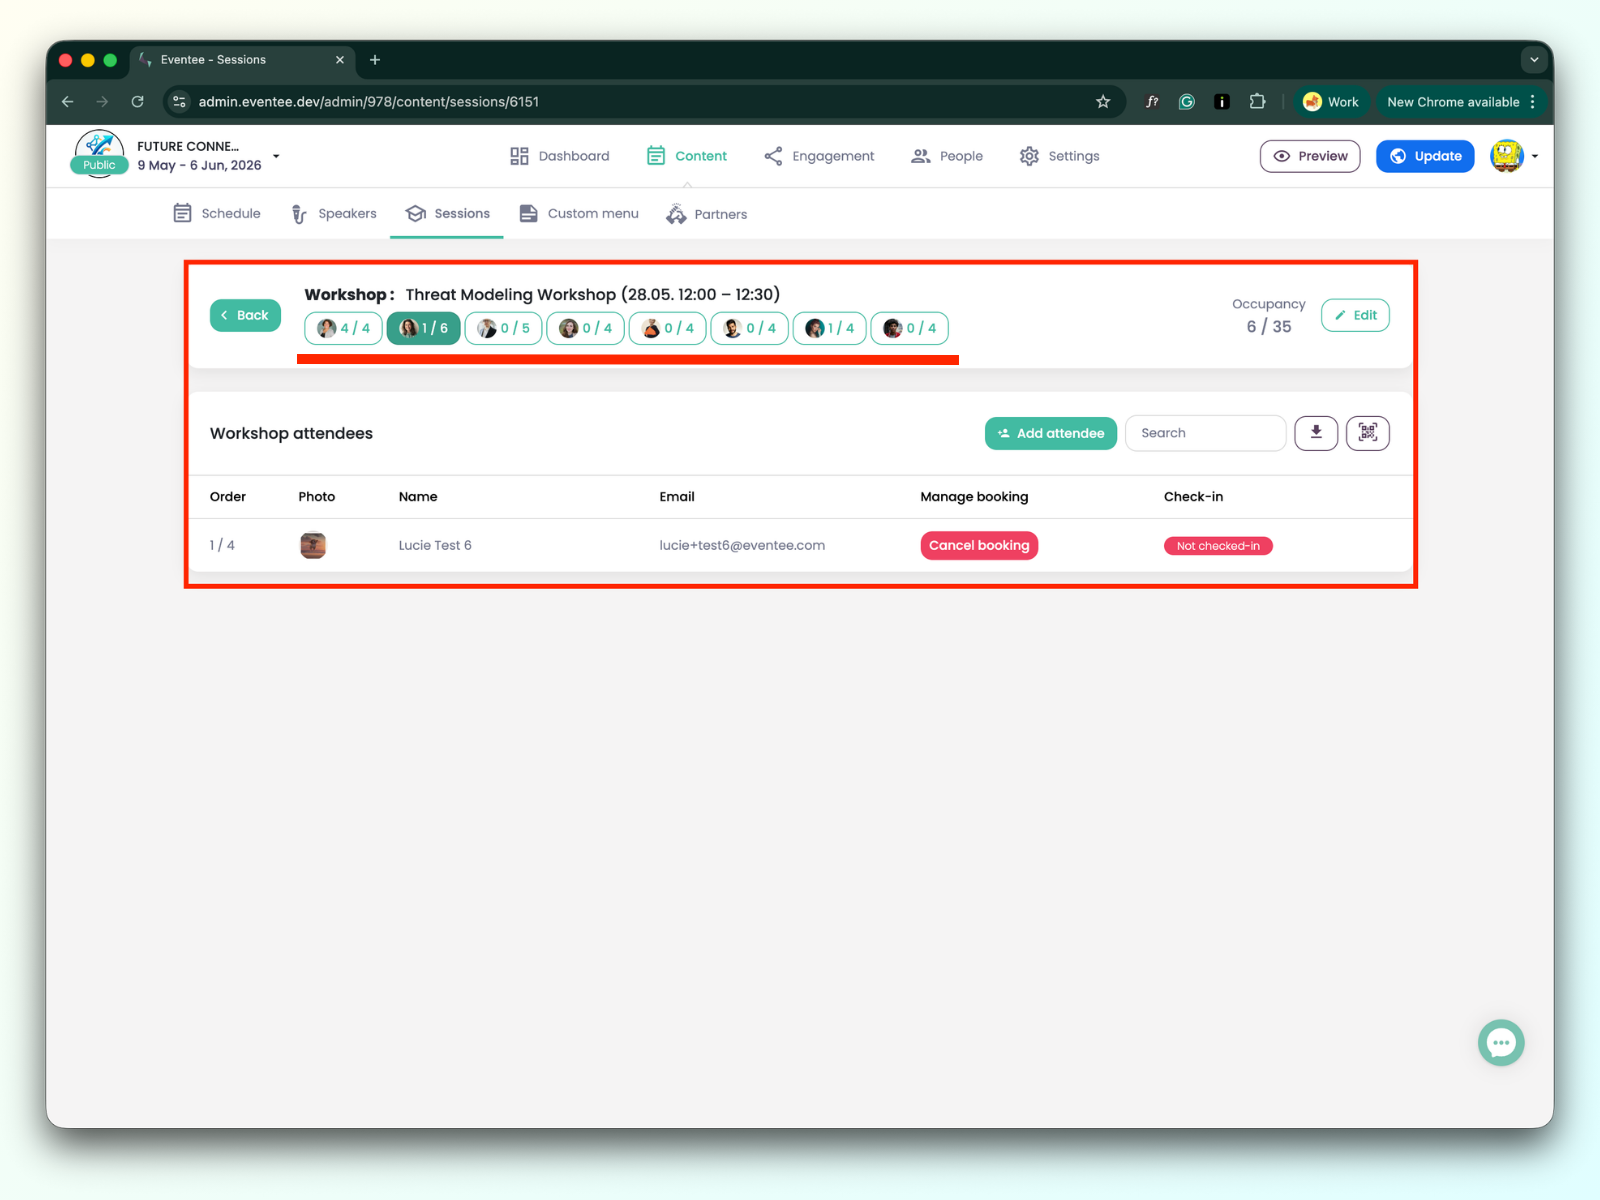
Clicking any workshop redirects you to the workshop details:
The table lists attendees who booked the workshop. You can edit the workshop data by clicking the edit button. Besides that, you can use the search bar to find an attendee, export the data, or open the check-in app.

For the mentored workshop, you can switch between individual speakers by clicking on their tabs.
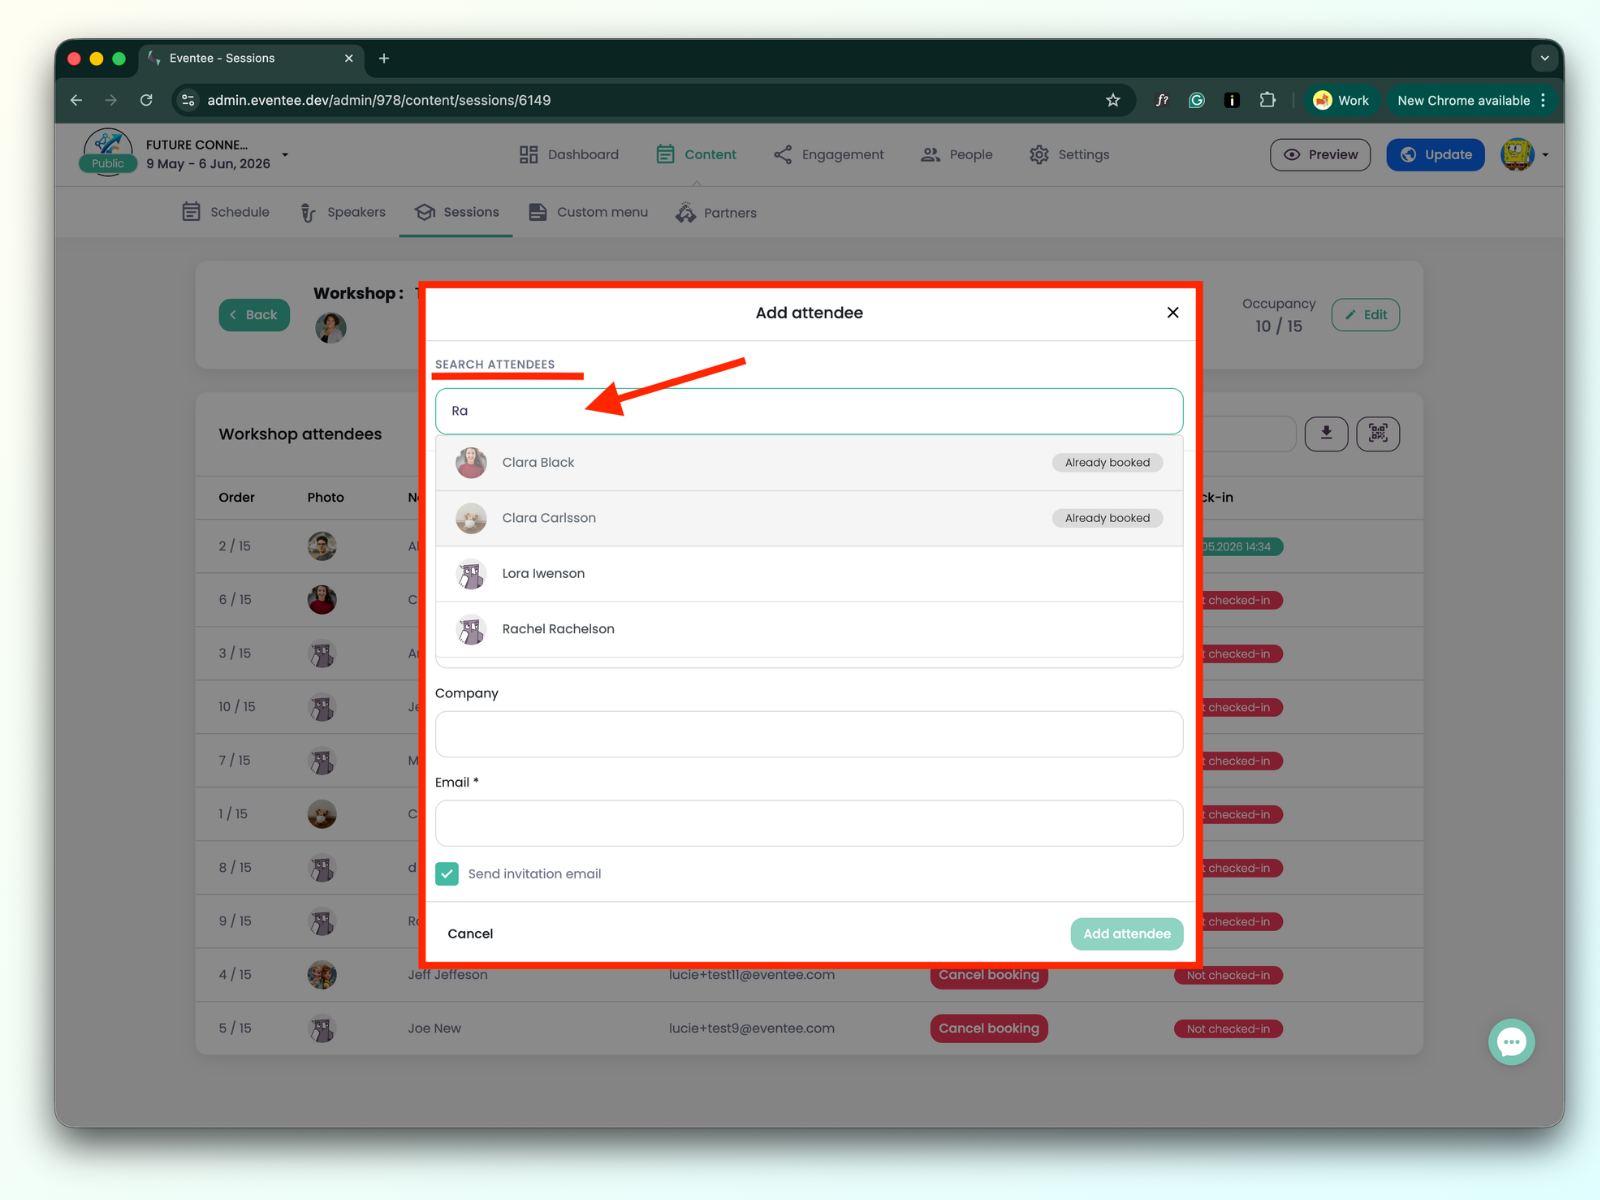
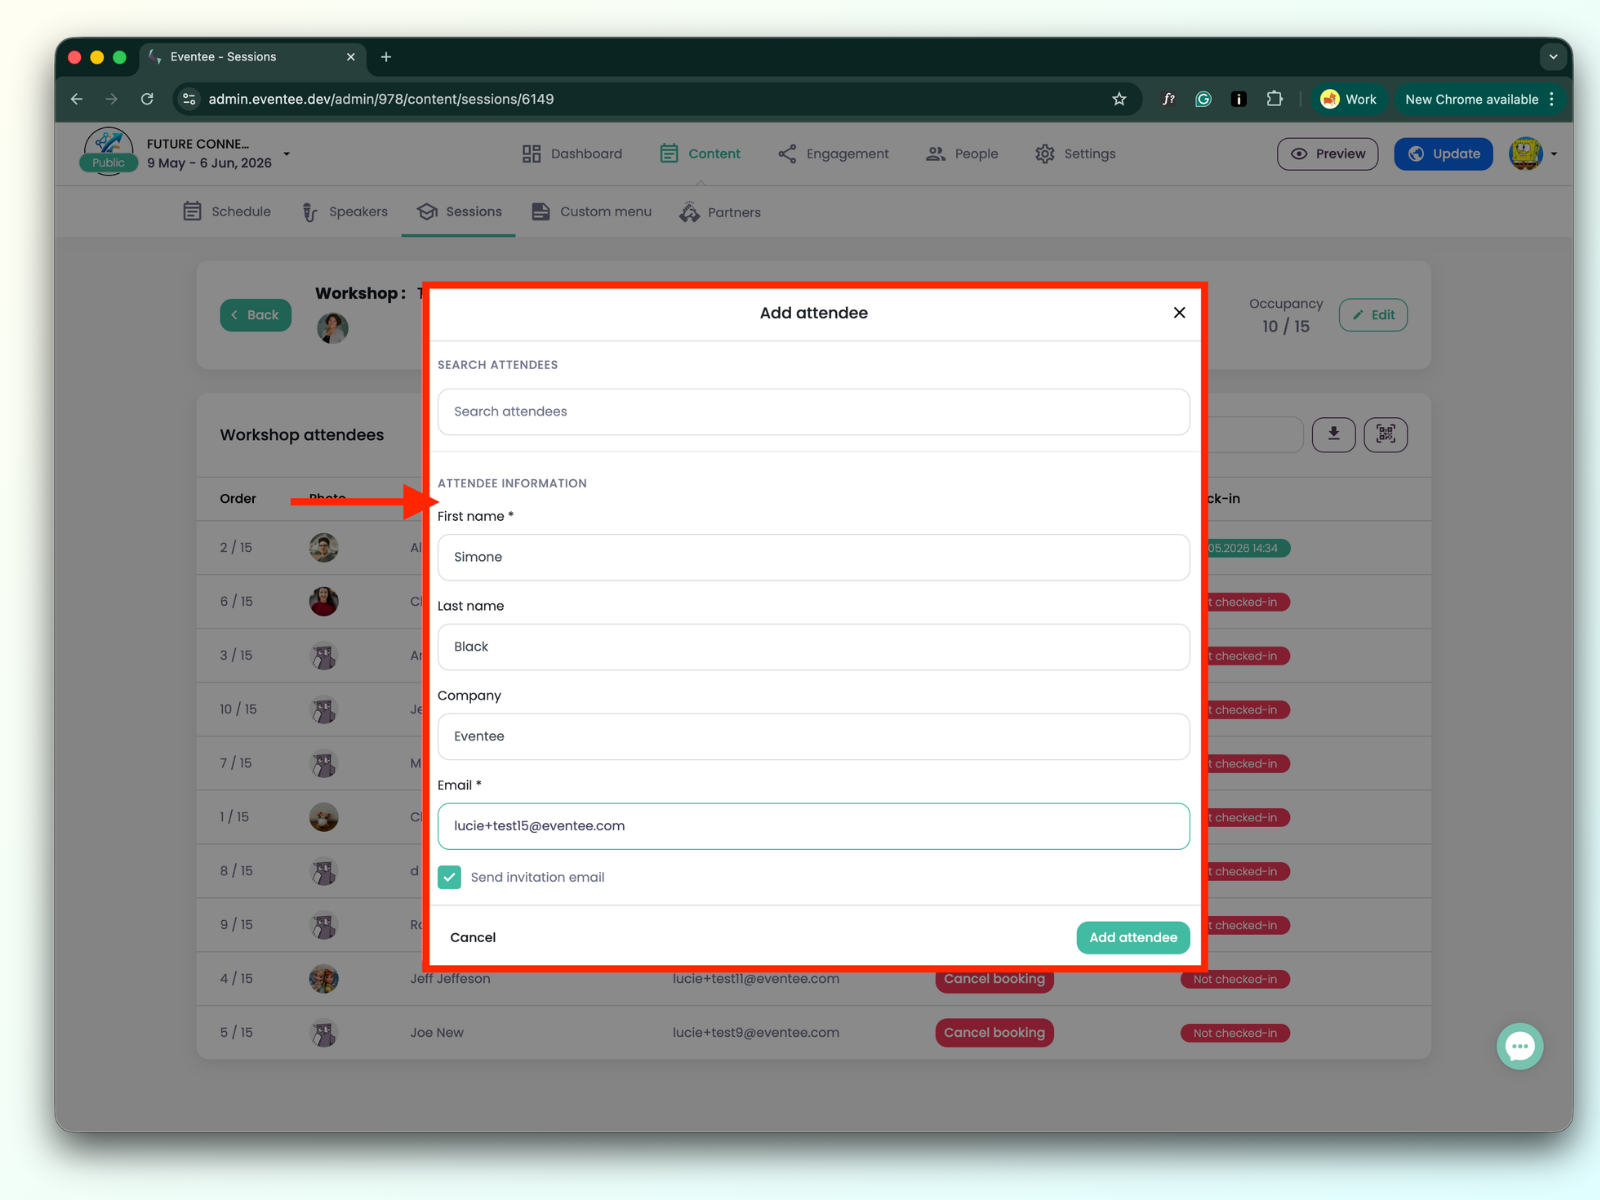
Creating a New Booking
Click the Add Attendee button. If you want to add an existing attendee, use the search bar and click on the attendee to add them to the workshop.
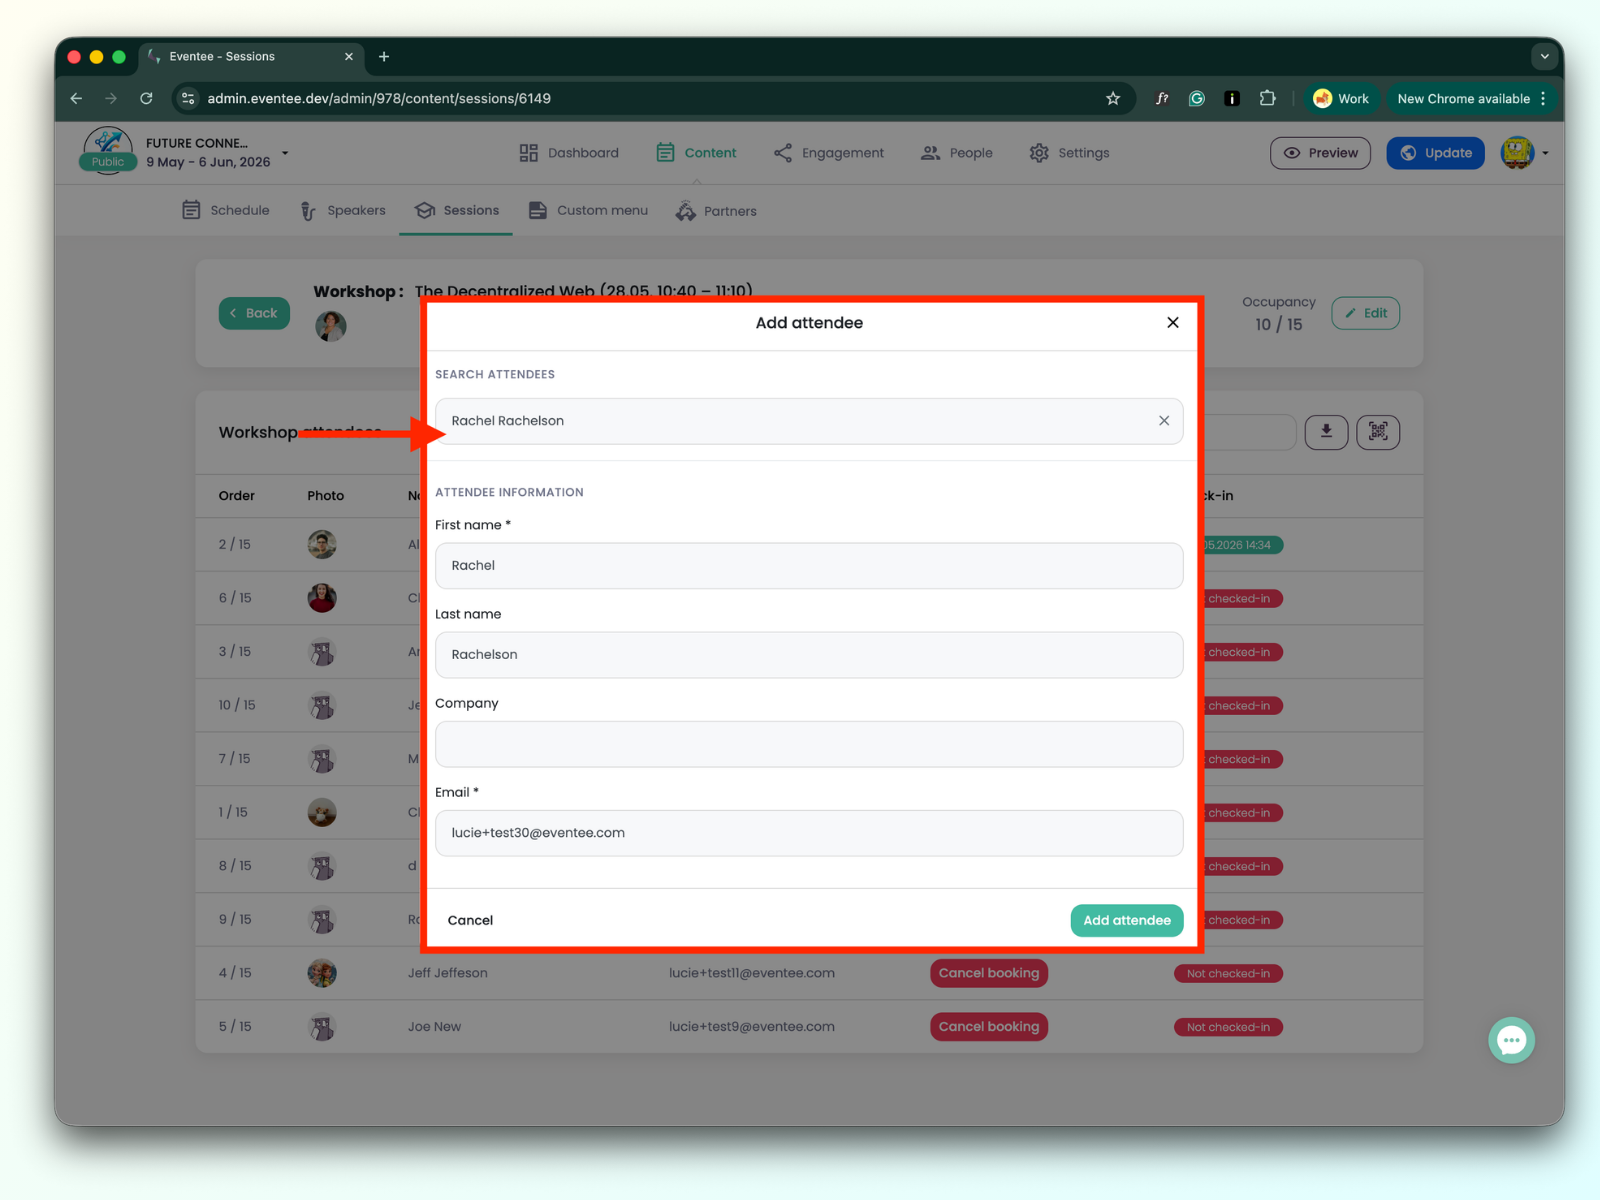
Click the Add Attendee button. If you want to add a new attendee who is not yet in the event, fill out the form data and click Add Attendee. You will then find the attendee in the workshop list as well as on the Attendees page.
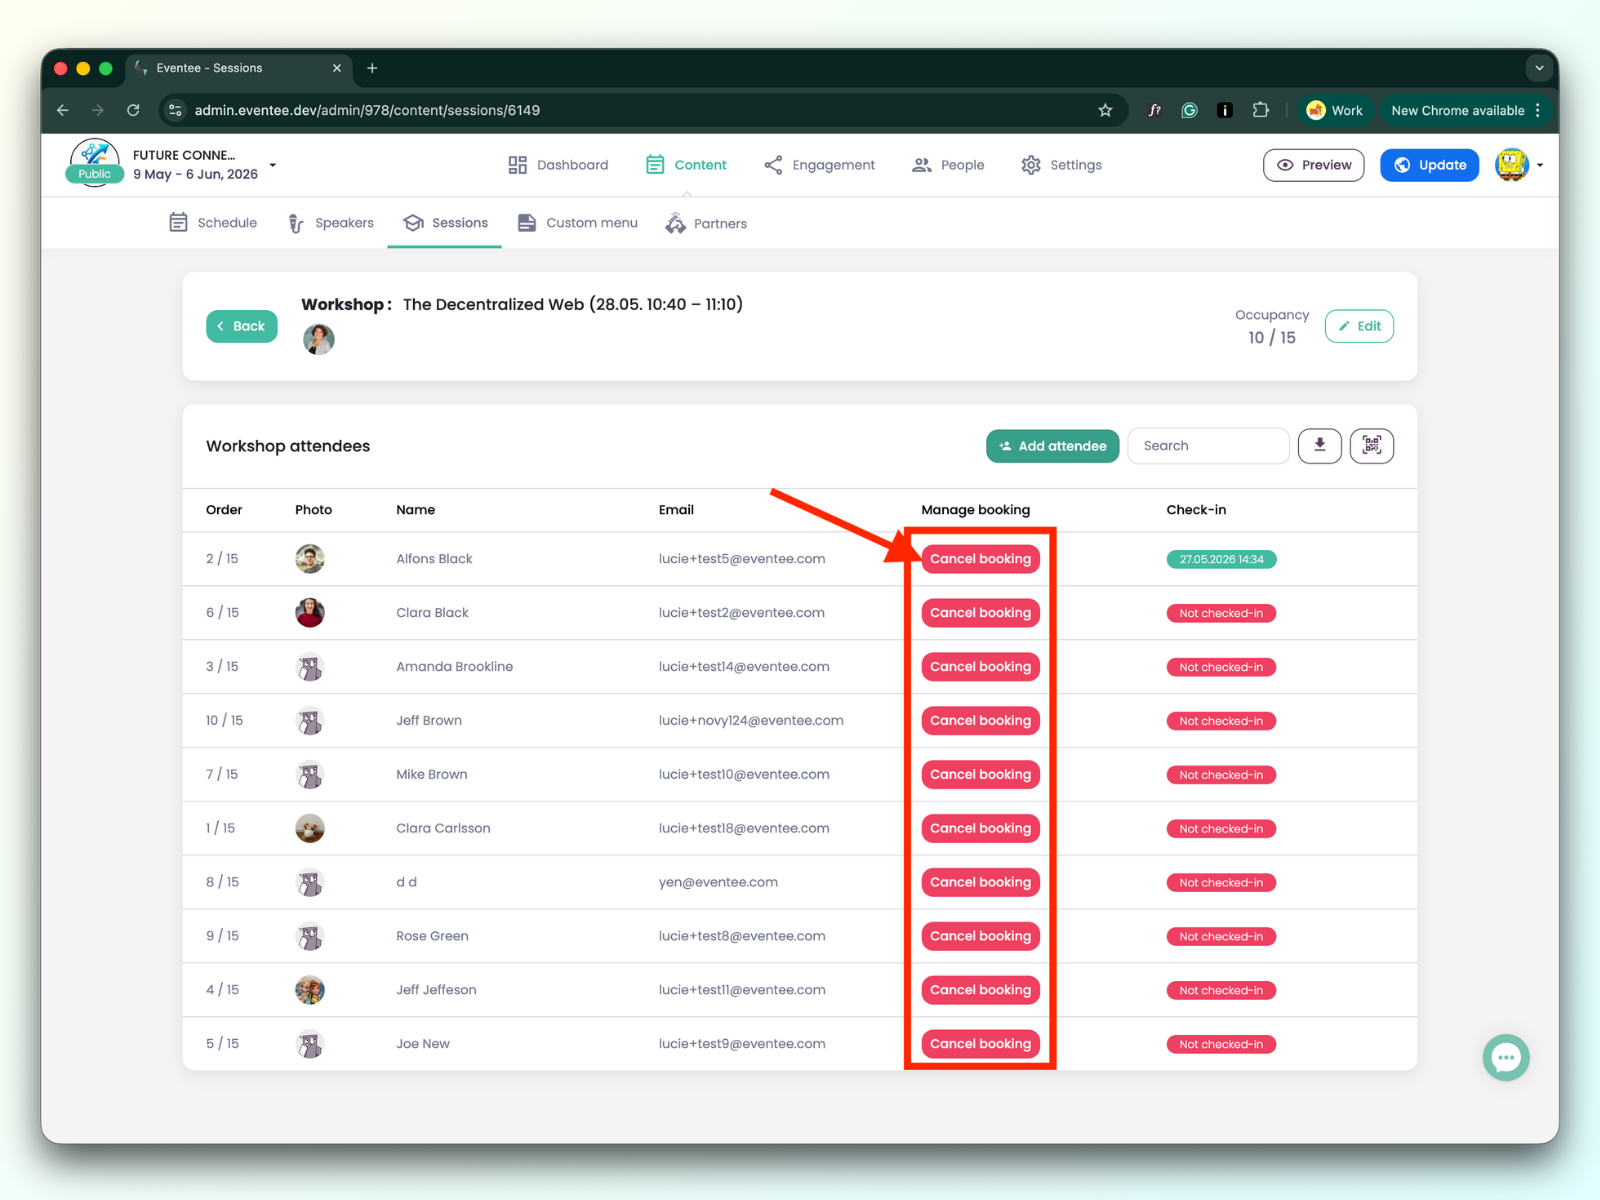
Canceling a Booking
Find the specific attendee whose booking you want to cancel and click the Cancel Booking button.
Both creating and canceling a booking are instantly reflected in the attendee's app. This means that when you create a booking for them, they will see that the spot is reserved and the workshop will appear in their "My Agenda" section. If you cancel the booking, they will receive a notification in the app stating that the booking has been canceled.