In this article, you'll learn how to import and invite attendees along with how to deal with invalid users, how the import file should look, and so on.

Please note that after the latest update, Eventee no longer automatically sends invitations after publish. When importing users to a published event, you can always choose whether you want to invite them now or later. Automatic invitations are available only to ticketing integrations.
Start by creating your attendee list in Eventee. To add attendees to Eventee, please head over to Users -> Attendees tab. Here, you should see an Import button on the right side of the screen, next to the Export.


Now that you know where to start, let's talk about how to upload and map the file attributes to correctly link the data fields.
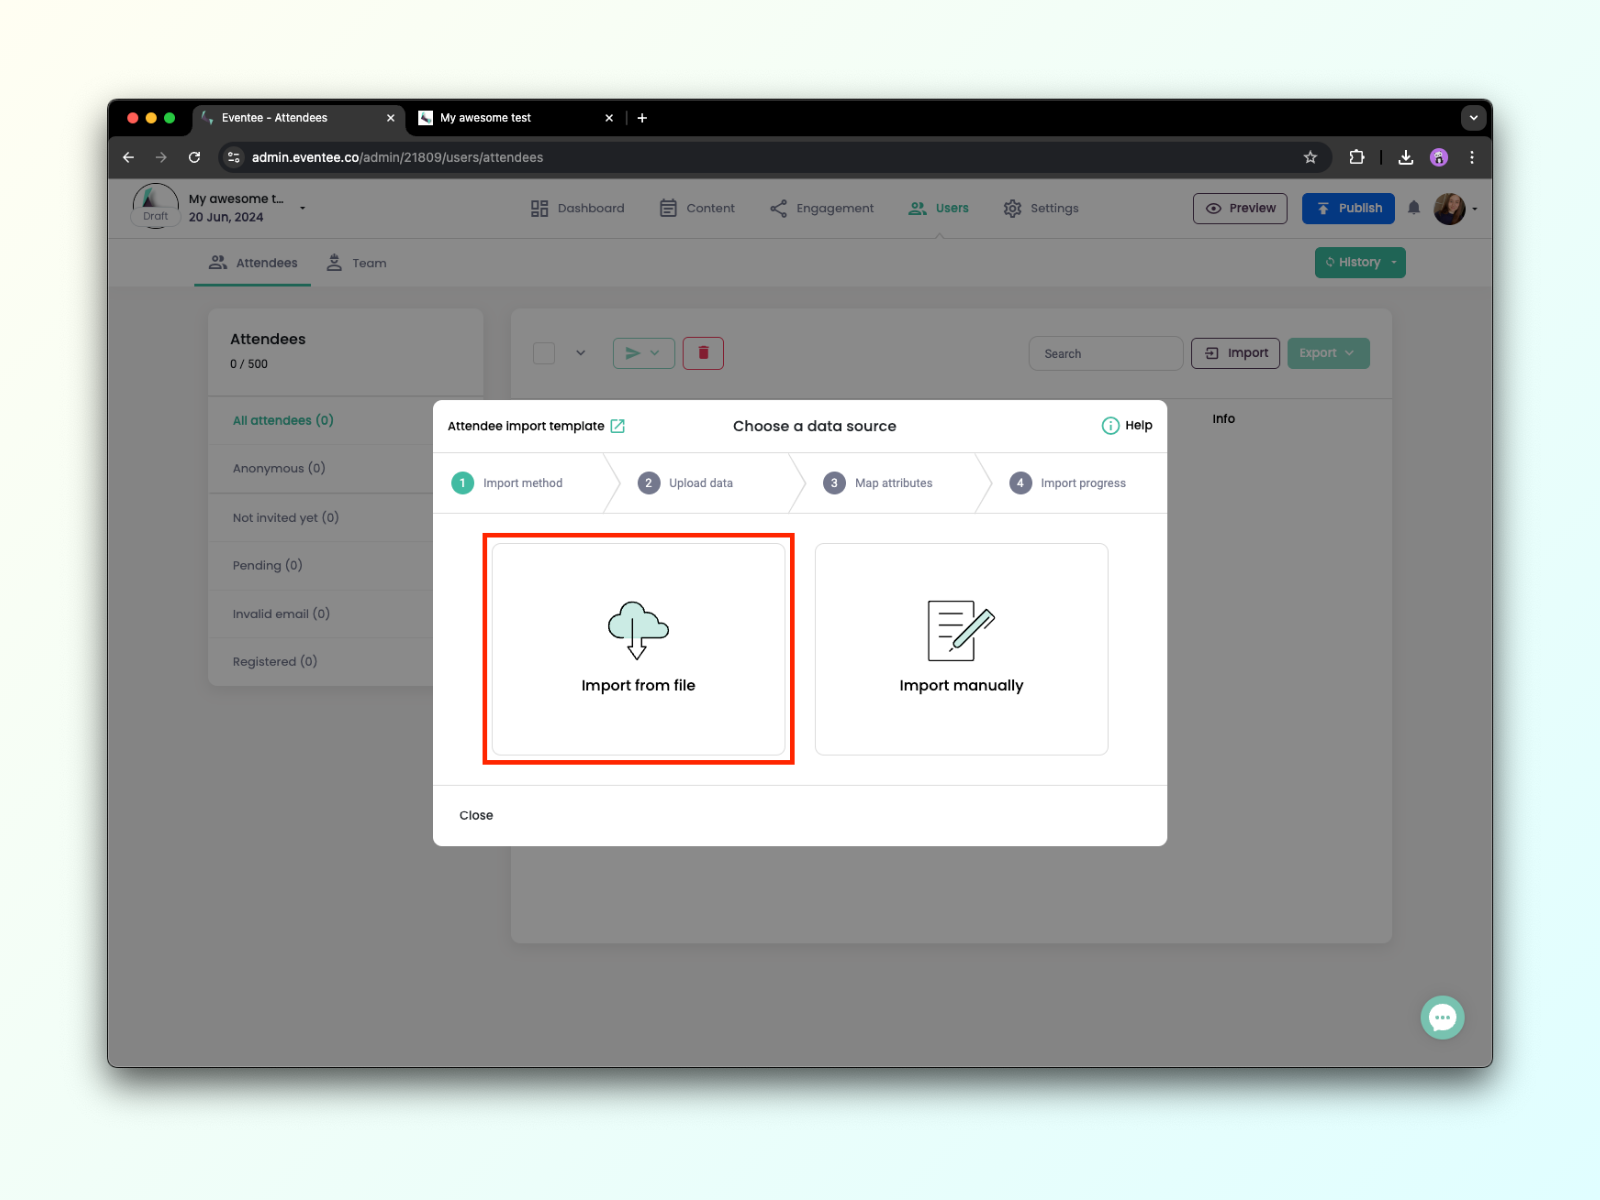
1A. In the Import dialog, select Import from file and upload your file with attendee information. We support .xls, .xlsx, .csv, and .tsv.
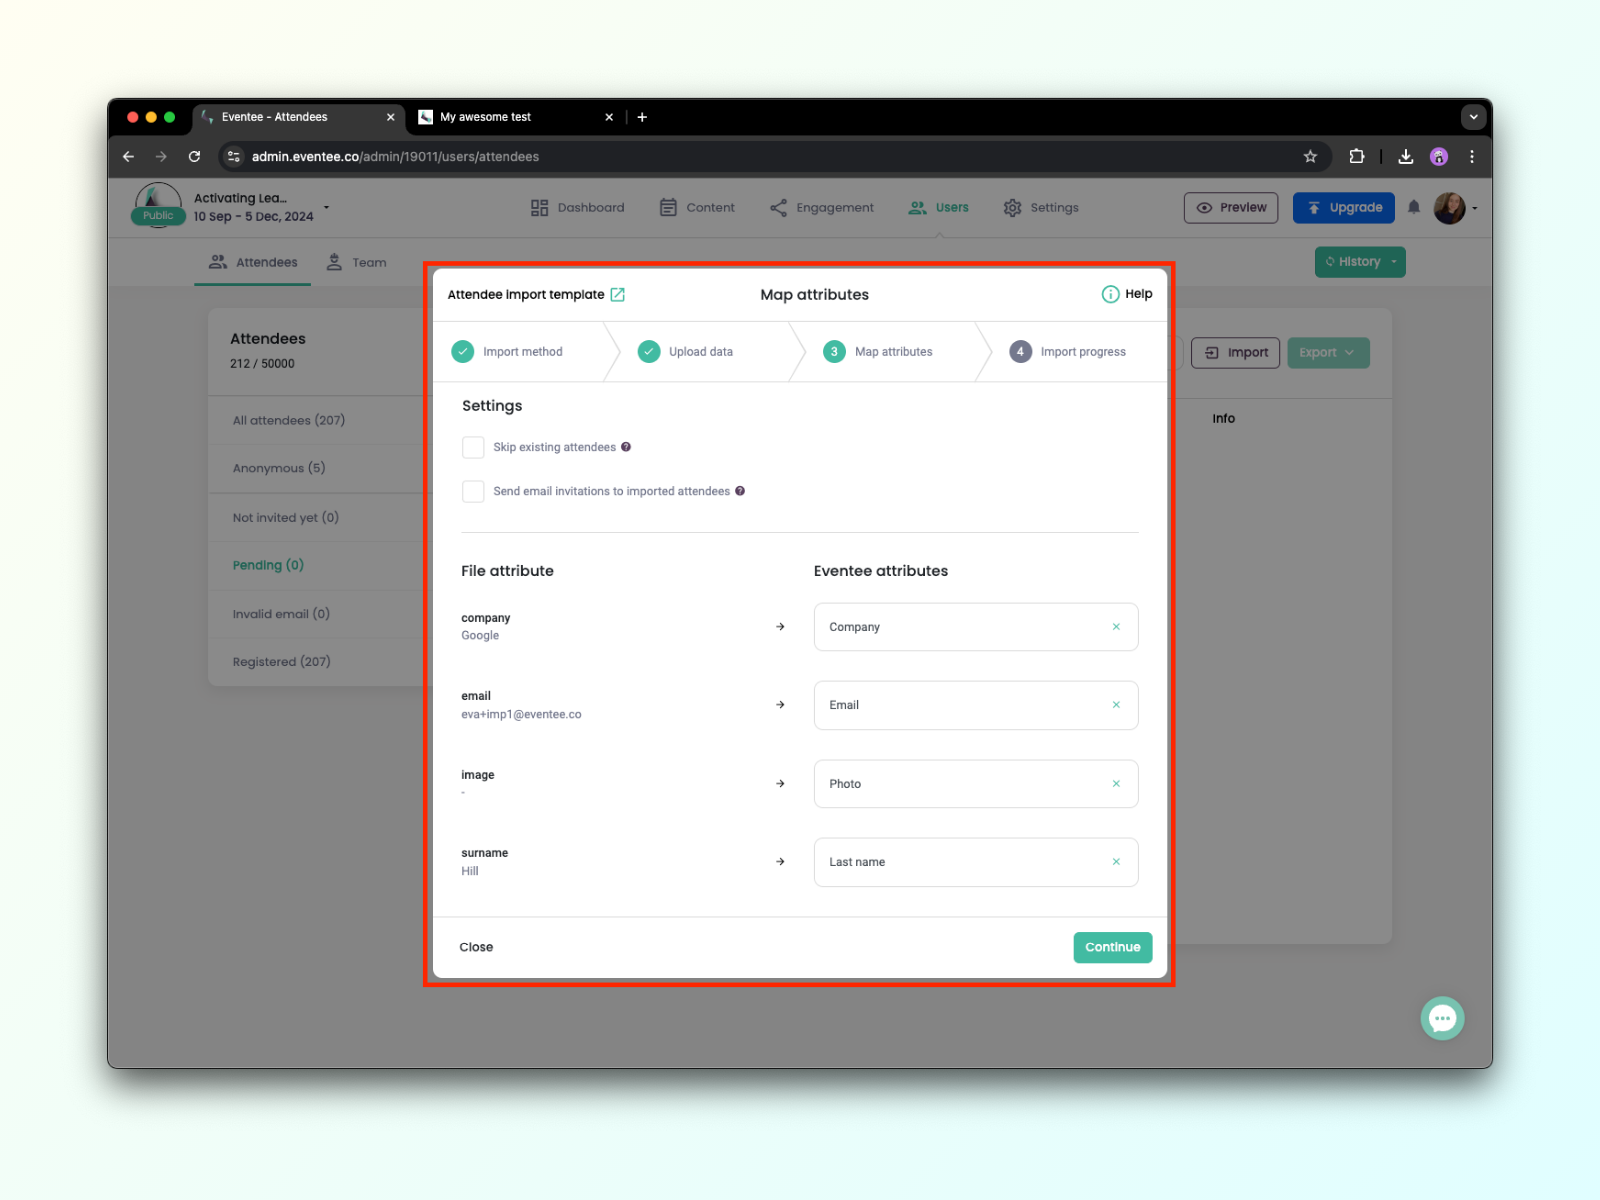
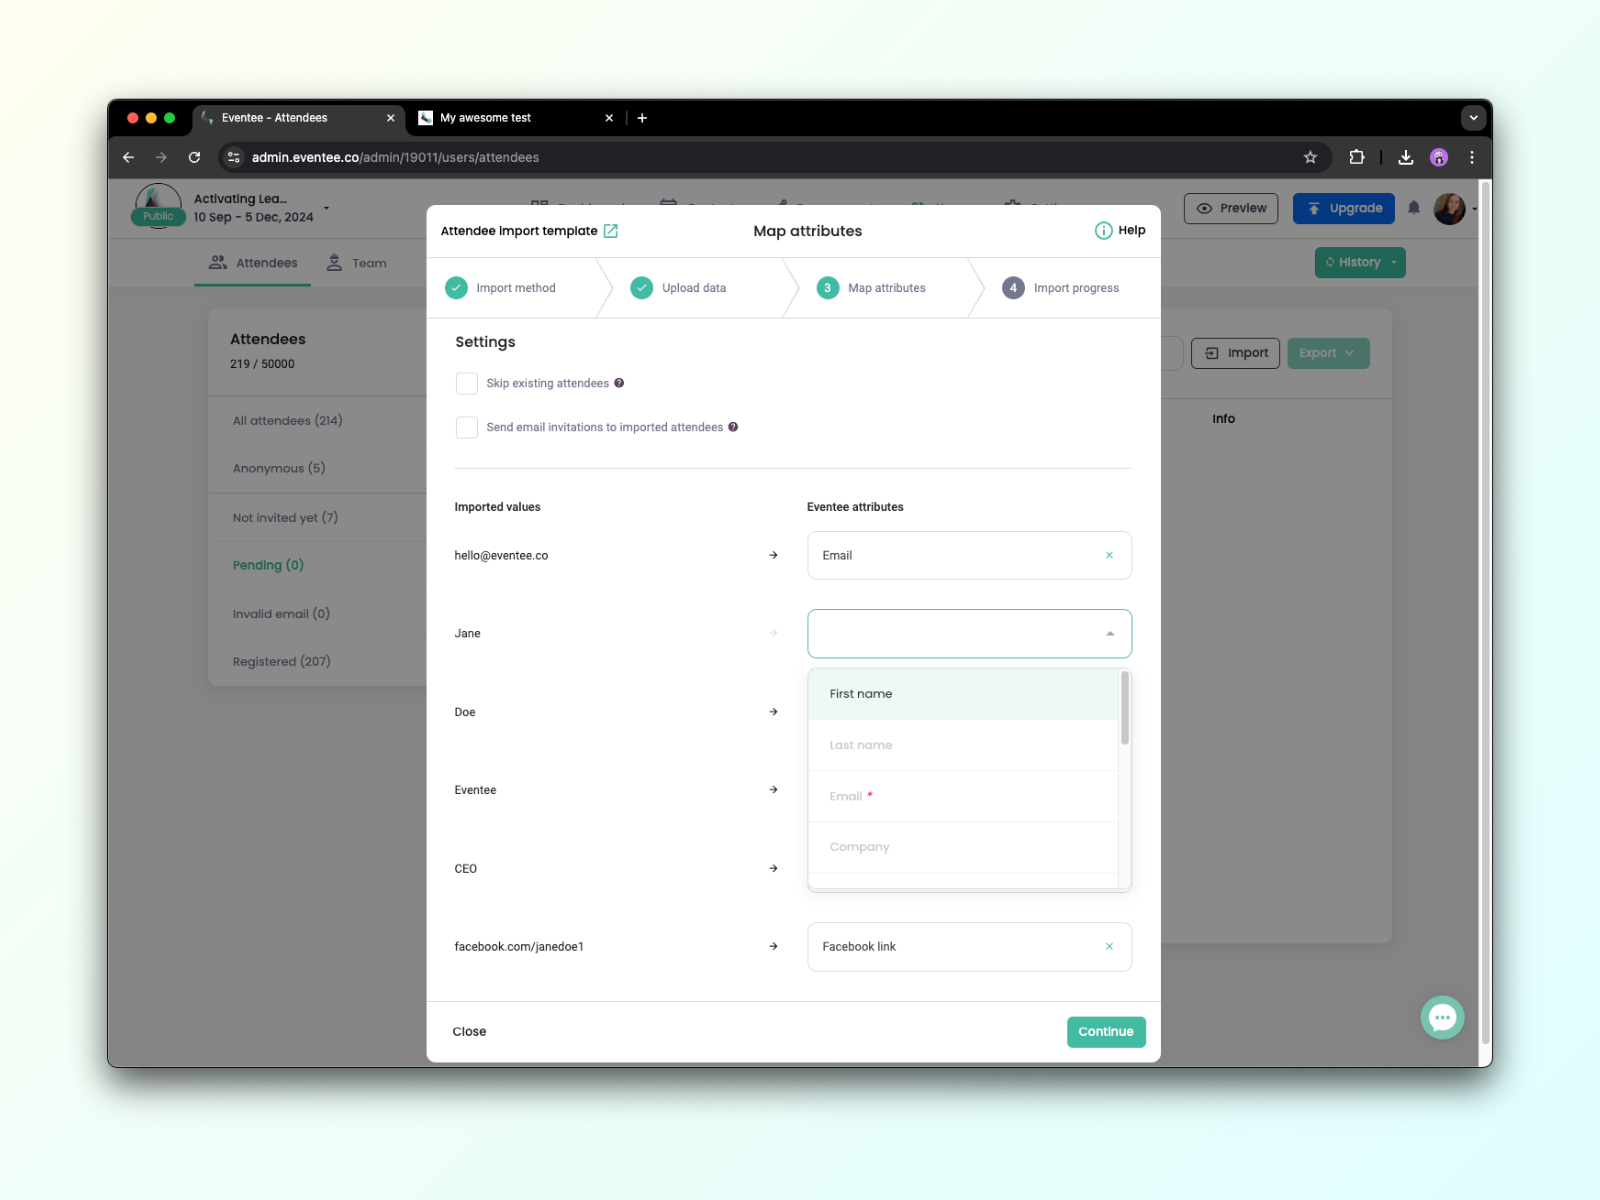
1B. Once your file is uploaded, hit Continue to proceed to the next screen where you'll map values from your file to Eventee attributes. For every column of your file, select a corresponding value from the Eventee list.
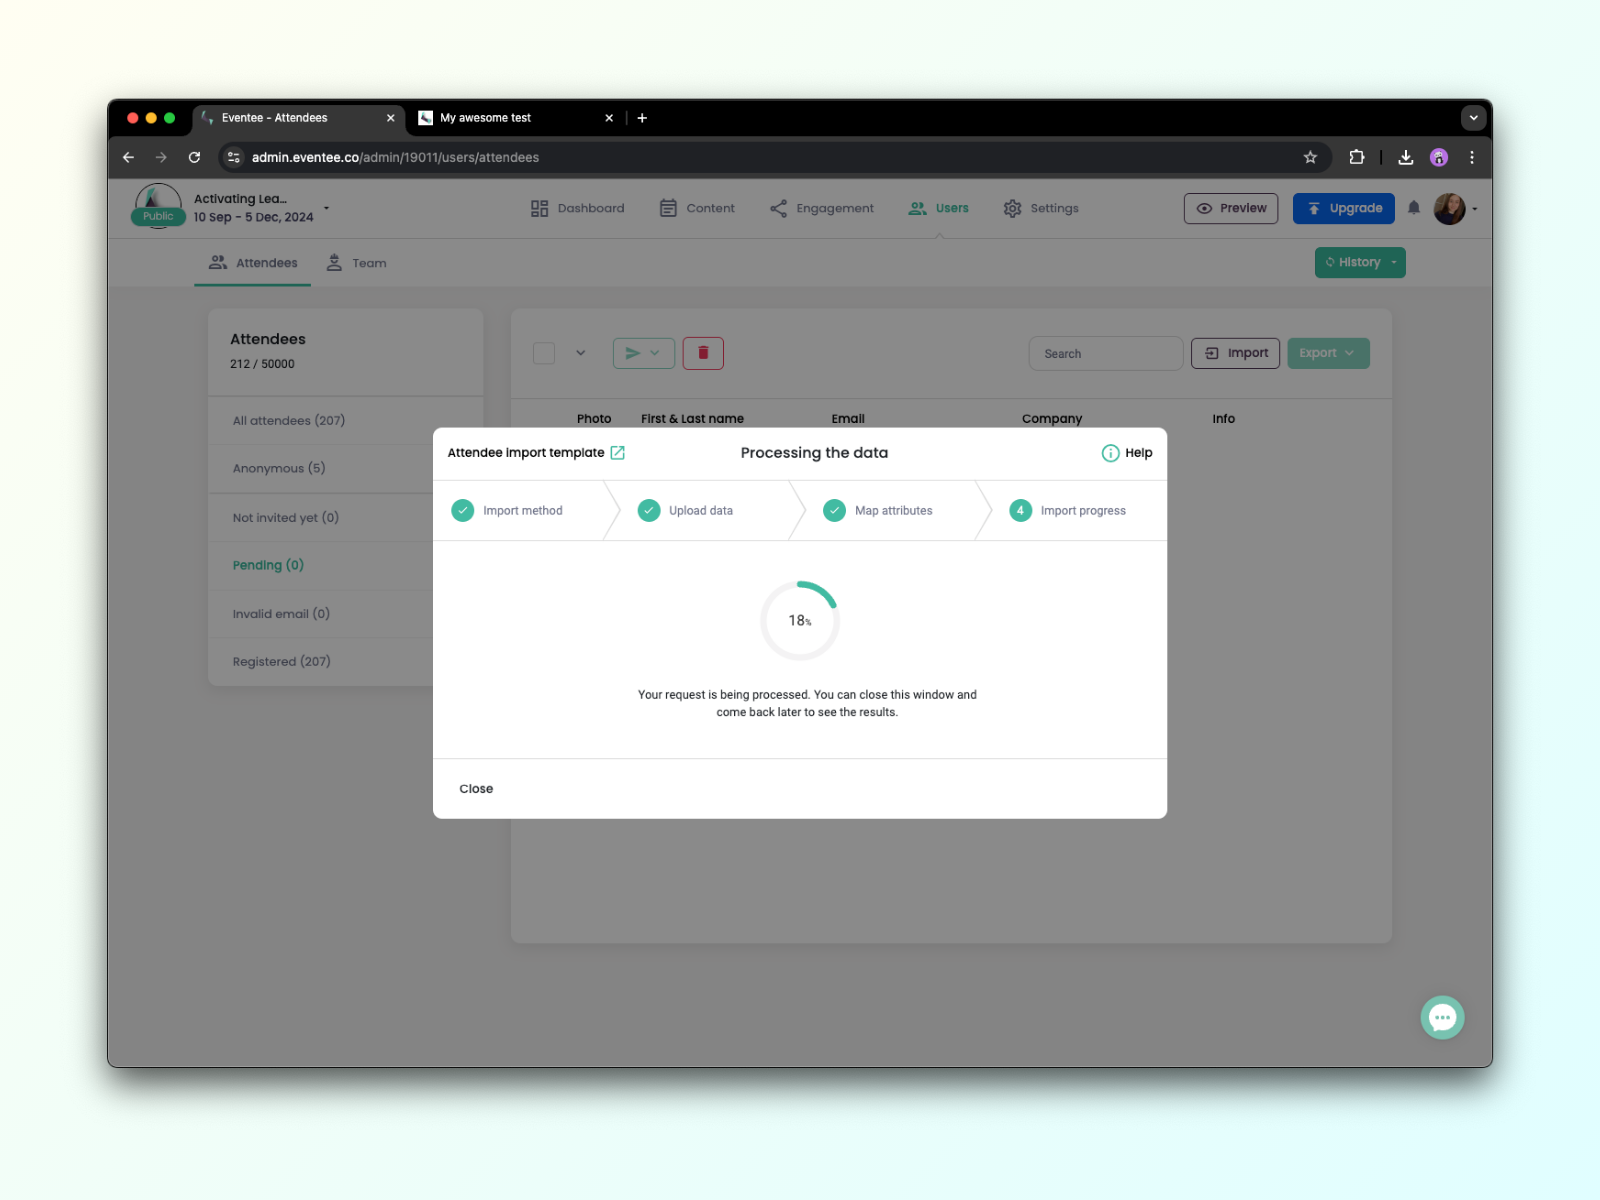
1C. Click Continue to let Eventee process your data. You can close this screen any time, and check on progress later if needed. All done, good job!

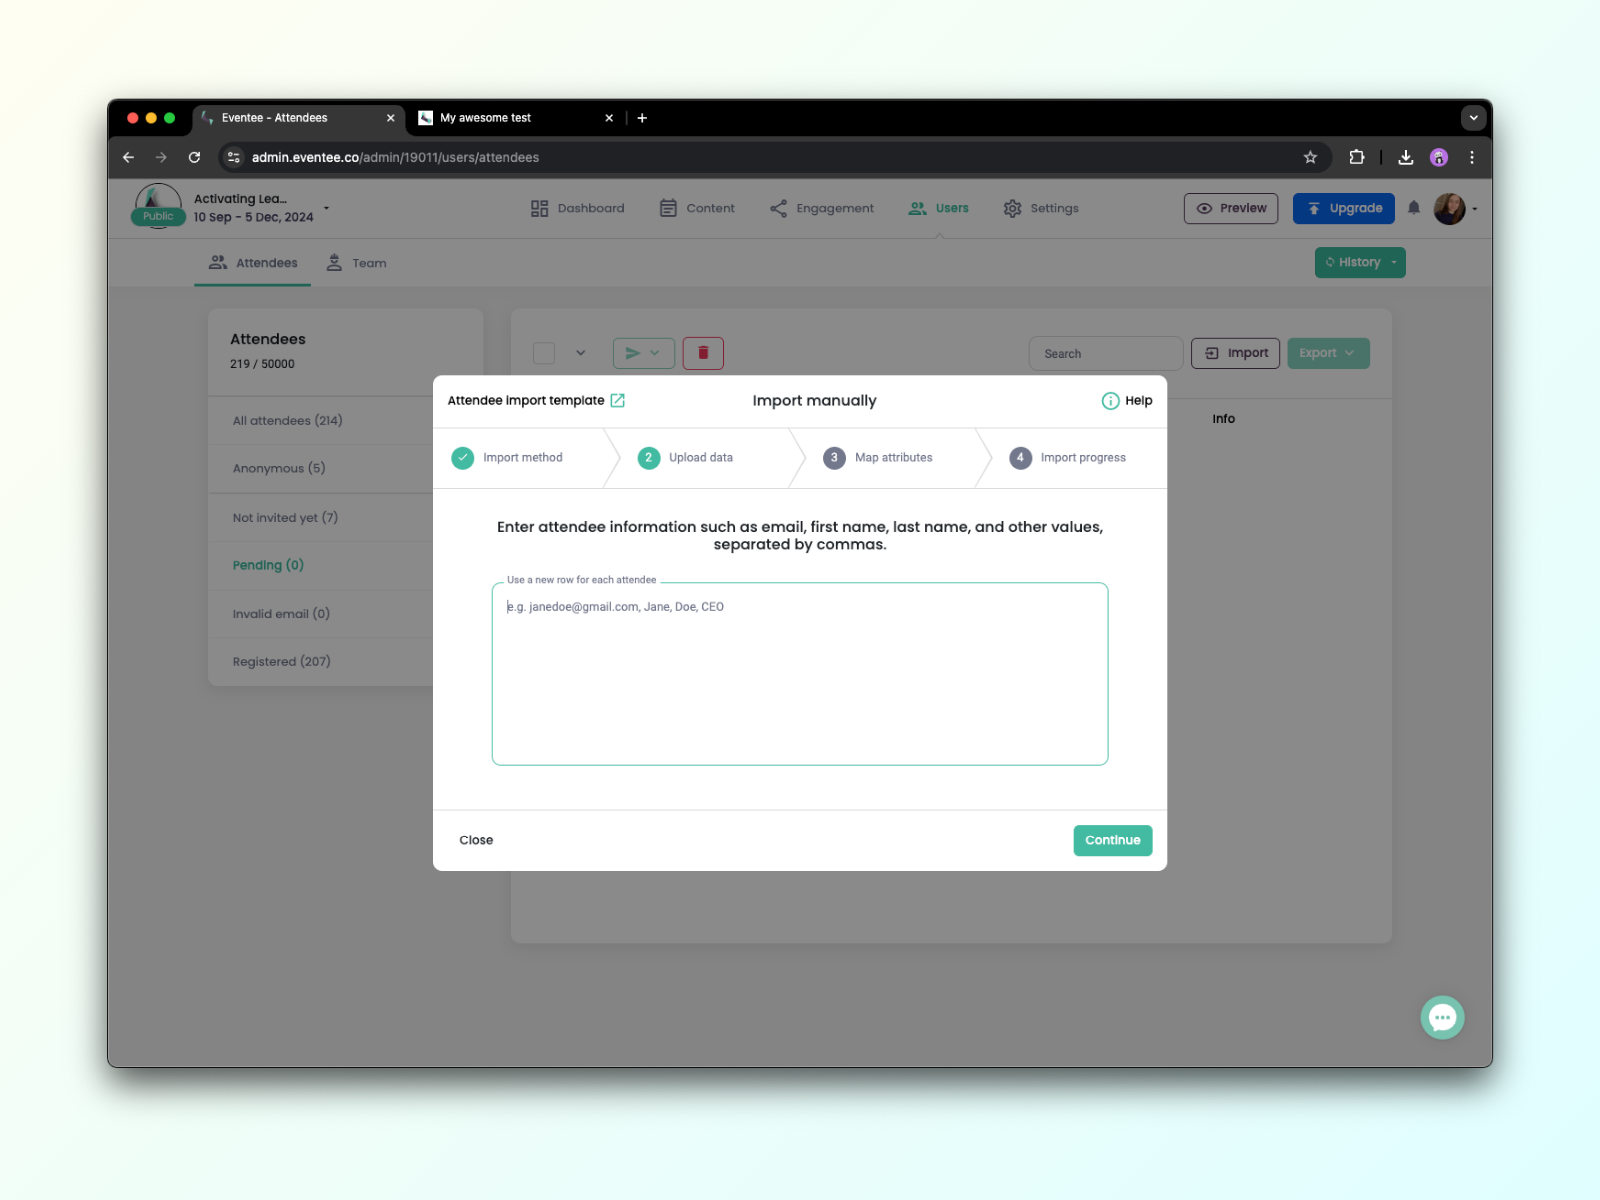
The manual attendee import is ideal for cases where you only need to import attendee emails or don't have a file to upload. However, even with manual import, you can still add detailed information about attendees, such as their name, company, position, social media links, etc.
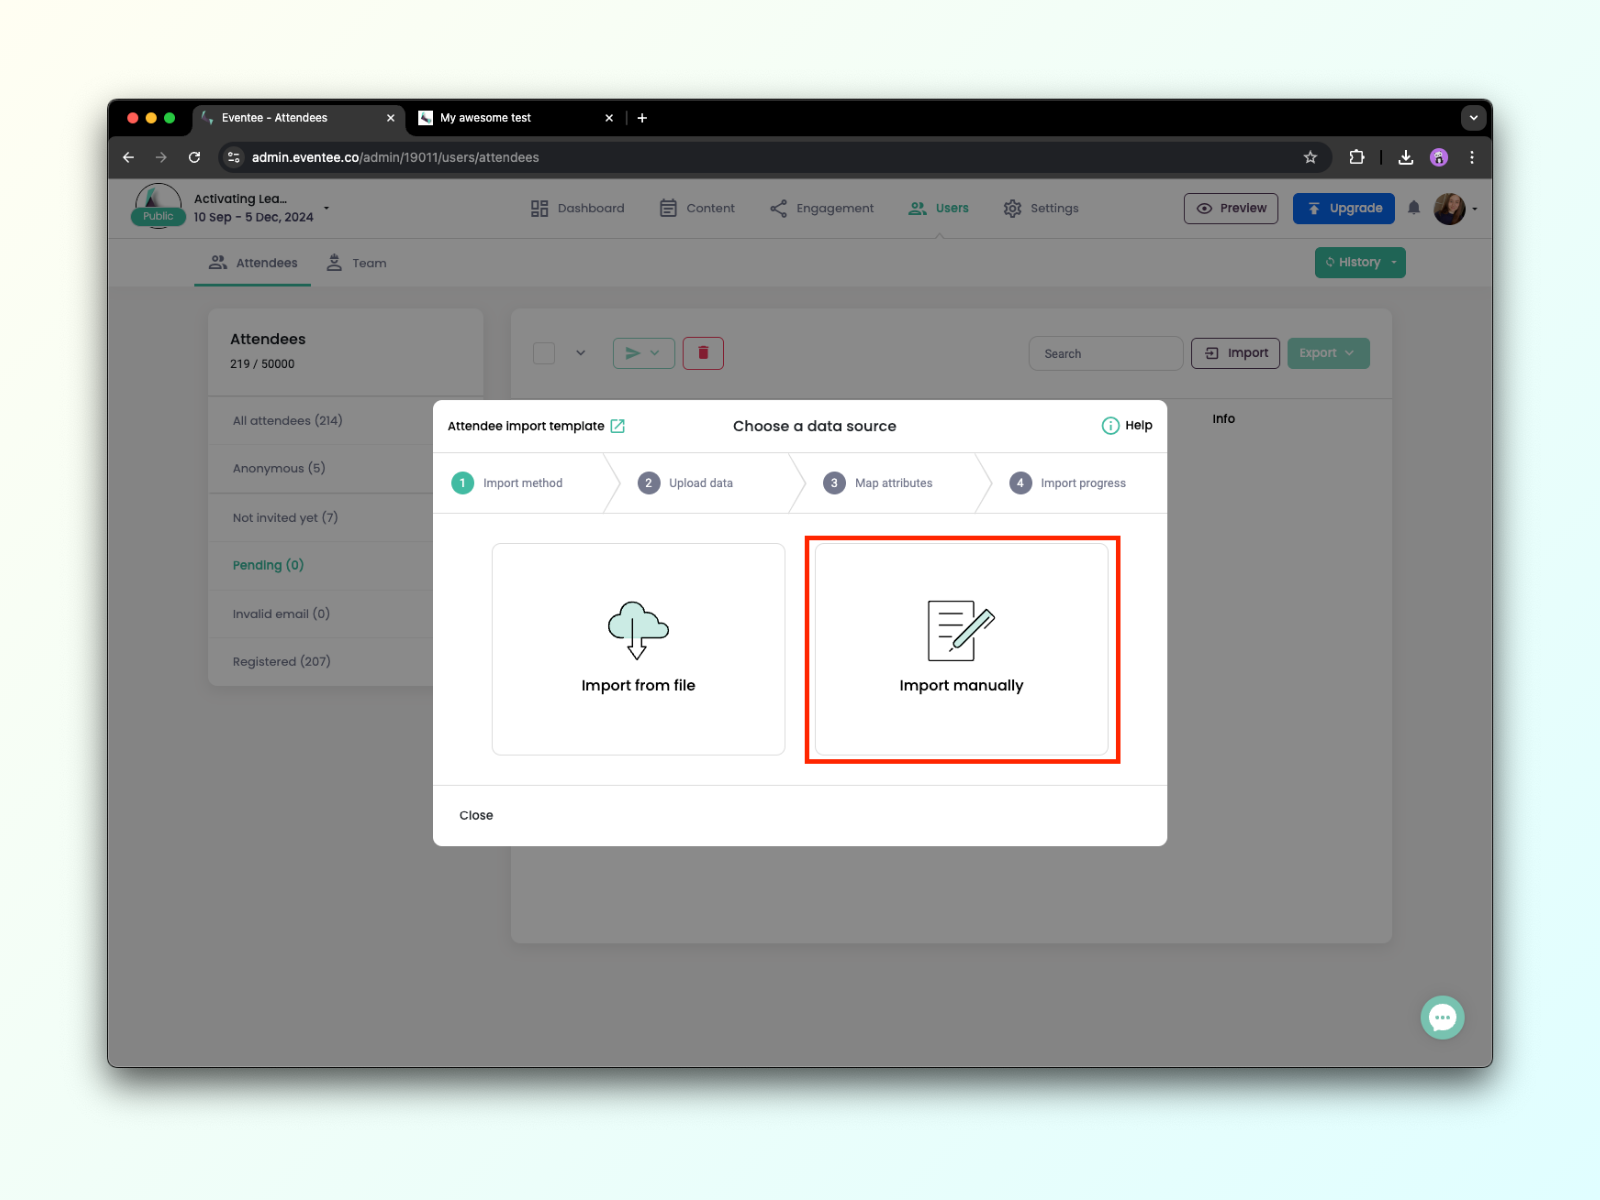
2A. In the Import dialog, select the Import manually option.
2B. Now, you can simply add your attendee emails or enter any additional values.
Values must be separated by commas and every new attendee must be on a new row.
*Photo link - must be a link to a public photo ending with .jpg or .png (NOT Google Drive, OneDrive, DropBox etc.), if login or registration is needed, we will not be able to download it.
2C. On the next screen, you need to assign the values you have entered to Eventee attributes.
2D. In the next step, Eventee will process your data and send out invitations if you have checked the option in the previous step. You can close this dialog at any time without interrupting the processing.

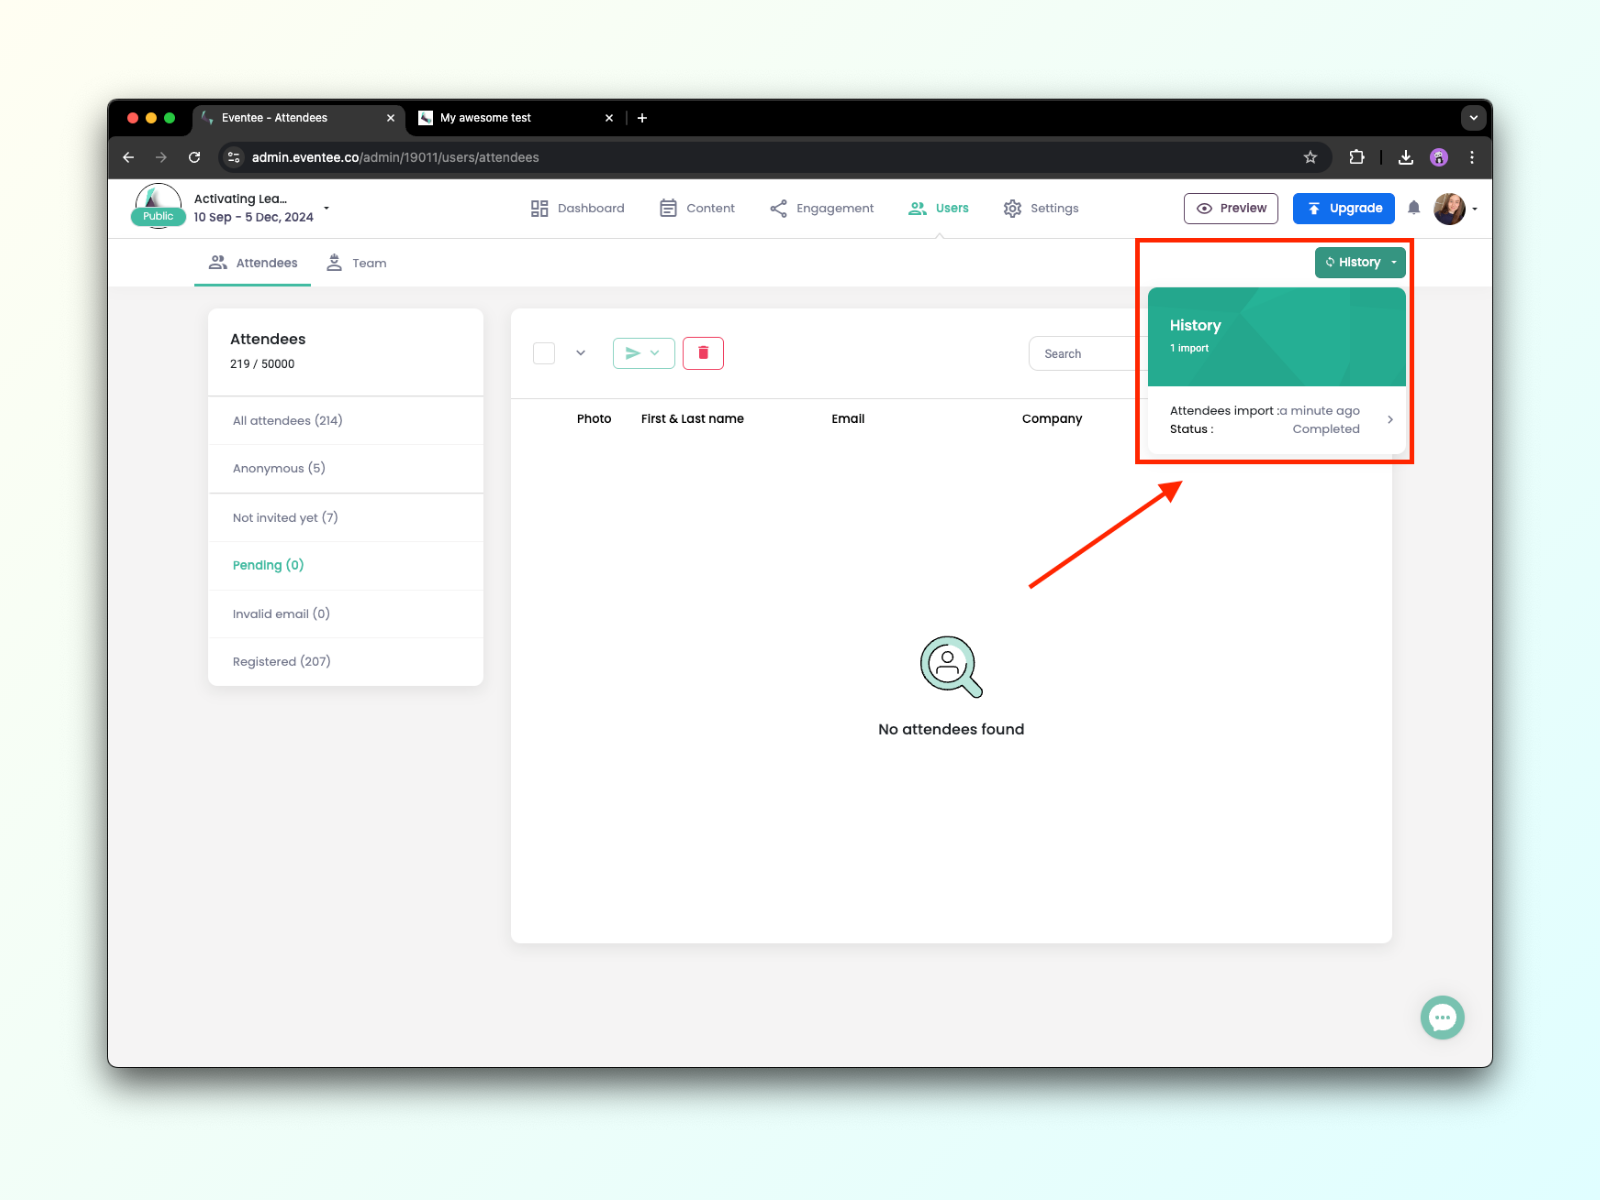
2E. You can check on the progress at any time through the History button.
How to handle invalid attendees
In this case, the best option is always to invite the user with a different email, but if that's not possible please message our support team, and they will look into it.