The easiest way to guide attendees through your program is to use the option to add tracks to each of your sessions. Through tracks, you can categorize sessions by topics and provide a clear overview of your program.
This feature is very useful, especially for more complex programs. Attendees can easily filter and follow the tracks they are interested in.
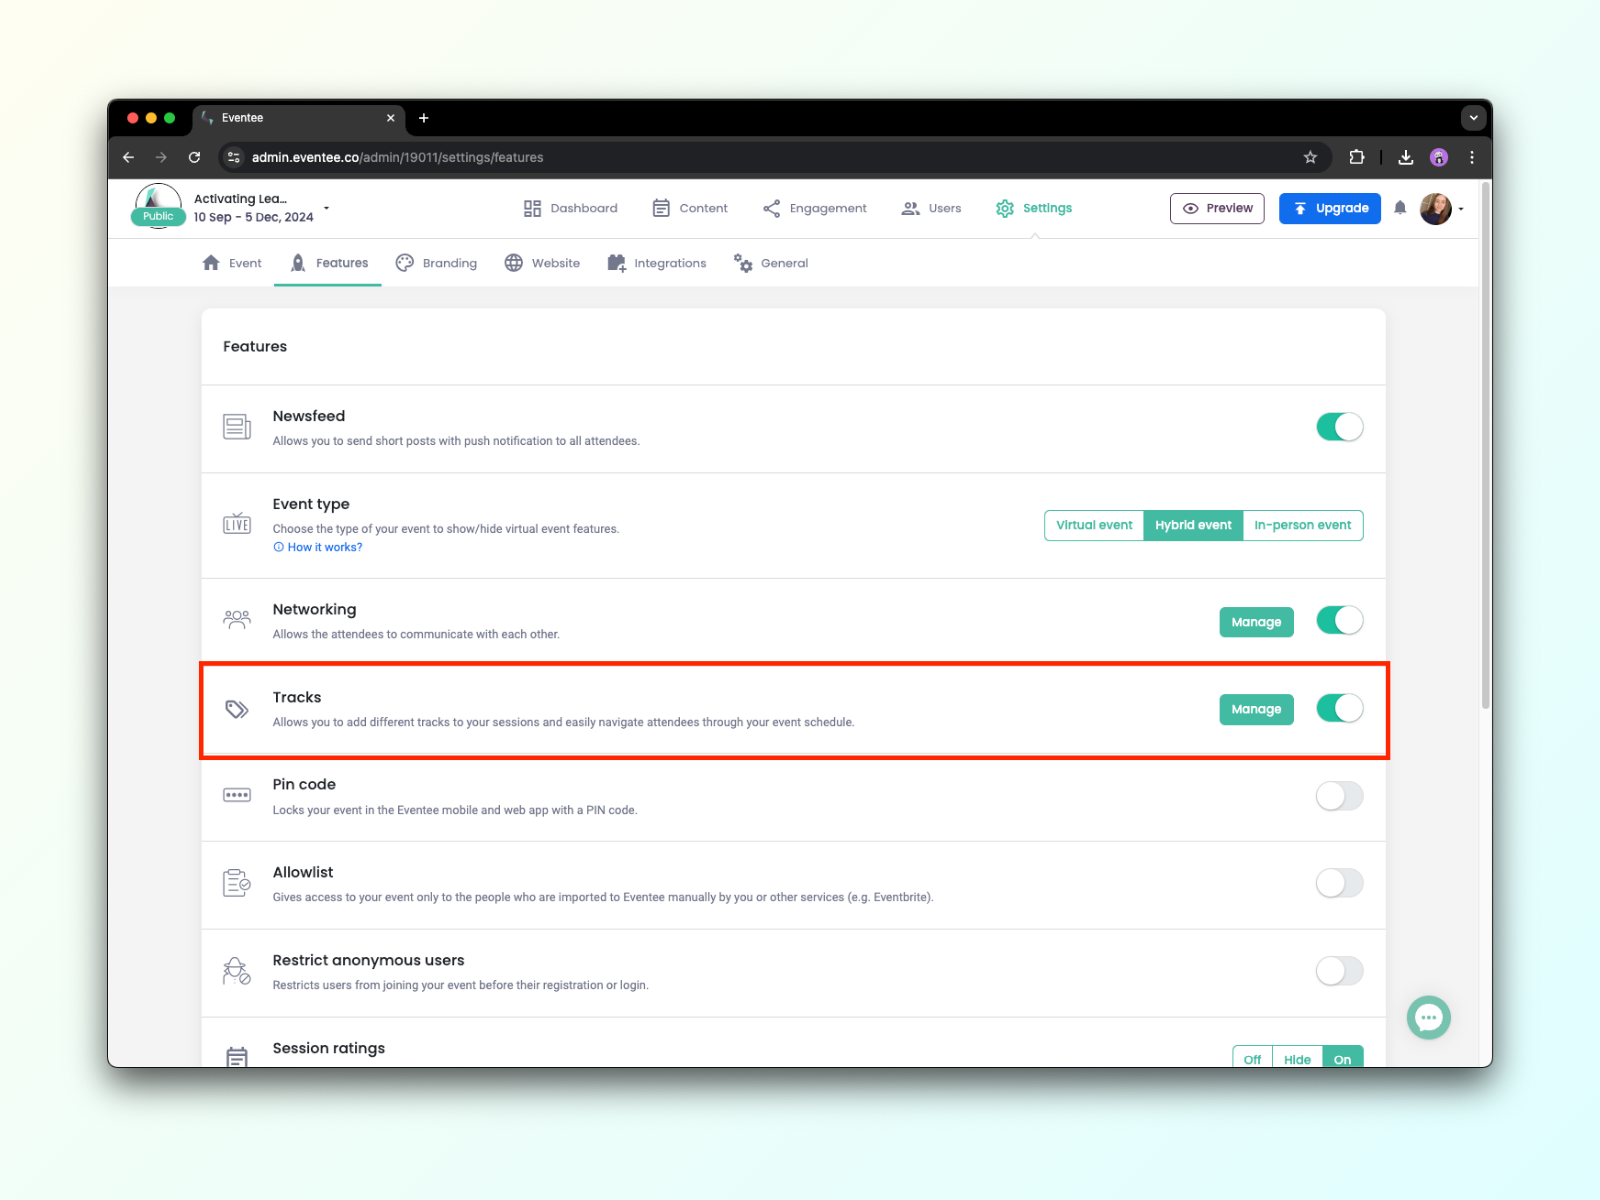
To add tracks to your sessions, you need to enable them in the Settings → Features tab.

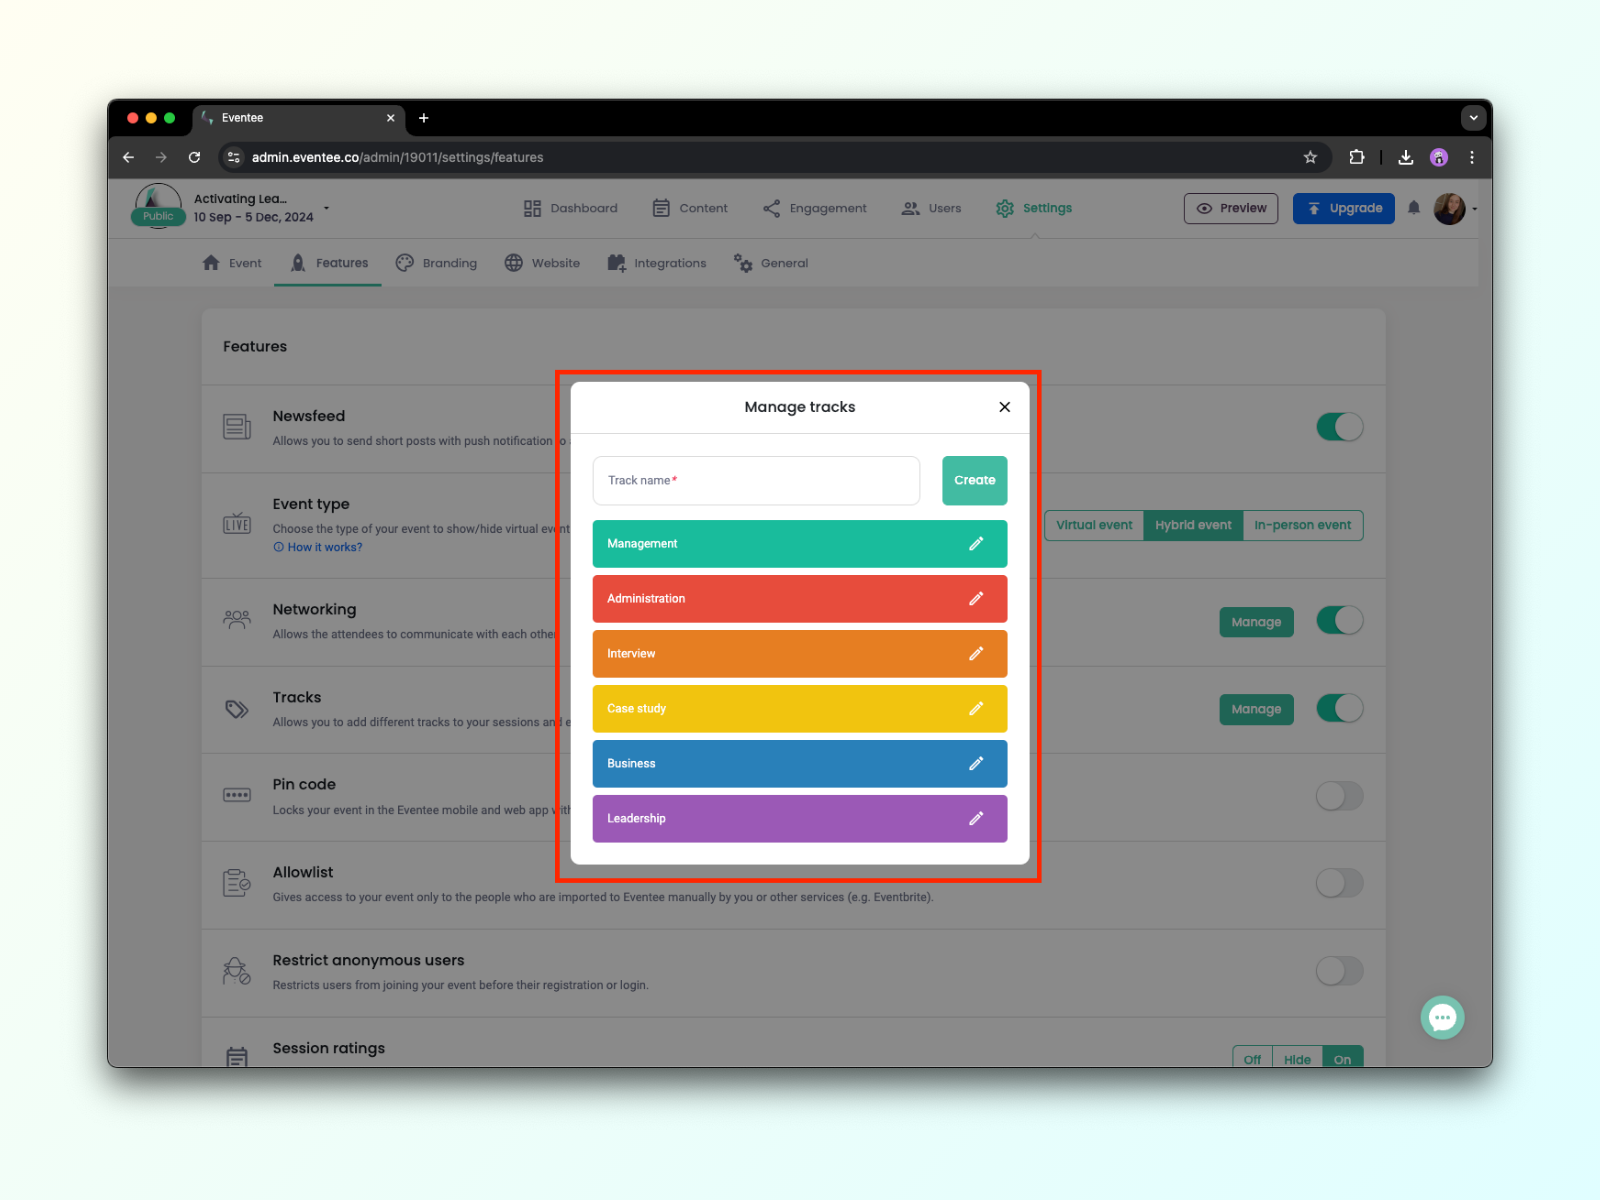
Once the feature is enabled, a Manage button will appear. Through this button, you can create your tracks - name them and assign them a color. The track name can be essentially anything, as long as it represents a group of your related sessions (e.g., fashion design, web design).

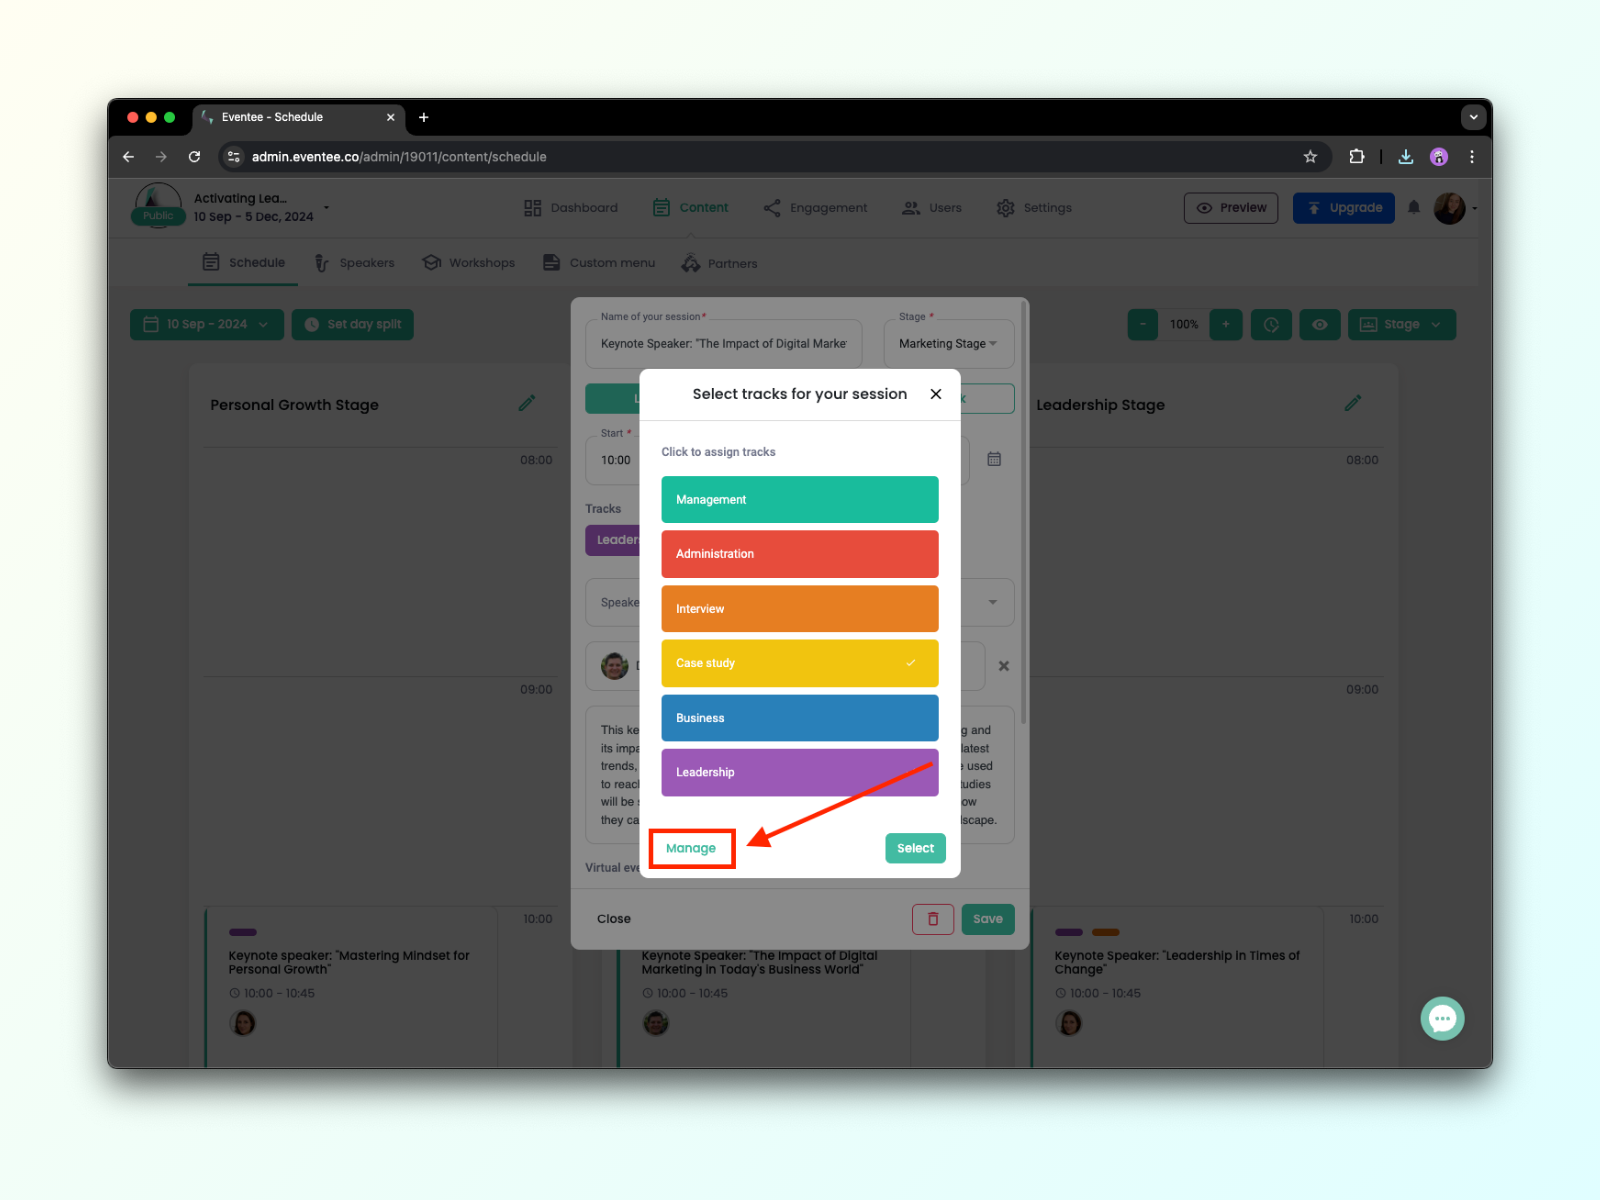
You don’t necessarily have to go to Settings to create new tracks. You can also create and assign them while creating content. However, make sure that the feature is enabled in Settings. Without enabling it, you won’t be able to see the tracks feature in the session detail.
When you click on + Add Track, you can either select from already created track or create new ones by clicking the Manage

What do tracks look like from a attendee’s perspective?
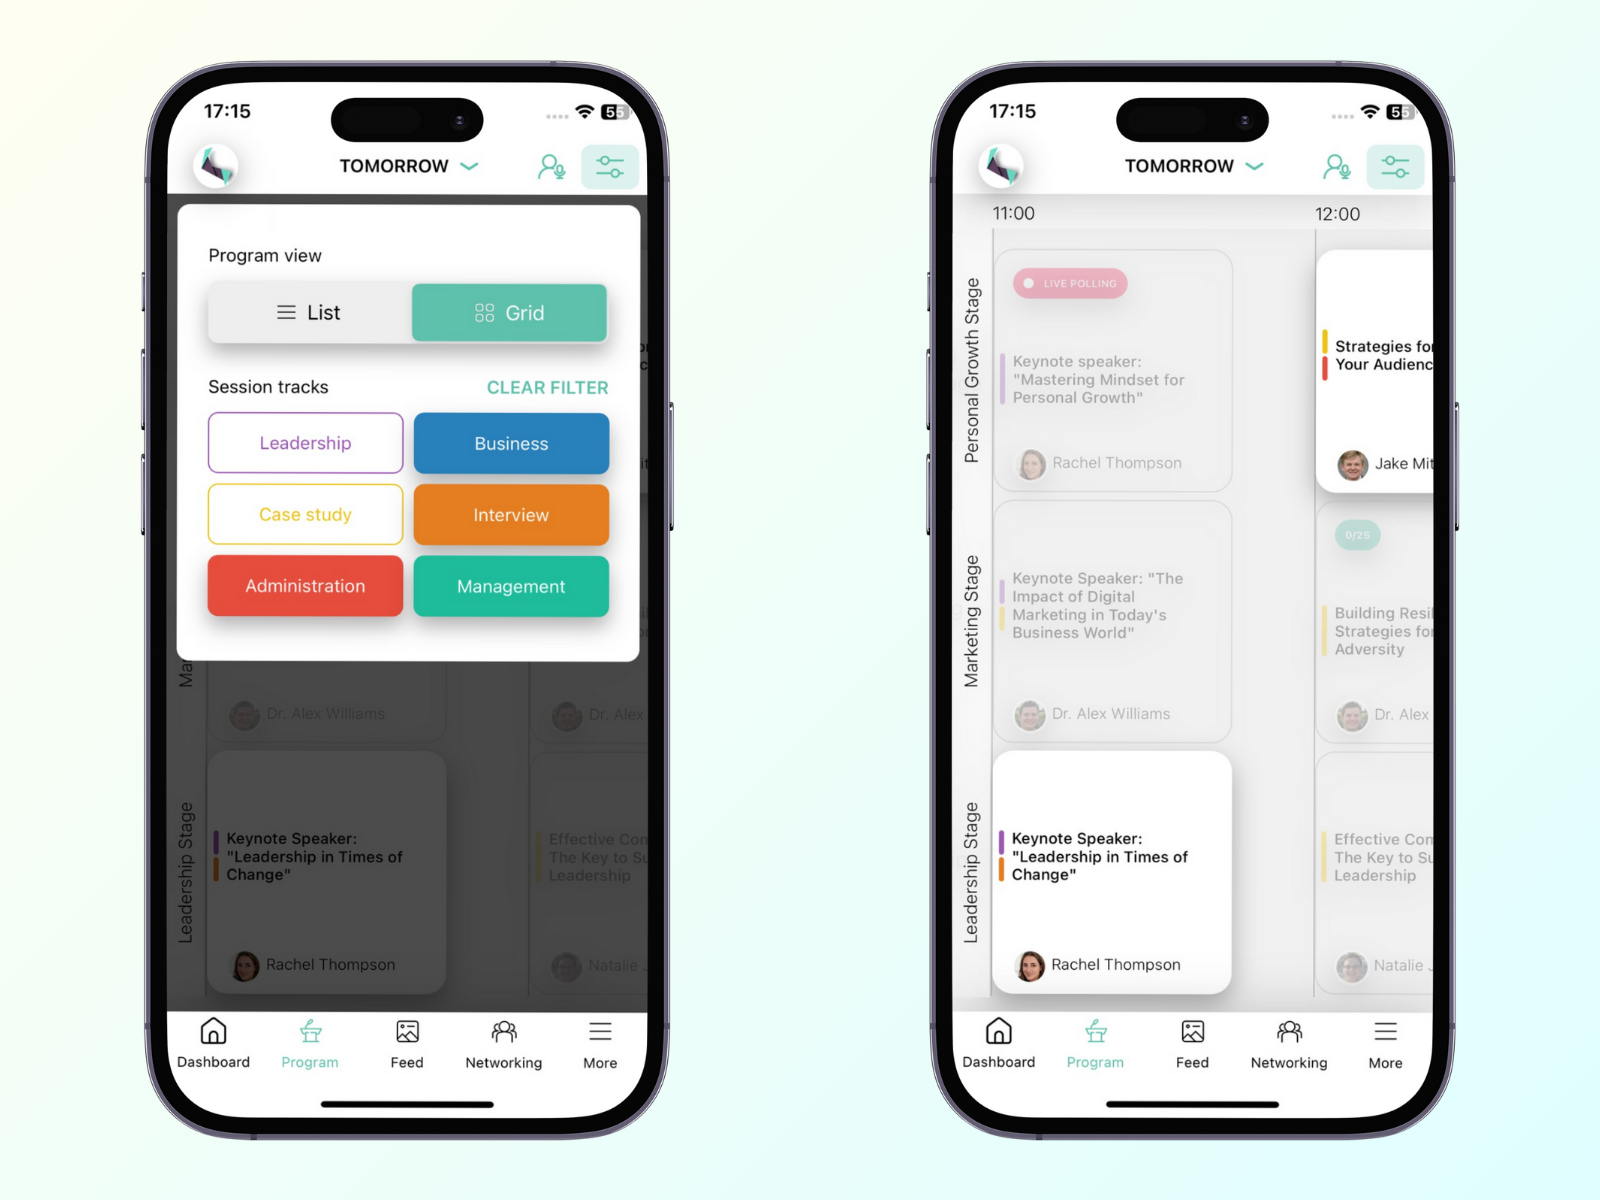
As mentioned earlier, your attendees can filter tracks. In the app, they can see a button in the top right corner. Clicking on it will display a list of all tracks. Here, they can easily select all the tracks they are interested in.

Sessions containing the selected tracks will be highlighted after applying the filter.